Falls Prevention Awareness Day

There seems to be a day for everything on the calendar! National
Hot Dog Day was July 19th, October 4th is Random Acts of Poetry Day, October 9th is National Fire Prevention Day and September 22nd is Falls Prevention
Awareness Day!  

Some are more important
than others.  Preventing falls should be
high on the list.  There are some
alarming statistics related to falling:

  • One in four Americans 65 and older fall each year,
  • Annually 37.3 million
    falls require hospitalization,
  • And an estimated annual cost of $67.7 billion
    due to fall injuries by 2020.

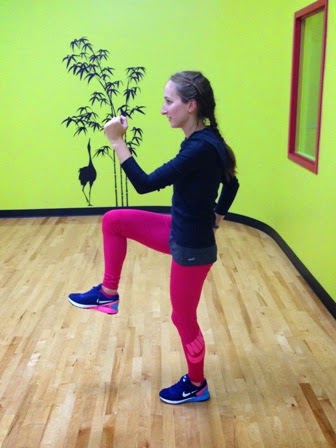
Fortunately one of the best strategies for preventing falls is
exercise.  

A simple but highly effective
exercise to maintain or improve balance only requires a chair.  At the surface the sit to stand exercise
seems very basic and possibly easy for some (until you do multiple repetitions
in a set).

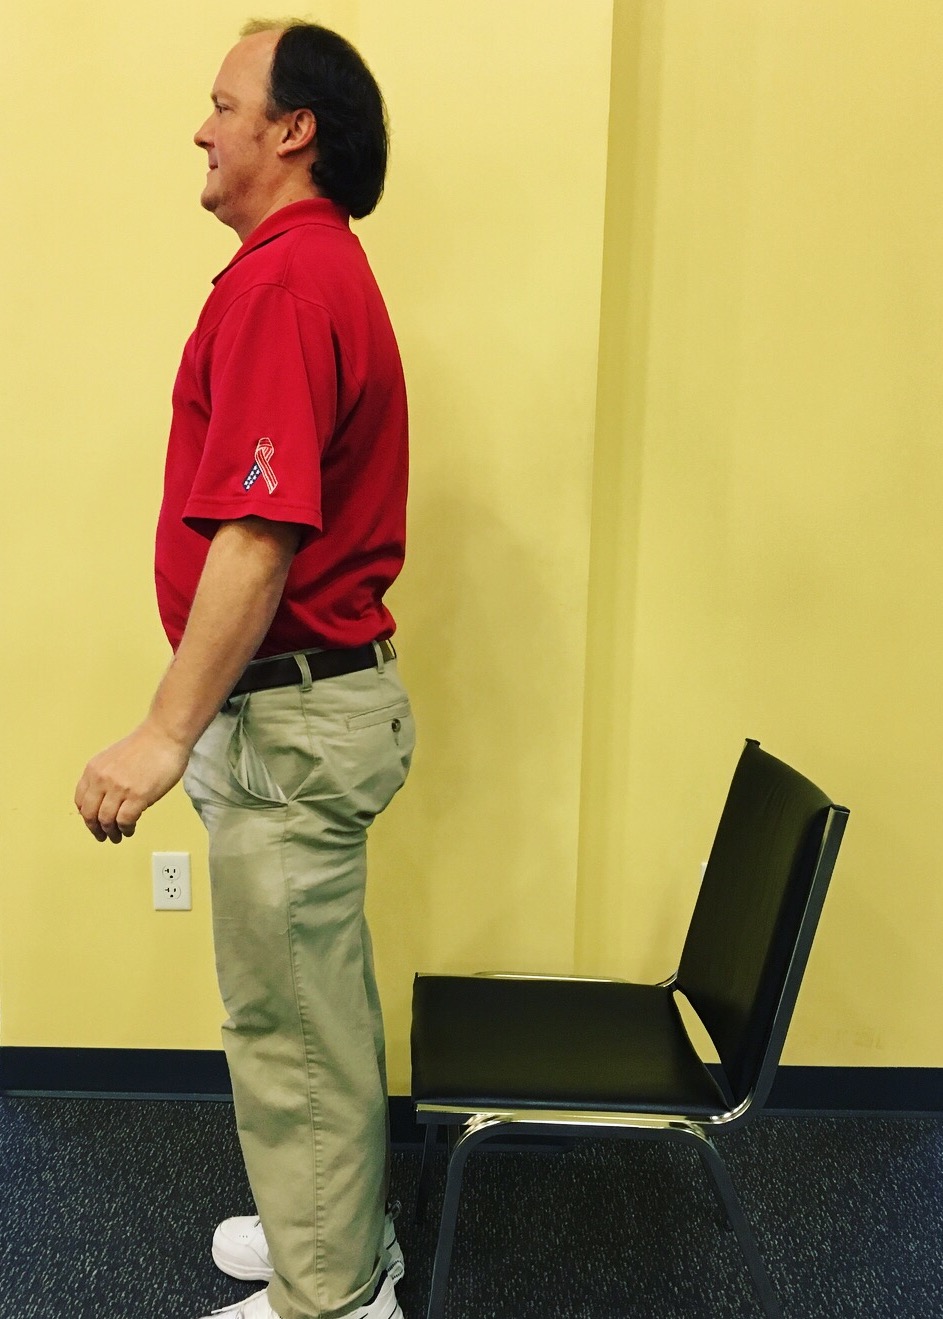
Begin sitting upright with your feet flat on the ground underneath
your knees. 
Move your shoulders and head over your toes, bring your knees
forward, and allow your hips to come of the chair, then push down equally into
both feet to stand up. Sit back down and repeat.

Tip: Make sure to keep your weight evenly distributed between both
legs, and try to keep your back straight throughout the exercise. Do not lock
out your knees once you are standing. 

What makes this exercise one of the top choices for improving
balance and preventing falls, to start it is functional.  Think about how many times you have to get up
and down from a chair throughout your day. 
Often standing up from a chair people feel unsteady and need to take a
moment to ready themselves before walking. 
Practicing this exercise will not only improve your leg strength which
will make the act of getting up and down easier but it will also give you
confidence that once you are standing you will be able to move.   The sit to stand exercise requires minimal
equipment, all you need is a chair! It can be executed in a safe manner and
modifications can be made to make it more or less challenging. The use of arm
rests on a chair to assist in standing is one modification that can be used to
make the exercise easier.  If you have
difficulty with your balance once you are standing try placing your chair near
a counter so you have support in front of you once you are on your feet.
Start with trying to build your repetitions gradually up to a set
of 10.  Once you are able to achieve this
goal you can add multiple sets throughout your day.  One simple way to sneak in some extra reps is
to stand up and sit down twice when getting out of a chair! 

Blog
post by Eric Chandler.

Long Bars, Short Bars, Mini Bars?


A common
question when working with clients in the pool is “Which is harder the long
bars or the short bars?”  

The answer to the question depends on the exercises that you will be doing and the goals of your exercise
program.  Understanding the equipment and
the differences will help you choose the appropriate tools to make your workout
the most effective.  
Using bars
with more buoyancy will create more resistance when trying to move them through
the water.  This will make these types of
exercises more difficult.  However,
exercise where you are in the hanging position will be easier with more buoyant
bars because they will provide more support and stability.
Using bars
with less buoyancy creates less resistance when trying to move them through the
water.  Less buoyant bars will make these
types of exercises easier.  The less
buoyant bars will make exercises more difficult in the hanging position.  The reduced support and stability will
require your body to work harder to maintain alignment therefore challenging
your core muscles more.
Example of
progression from easy to difficult using equipment for an exercise that
requires you to move the bars in and out of the water vs. a hanging exercise.
Pump and Walk
Mini Bar → Short Bars Level 1 →
Short Bars Level 2 → Long Bars

Splits and Spreads
Long Bars→ Short Bars Level 2 →
Short Bars Level 1 → Mini Bars

Equipment


Long Bars
Long bars
provide the most buoyancy, therefore they will give you the most support and
resistance.  

Short Bars
Level 2
These bars
have slightly less buoyancy than the long bars. 
They will be a little easier for exercises that require movement through
the water and slightly harder for hanging exercises than the long bars.

Short Bars
Level 1
The level 1
short bars have less buoyancy than level 2 short bars and long bars.  They will be easier for exercises that
require movement through the water and more difficult for hanging exercises.

Mini Bars
Mini bars
provide the least amount buoyancy.  These
bars will be the easiest for exercises that require movement through the water
and the most difficult for hanging exercises.  

Blog post by Eric Chandler.

Marathon Training Tip #8: Aquatic Recovery


One of the
most overlooked aspects of training is rest and recovery.  Often
times complete rest for active people is very difficult.  There are many
benefits to including active recovery sessions in your training.  One of
the best places to perform an active recovery workout is in the water. 
The water provides a non-weight bearing environment in that helps reduce stress
on the joints, provide traction to your spine, promote circulation and reduce
swelling to name a few.  The shallow water can provide some of the same
benefits by reducing the amount of impact performing similar activities to
running. At waist level in the water you are about 50% weight bearing. 
Last but not least, exercise in the water is fun! 
Try these
aquatic recovery exercises to improve your performance, reduce your risk of
injury and add some variety to your training program.

Deep End Exercises

Wear a buoyancy belt. Perform waking exercises
for 2-3 laps & hanging exercises 10-15 repetitions.

Forward
Walking
Equipment: none
Action:  Step forward in a normal walking pattern.
Alternate arms with each step while focusing on forward movement with proper
alignment and posture. 
Walk +
Stretch
Equipment: none
Action: Walk 3 steps then kick your leg forward, reaching for your
foot with the opposite arm.  Walk 3 steps
and repeat with the other arm and leg. 
Keep torso straight and keep toes up.
Symmetrical
Walking with Turns
Equipment: none
Action:  While walking forward turn palms out and push
arms out to align with shoulders. Arms make a breast stroke motion. Bring arms
to chest.  Return to start position.  Take 3 strokes forward, then turn 180 degrees
and walk 3 strokes backwards, turn 180 degrees and repeat.
Splits +
Spreads
Equipment: 2 long bars
Action:  Separate legs in open scissors kick position:
one leg straight forward, another leg straight back.  Return to start position. Repeat with the
other leg forward.  Return to start
position.  Spread both legs apart to the
sides, keeping toes up and legs straight. 
Return to start position.
Tips:  Keep legs straight and attain full range of
motion with each movement.  Feel the
stretch while keeping toes up to.
Leg Stretch
Series
Equipment: 2 long bars
Action: Bend one knee to a 90° position, keeping toes up. Extend leg
straight in front of the body then back to the 90° position. Return to start
position. Repeat with the other leg. Repeat the sequence changing leg extension
of the knee to an internal position (kicking across the body) then an external
position (kicking out).
Running
Pendulum
Equipment: 2 long bars
Action: 
Run moving to the side lying position using four running steps;
pause.  Return to start position. Repeat
moving to other side.

Shallow End Exercises

Perform
walking exercises for 2-3 laps & stationary exercises 10-15 repetitions.

Weight Shift Catch
Action: 
Shift weight to one leg and simultaneously catch and lift the knee with
both arms and pull the knee to the chest, hold the balance. Return to start
position. Repeat with the other leg.
Tips: 
Maintain straight body alignment while pulling the knee up. Come up on
the toes each time when pulling the knee up.
Catch + Pull
Action: Walk forward 3 steps and catch one foot with the opposite arm
behind body, the other arm reaches straight above the head.  Return to starting position.  Walk forward 3 steps and repeat with the
opposite hand and foot.  For an added
challenge—before you catch the foot, bend the weight bearing knee down into a
squat position and power up to your toes.
Leg Swing
Action: Walk forward 3 steps, stand on one leg while swinging the
other leg forward, back, forward. Swing the arms so opposite hand and foot are
in front.  Was forward 3 steps and repeat
with the opposite side. Make sure to keep your body straight and sing the leg
high back and forth.
Squat Hurdles
Action: Walk forward 3 steps then squat, arms straight forward at
shoulder level. As you stand, mimic hurdle motion: one leg kicks straight out,
touching the foot with your opposite hand. Other arm extends back.  Walk forward 3 steps and repeat with the
opposite hand and foot.  Get the motion
in rhythm, kicking knee is straight, weight bearing leg is on the ball of the
foot.
Carioca
Action: Stand with arms out to side at shoulder level. Step side to
side crossing one foot in front then in back (like the grapevine). Take wide
steps, keeping your pelvis stable.
Blog post by Eric Chandler.

About
Eric Chandler

Eric joins the Cape Cod Rehab Running
Team with a background in Exercise Science. He is a Certified Strength &
Conditioning Specialist (CSCS), certified in Part I & Part II of the
Burdenko Method, a Certified Functional Movement Screen (FMS) Specialist, and
has also been training in the TRX Suspension Training Method. Eric looks for his
clients’ strengths and uses those strengths to help them get the most out of
each session. A recreational runner, Eric has served on many of the CCR Flyers
Cape Cod Marathon relay teams as has a goal of breaking 20 minutes in the 5k.

Marathon Training Tip #6: Strength Train


What do most runners do
to train?  Run.
The majority of
distance runners started running because they love to run.  There are many health benefits to running and
it is also convenient to just walk out the door and run.  Often overlooked or ignored by runners is the
importance of strength training. Complimenting your running program with
strength training will improve your performance and also reduce your risk for
injury.  
Here is a TRX series of exercises that
will help strengthen your total body with exercises specifically selected to
address weaknesses typically seen in runners. 
They will help strengthen the core, upper body and lower body and should
be performed 2-3x per week, with a day of rest in between.
Note:
Do not perform any exercise that causes or increases pain.

Warm Up

Squat/Row to Heel Raise
Hold the TRX handles with arms bent and your feet shoulder width apart. Sit back
into a squat keeping your heels on the ground and extend arms. Stand back up
pushing through your heels and pulling with your arms. Once fully standing
raise up on to your toes. 
2×15


The Workout

Power Pull
Hold the TRX handle in single handle position with one hand.  Keep elbow bent at the start and feet shoulder
width apart.  Extend arm holding handle
and drop back into a squat.  Reach back
with your other arm towards the ground. 
Return to the start position by pulling with your arm and driving up
with your legs. 
2×10 each arm

Alternating Side Lunge
Hold the TRX handles and stand with your feet together.  Take a large step out the side keeping toes
pointed straight ahead. Bend the knee that you took a step with pushing hips
back and sitting into a side lunge position. Return to the start position and step
to the other side.
2×10

Balance Lunge with Knee Drive
Hold the TRX handles and stand with your
feet together.  Step back into a reverse lunge.  For a challenge: keep the back foot off the floor in a
balanced position!  Stand up on your
stance leg driving your knee forward into a march position.  Do all repetitions on one side then the
other.
2×10 each

Bridge with Hamstring Curl Series
Lay on the floor with your heels in the TRX cradles (handles should be about 12” off
the ground). Raise your hips into a bridge position.  Keeping hips level draw one knee in towards
your body.  Extend leg out and repeat
with the other leg. Repeat with both legs. Lower body back to the floor.
2×10

Watch Meaghan demonstrate all the TRX Strength Training for Runners exercises…

Bonus! Runner’s TRX Core Circuit

Complete the three exercises in a row
without rest.  Try the circuit 3 times.
Mountain Climbers
Start in a push up position with your feet in the straps. 
Maintain a flat back as you march knees towards your chest in an alternating
pattern.  As the knee comes in towards
your body your hips should rise slightly. 
10x
Three Position Crunch
Start in a push up position with your feet in the straps.  Maintain a flat back as pull both your
knees towards your chest. Return to the start position and pull both knees in
towards your right elbow, return to the start position and pull both knees
towards your left elbow. Repeat the series of 3 movements 5x.
Pike
Start in a push up position with your feet in the straps.  Keep your legs straight and drive your hips
towards the ceiling as you pull your feet towards your hands. 
10x
Blog post by Eric Chandler.

About
Eric Chandler

Eric joins the Cape Cod Rehab Running
Team with a background in Exercise Science. He is a Certified Strength &
Conditioning Specialist (CSCS), certified in Part I & Part II of the
Burdenko Method, a Certified Functional Movement Screen (FMS) Specialist, and
has also been training in the TRX Suspension Training Method. Eric looks for
his clients’ strengths and uses those strengths to help them get the most out
of each session. A recreational runner, Eric has served on many of the CCR
Flyers Cape Cod Marathon relay teams as has a goal of breaking 20 minutes in
the 5k.

Progressive Overload

Are
you no longer seeing results from your exercise routine?  Are you familiar
with the principle of progressive overload?  If not, this might be what
you’re missing.   
Your
body has most likely adapted to the demands you have placed on it when you
started your exercise routine.  If you do not increase the amount of
weight you are using or change your repetition schemes you will eventually
plateau. 
This
is where the principle of progressive overload come into play.  You need
to progressively overload the musculoskeletal system and progressively increase
the load as the tissues become accustomed to the stimulus. 
You
are probably asking yourself how do I know when to increase the weights I am
using and by how much?  As personal trainers, we are here to help make the
most out of your gym experience by keeping you safe as you progress.  They will give you suggestions on which
exercises you need to increase your weights and by how much.  

Dust off those exercise cards that you have
memorized and schedule an appointment with a personal trainer today!

Blog Post by Eric Chandler CSCS.

5 Burdenko Strength Exercises for Runners

All athletes need to strength train but it’s an
element to your training that is often missed. 
Strength training will make you a stronger, faster, and more efficient
runner and most importantly—strength training will help keep you injury
free.  Below you will find 5 Burdenko
exercises that Eric Chandler, a Certified Strength & Conditioning
Specialist and Certified Burdenko Method Instructor, chose to target muscle
groups important for runners. 

Begin with 10 repetitions of each exercise.  After a few sessions, try 2 sets of 10
repetitions and start adding speeds.  Do
not perform any exercise that causes or increases pain.

Earth to Sky

Lunge to the
side and “sweep the floor” with your opposite hand and continue to complete big
circle overhead. Continue for 10 repetitions and repeat to the other side.

1/2 Roll Lunge Step

Stand on one leg with your foot in the middle of the half roll.  Use the other leg to step forward into a
lunge and then step back into a lunge. 
Repeat back and forth for 10 repetitions and repeat on the other
side.  For a challenge, reach opposite
hand to the front foot while lunging.

1/2 Roll Leg Swings

Stand on one
leg while swinging the other leg forward and back. Swing the arms so opposite
hand and foot are in front. Make sure to keep your body straight and swing the
leg high back and forth. Continue for 10 repetitions and repeat on the other
side.

Scooters


Lay on your
side with legs straight together. Support your head with your lower arm and
position your top arm in front with fingers pointing towards the body for
stabilization. Bend top knee towards the top arms. Extend leg straight at elbow
level. Swing leg back to starting position. Continue for 10 repetitions and
repeat on the other side. Progress to full leg extension behind the body, bend
knee and bring forward to elbow again.


Rotate and Kick

Lay on your side with legs
straight together. Support your head with your lower arm and position your top
arm in front with fingers pointing towards the body for stabilization.
Lift top leg straight up and bend your knee down bringing your heel to your
buttocks. Turn knee up and extend your leg straight up. Return to start
position. Continue for 10 repetitions and repeat on the other side.

Blog post by Jen Skiba.

5 Burdenko Warm Up Exercises for Runners

A good warm up is important for preventing injuries
and preparing your body to perform.  Next
time you head out the door for a run, try these 5 Burdenko warm up exercises
that Eric Chandler, a Certified Strength & Conditioning Specialist and
Certified Burdenko Method Instructor, picked out with runners specifically in
mind. 
Warm up by walking for 3-5 minutes.  Perform 10 repetitions of each exercise.  Gradually move through greater range of
motion.  Do not perform any exercise that
causes or increases pain.

Wake Up Call

Take a small
step forward white extending your arms overhead. Clap! Return to start position
and repeat with the other leg. Gradually take bigger steps forward until you
are lunging.

Weight Shift Catch

Shift weight
to one leg and simultaneously catch and lift the knee with both arms and pull
the knee to chest, hold the balance. 
Return to start position and repeat with the other leg.

Squat Hurdles

Squat with
arms straight forward at shoulder level. As you stand, mimic hurdle motion: one
leg kicks out straight, touching the foot with your opposite hand. Other arm
extends back. Squat and repeat with the opposite hand and foot. Get the motion
in rhythm, kicking knee is straight, weight bearing leg is on the ball of the
foot.

High Knees/High Heels

Perform 3 high
knees with alternating arm swings then 3 butt kicks, lifting the heel towards
the buttocks, continuing with the arm swing.

Power Stride

Start with one
foot in front of the other.  Drive up
with the back leg to a high knee with opposite arm in the air.  You can take it one step forward and go all
the way up to your toes on the stable leg. 
Continue for 10 repetitions and repeat to the other side.

Blog post by Jen Skiba.

Tips for Safe Snow Cleanup

The forecast is calling for more
snow!  Snow can be great for recreational
activities such as skiing (downhill and cross country), snow shoeing, sledding
and more.  However, it can cause much
frustration with walking, clean up and travel.   

Here are some tips for safe snow clean up.

Shoveling

Warm up
before shoveling.  Shoveling can be a strenuous
activity and just like an athletic event, you should properly warm up.  A simple warm up would be to
walk around the house for a couple of minutes before heading outside.  Once you are outside, start by cleaning off
your car to help warm up the arms and shoulders.
When
possible try and shovel multiple times during a snow storm.   Shoveling 2 inches of snow at a time will be
less strenuous than letting the snow build up and doing it all at the end.
Push the
snow as you shovel.  This will be easier on your back.  If you do have to lift the snow, bend with your knees, use your legs and do not fill
the shovel completely!

Take it
slow! Take frequent breaks; do not work to the point of exhaustion.  If you feel tightness in your chest while
shoveling, stop immediately.
Dress
warmly and pay close attention to extremities.  These are the first areas to develop frost
bite (hands and feet, nose and ears).

Clearing your car

Use a
brush/ice scraper to remove snow and ice from windshield, side and rear
windows, side mirrors, and head lights/tail lights.
Make sure
your tailpipe is clear of snow before starting your vehicle.
Also make
sure to clear the snow from the roof of your car.  Sliding snow can be dangerous for yourself
and other drivers. If you have a taller vehicle such as an SUV or a truck, grab
a step stool or invest in a long handle brush.
Don’t
force the wipers; you may damage the motor. 
If your wipers are stuck to the windshield try pouring some windshield
washer/deicer fluid on them.  Do not use
hot water to remove ice from your windshield as this could cause your windshield
to shatter.
Blog post by
Eric Chandler CSCS.