If you
are like me, someone who enjoys exercising on a regularly, if not on a daily
basis, you may discover that you often feel tightness in your hips, hamstrings,
and hip flexors. Even if you do not
exercise consistently, maybe you have a job that requires sitting, bending, or
kneeling often, you are also subject to feeling stress in the central area of
your body. These muscles, these forever
active muscles, are too often the cause of several ailments and set-backs to
living an active and healthy life.
Going
back to my exercising counterparts, the tightness you may experience in the
upper section of your legs, lower back and abdomen areas, may lead to your not
performing as well as you could with more flexible hips. Because our hamstrings, major glutes and hip
flexors tend to work in unison during activity it is extremely important that
you take the time to tend to these areas with intention to keep them healthy,
long-lasting and able to perform on the ready.
Each
person may carry a lot of emotional stress in their hips. Think about it. When we are sad, frustrated,
or just feel ‘blah’ we tend to slump, slouch, sit or lay in awkward positions
that place high demands on the areas of focus here. Our low back curves excessively because we
forget about keeping it even. Our
shoulders slouch forward as we forget to keep them back. Our hips, well forget about it. Our hips take on the demand of our torso
weight in these unaligned positions.
This is how emotions cause stress on our body. Emotions cause us to misalign our bodies or,
on the more positive side, keep our bodies upright and in good form. Everything we do impacts our hips.
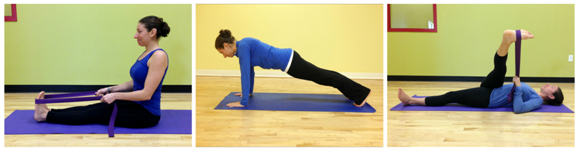
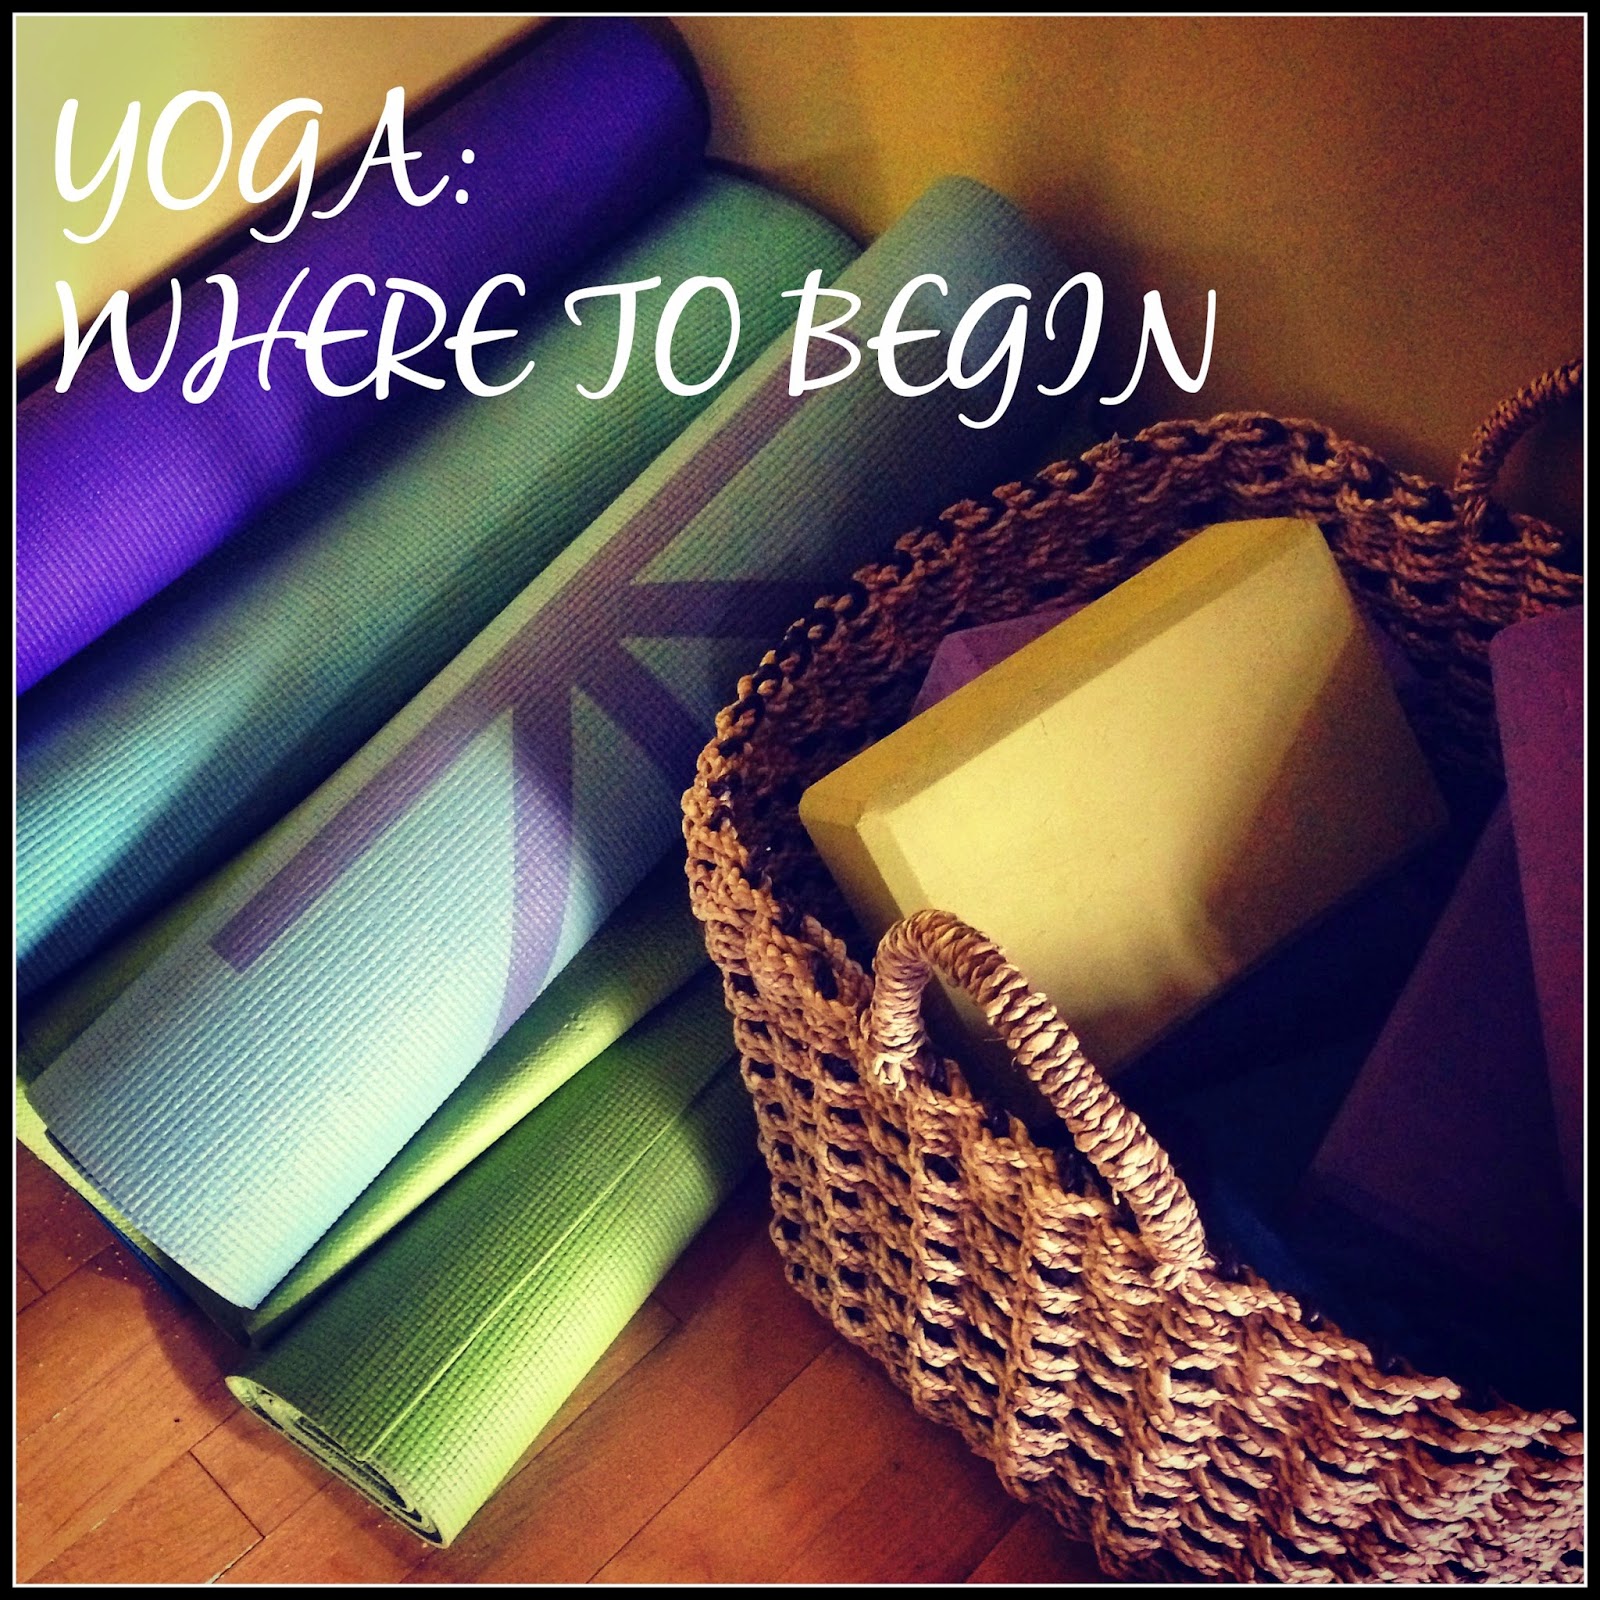
There are
3 exercises that you can do at home that will help any person, athlete or not,
keep hips strong, flexible, and ready to take on the excessive demands of life
so that injuries may be prevented, thwarted by the habit of maintaining good
posture naturally, even during times we forget about our alignment. We need to build muscle memory and these 3
exercises, added into your life regularly will help.
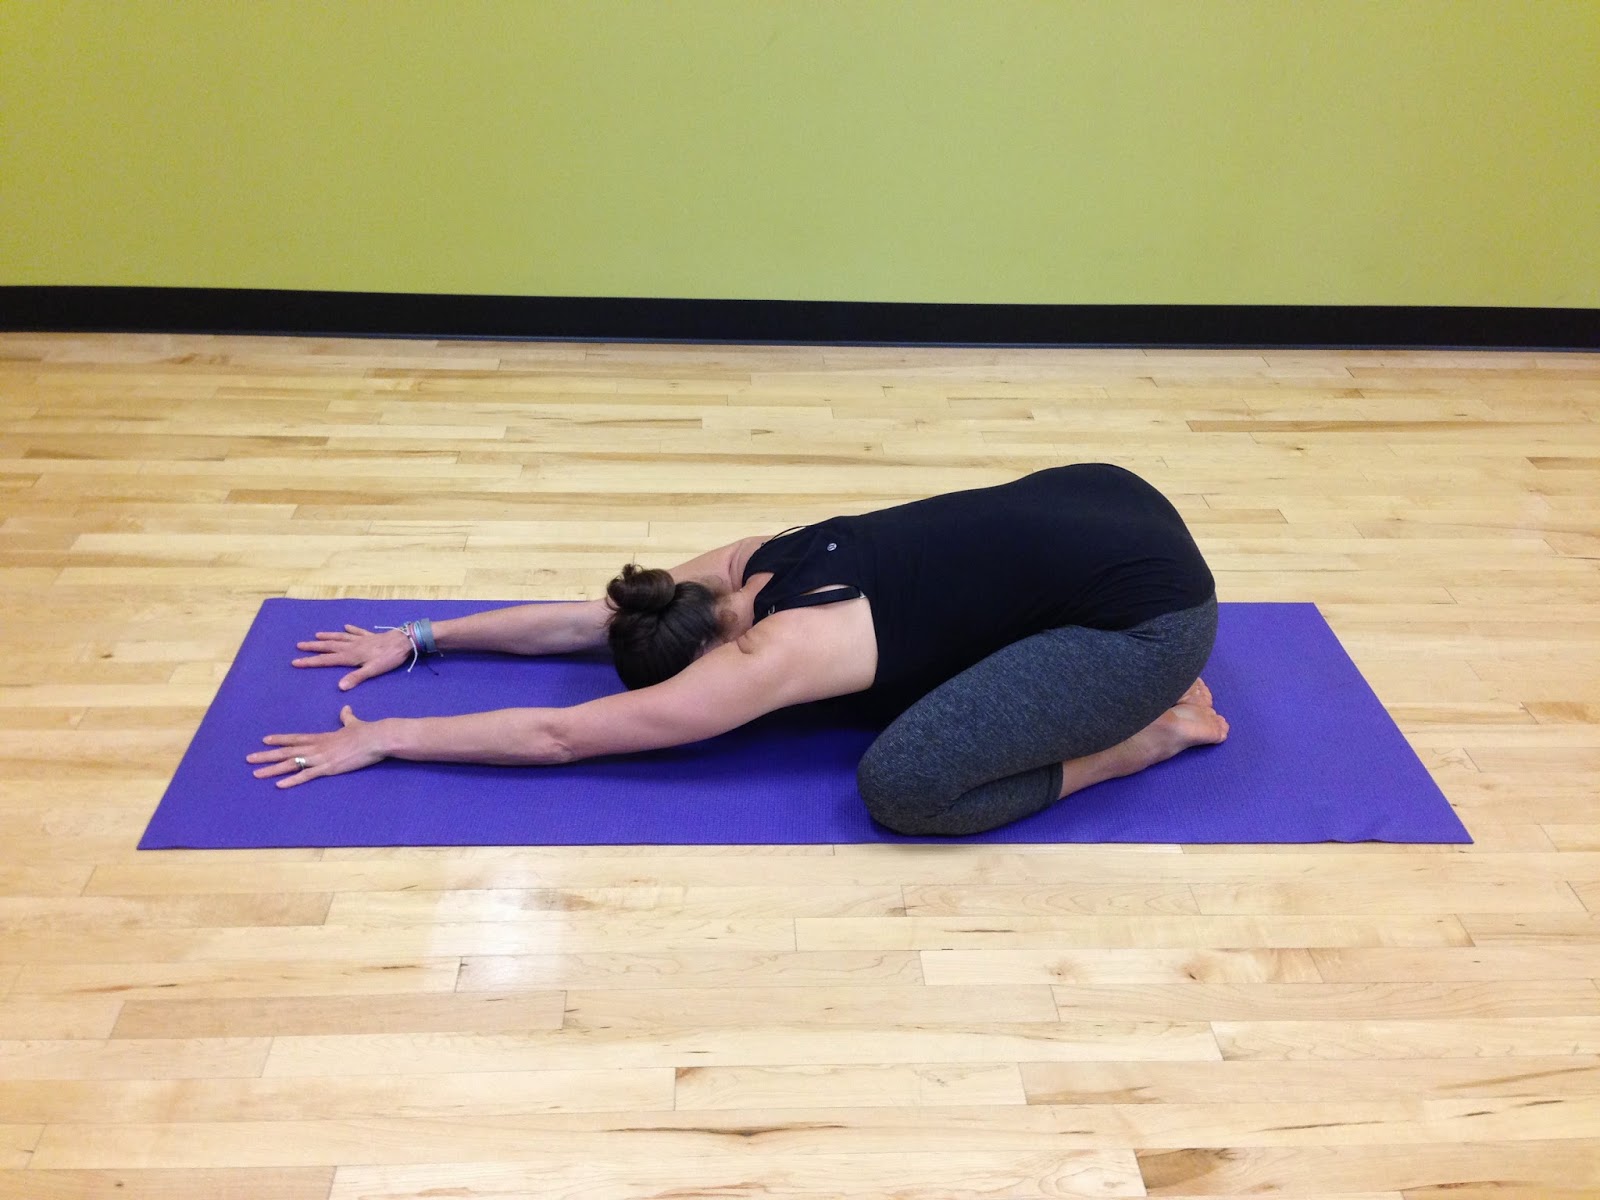
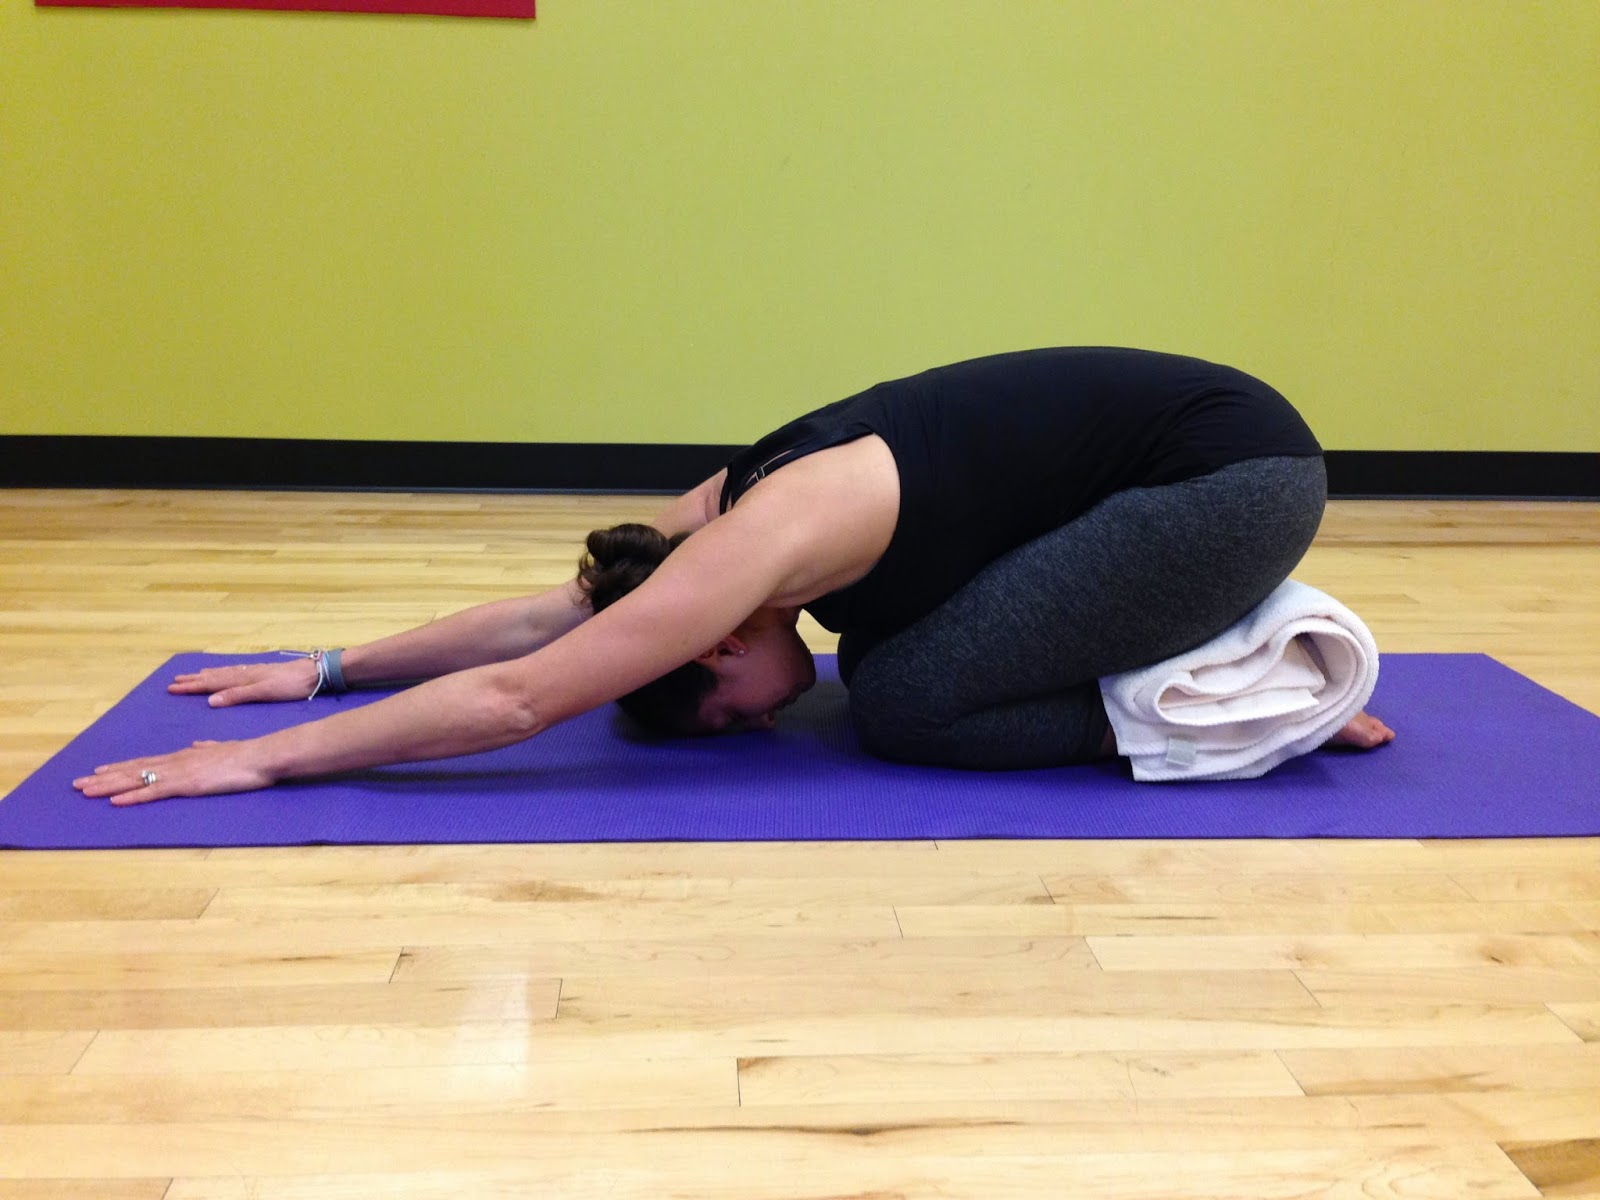
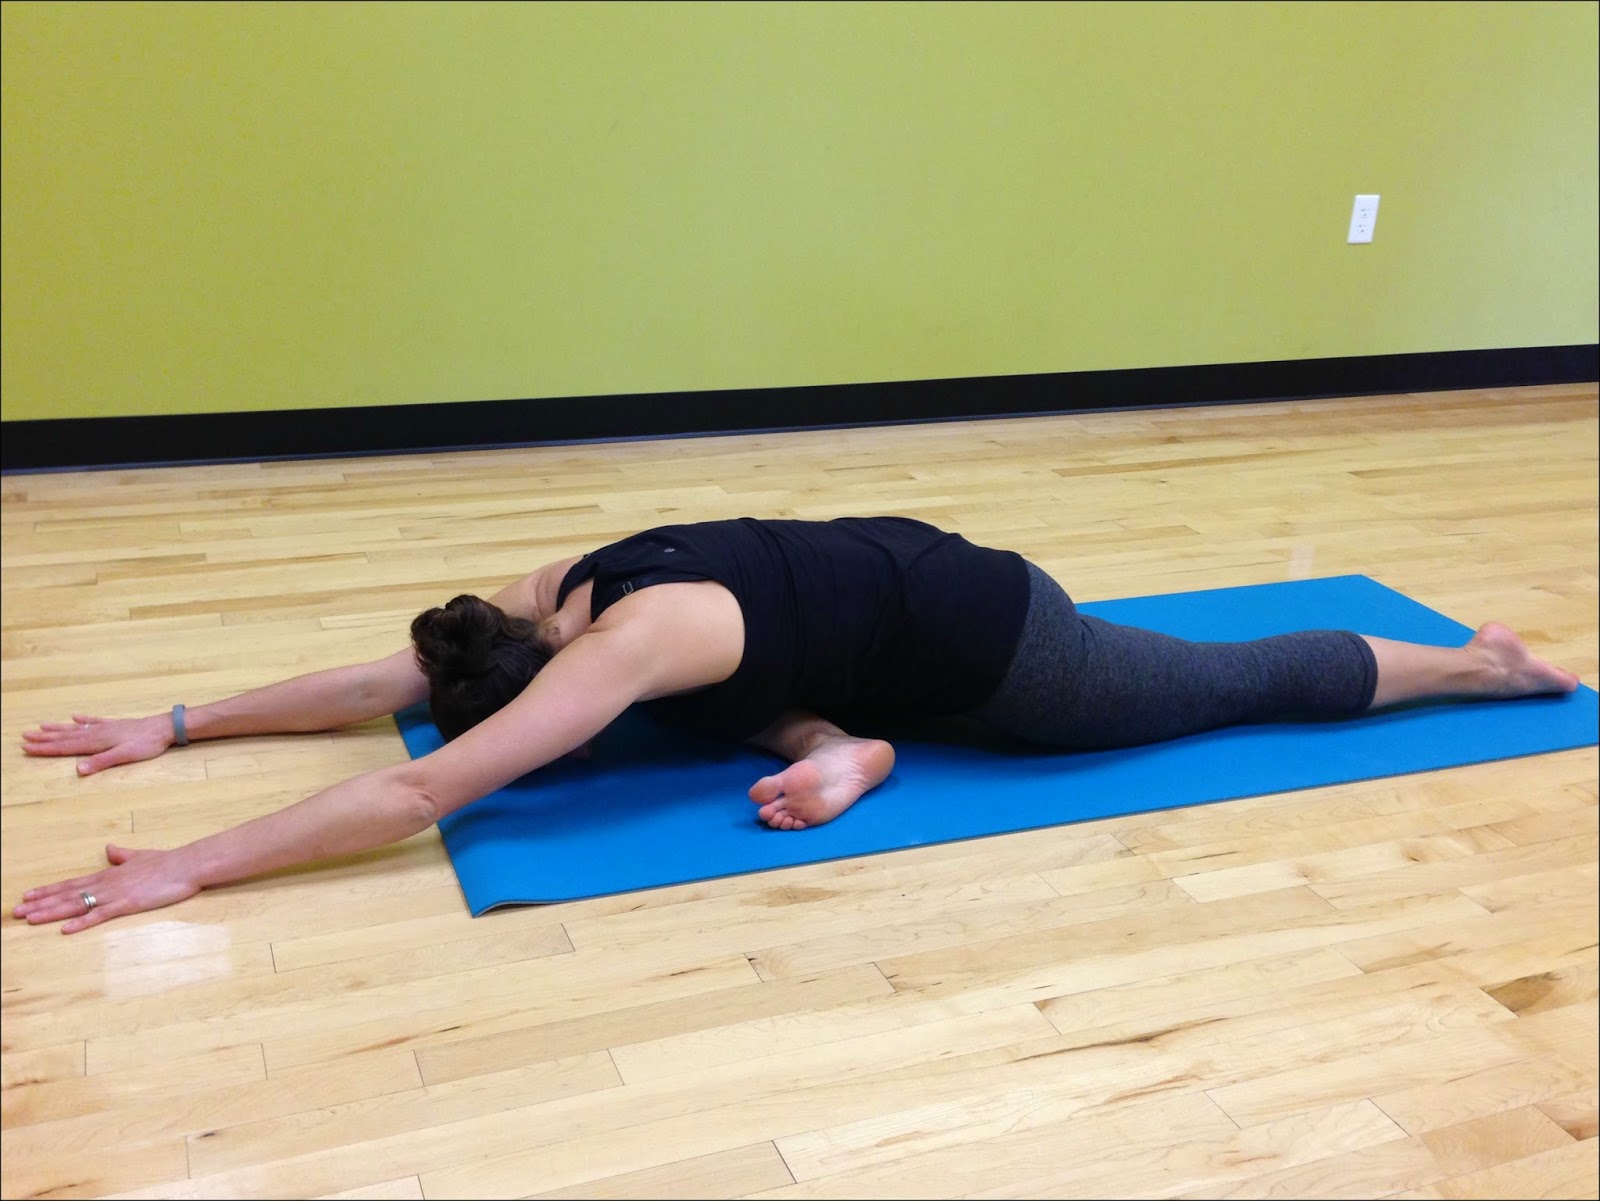
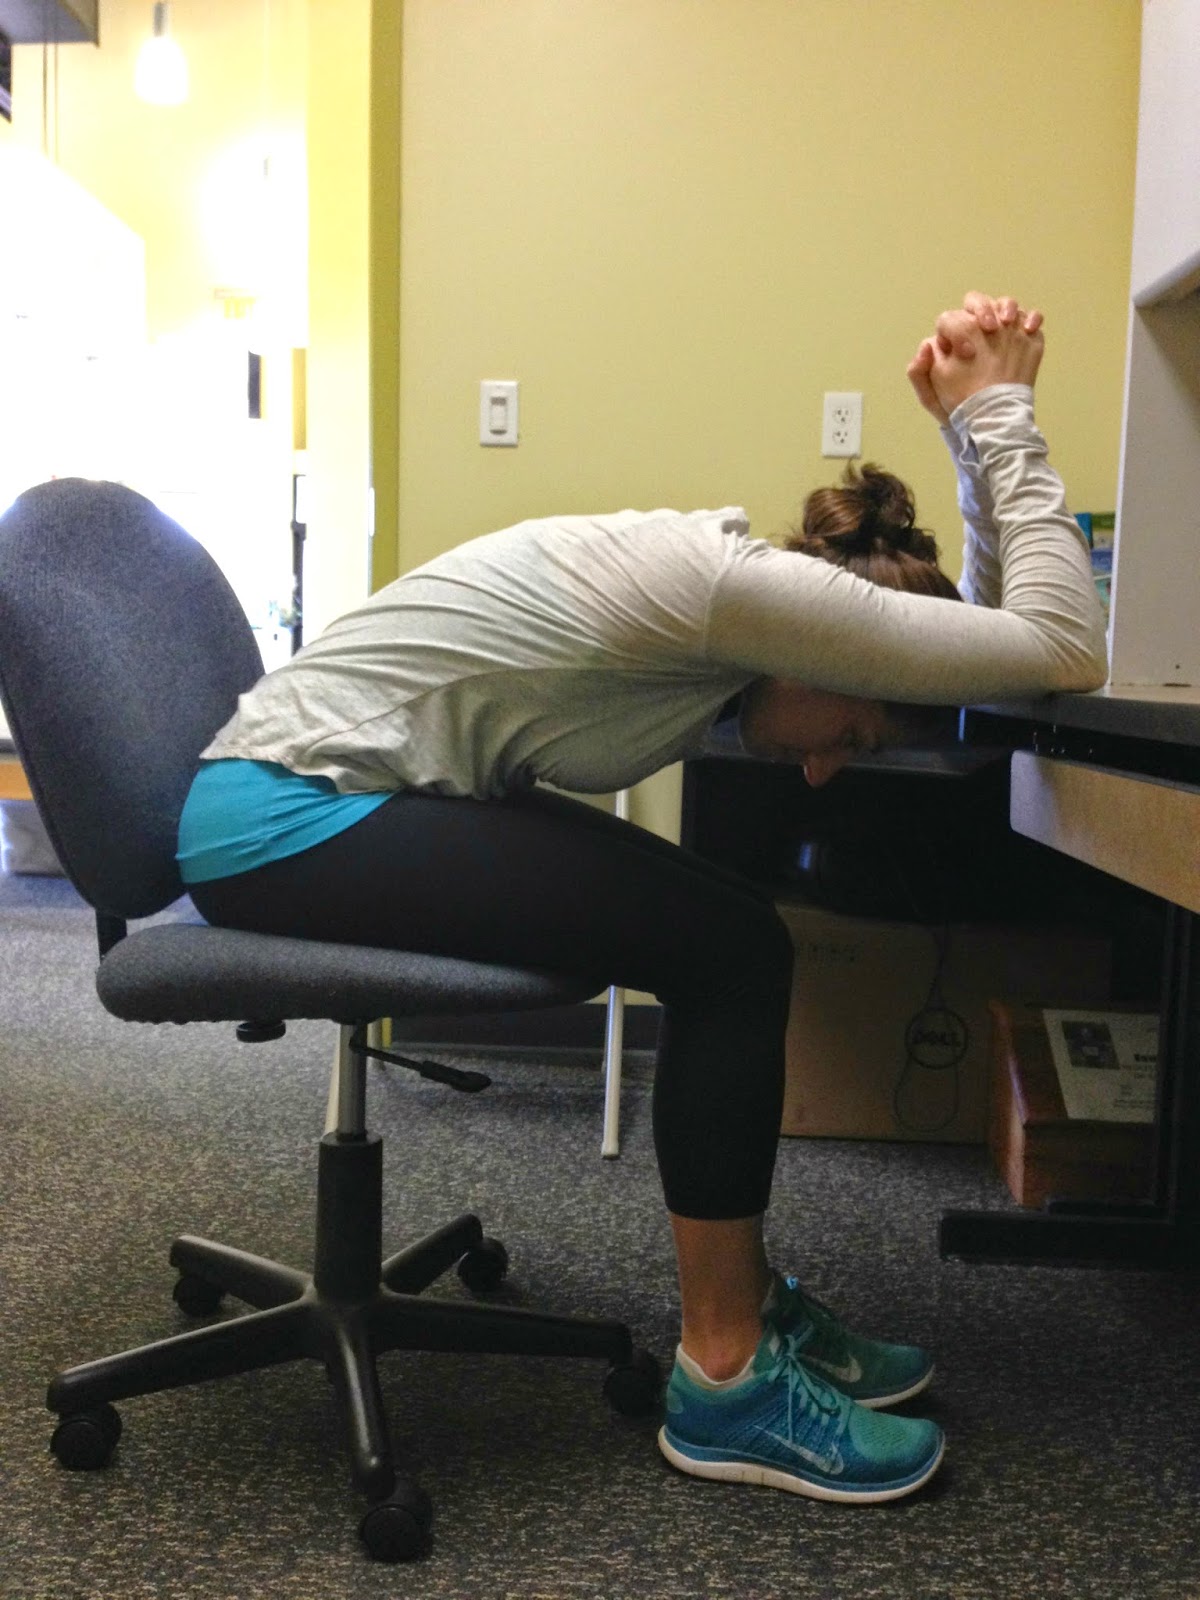
Child’s Pose
This relaxing posture is designed to
stretch your hips, lower back and upper parts of the back of your legs. Child’s Pose also, depending on the version
of the pose, may help lengthen your side body and open your shoulders (when
arms are extended out in front).
stretch your hips, lower back and upper parts of the back of your legs. Child’s Pose also, depending on the version
of the pose, may help lengthen your side body and open your shoulders (when
arms are extended out in front).

- First, come down onto your knees. (If you have knee problems, place pillows
underneath or perform this exercise lying on your back instead. Just follow the same instructions). Move your knees outward until they are a bit
wider than your hips. - Next, bring your BIG toes together. This creates a base for your hips to sit back
into, as well as ensure you stretch the appropriate muscles. - After
this, sit your hips back, toward your
heels. Some may be able to touch hips to
heels while others may not. It isn’t
important to get your hips all the way down to your heels. What is important is knowing your body’s
limits and respecting them. - Lastly, once your find a comfortable placement for your
hips, lean your torso forward, over your thighs. The goal is not to get your torso all the way
down to the floor. In fact, if you are a
beginner to this pose you most likely will not be able. The goal is, however, to relax and try to
keep your spine nice and long (no bending the spine). To accomplish this, either come onto your
forearms with your elbows under your wrist, or place a pillow or block beneath
your forehead as you keep your chin slightly tucked to your chest. Keeping your spine long will help you get a
deeper stretch through your hips, glutes, low back and beyond. - Variations: Extend your arms our in-front of you with palms
facing down to open shoulders, or bring your arms to your sides and truly relax
into the posture. Stay here for 3-5 minutes.
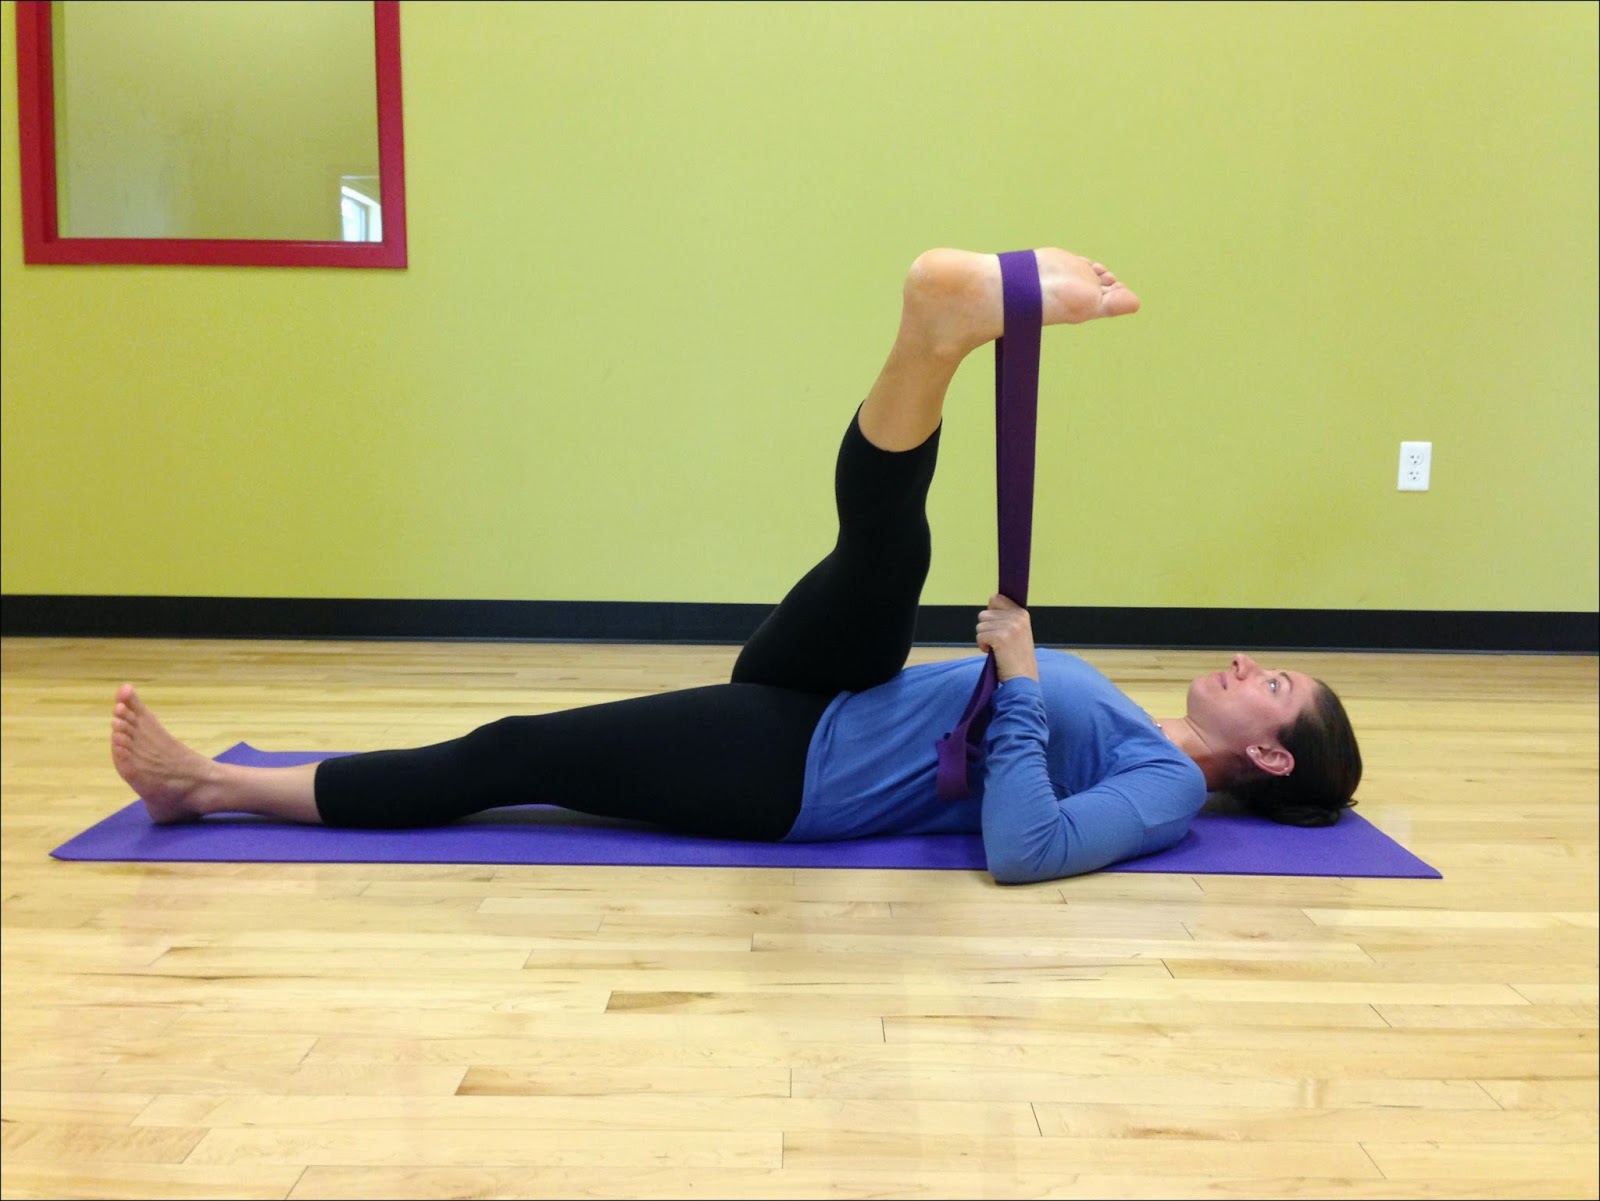
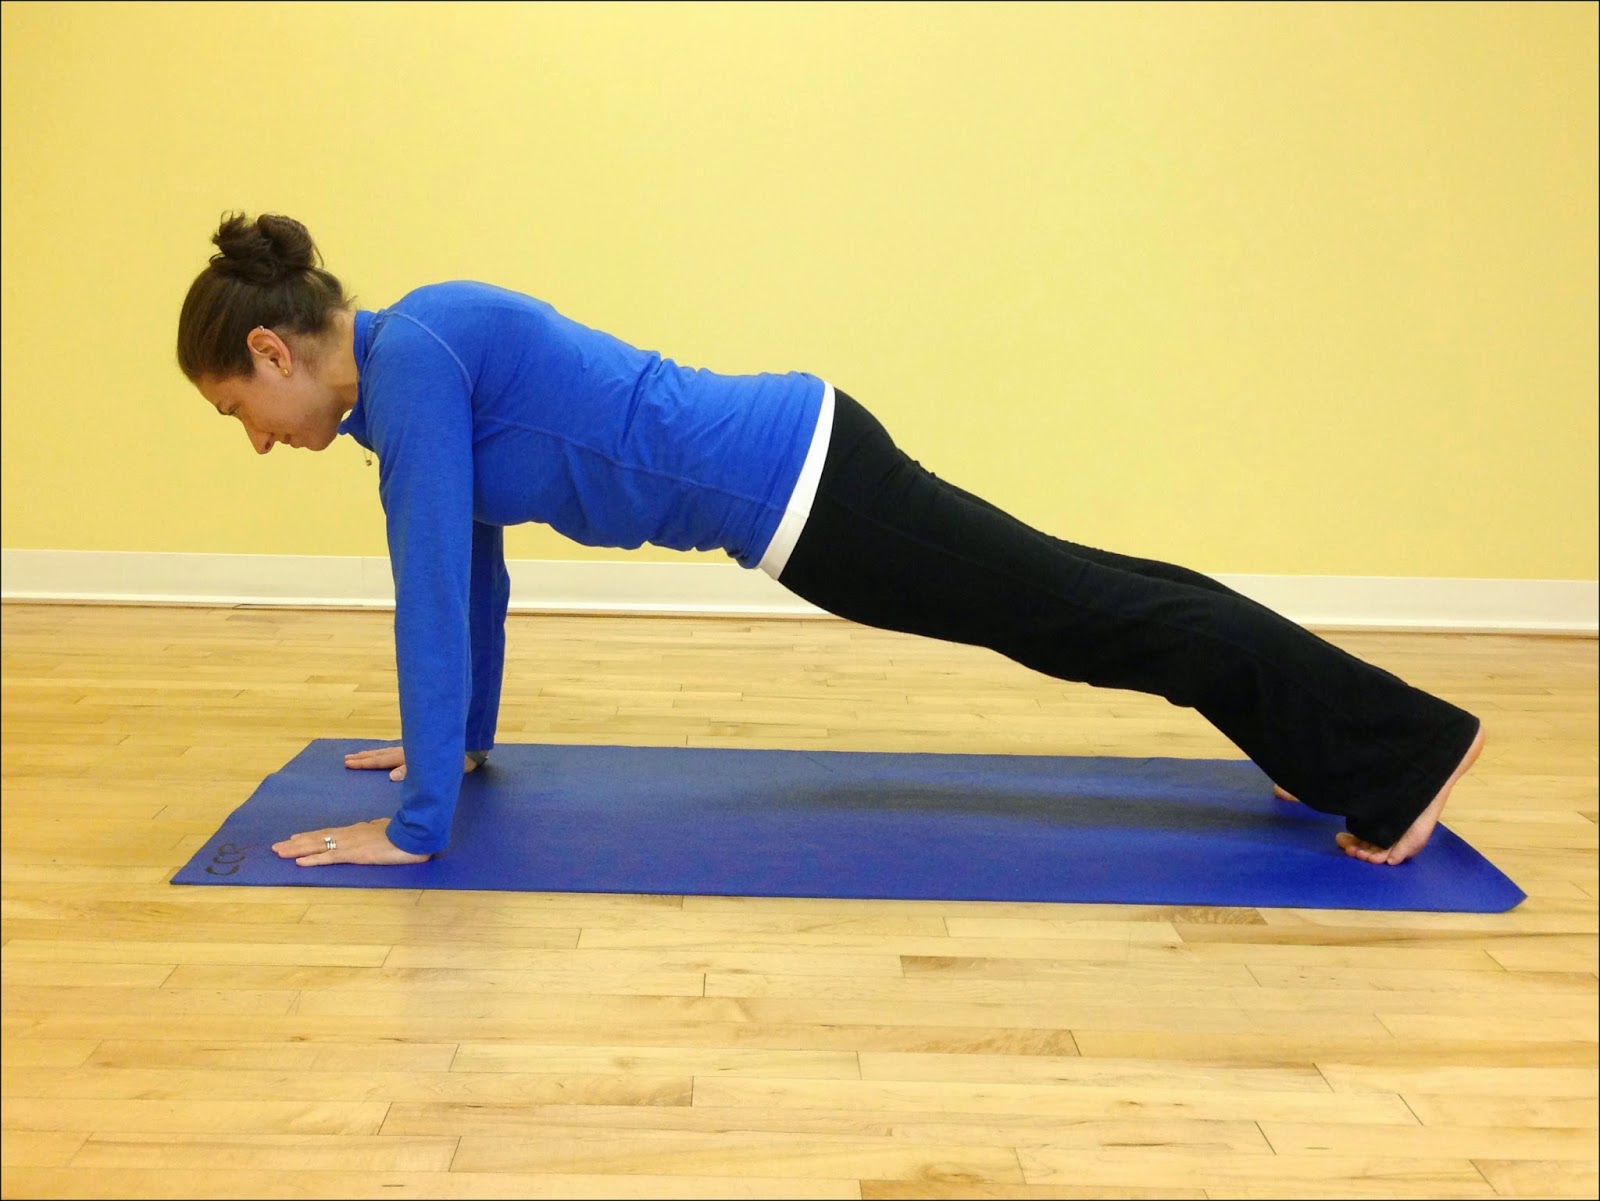
Wide-legged
Forward Bend
This is one of my favorite stretches
because there are so many variations that help open those tight muscles even
more.
because there are so many variations that help open those tight muscles even
more.
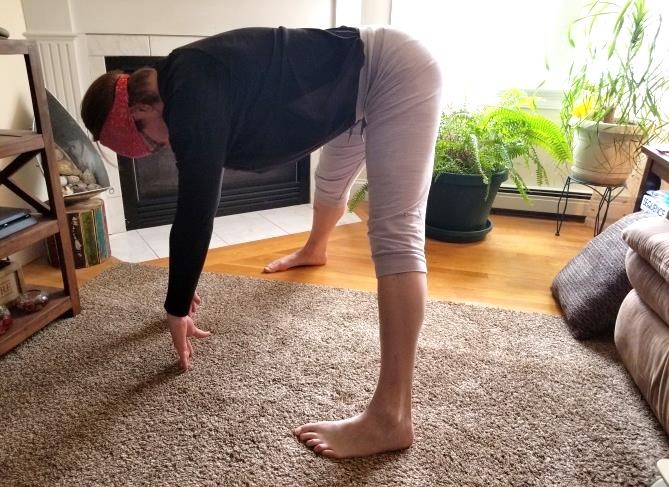
- First, step your feet out to the sides of your body, nice
and wide. Be sure not to step out so wide
that you cannot keep your balance. Keep
your toes facing forward, pressing the outside of your feet down into the
floor. Squeeze your thigh muscles to
keep your legs strong. - Next, standing with wide legs, tuck your pelvic bone by
drawing your navel into your spine, sending your buttocks flesh downward to
help flatten your lower back, protecting it from bending. - Moving
on, squeeze your shoulder-blades into
one another so that your chest pushes forward.
Now you are ready to bend. - From
here, keeping your spine long, lean
your torso forward, bending at your hips and not your waist. Bring your torso down until parallel to the
floor if possible. (If not, only bend
down to where you can keep a long spine and stay there. Over time your muscles will stretch and you
will be able to be parallel to the floor.
Don’t rush this process as it may lead to straining the muscles). - Remember to keep pressing into the outside of your feet while
you bend forward. - Lastly, if you are parallel to the floor, stay here for
30-seconds before slowly coming back upward to stand. Keep your spine nice and long to get maximum
benefit. Repeat this slowly 5-10 times,
remembering to pull shoulder blades into the spine while keeping pelvic bone
tilted.
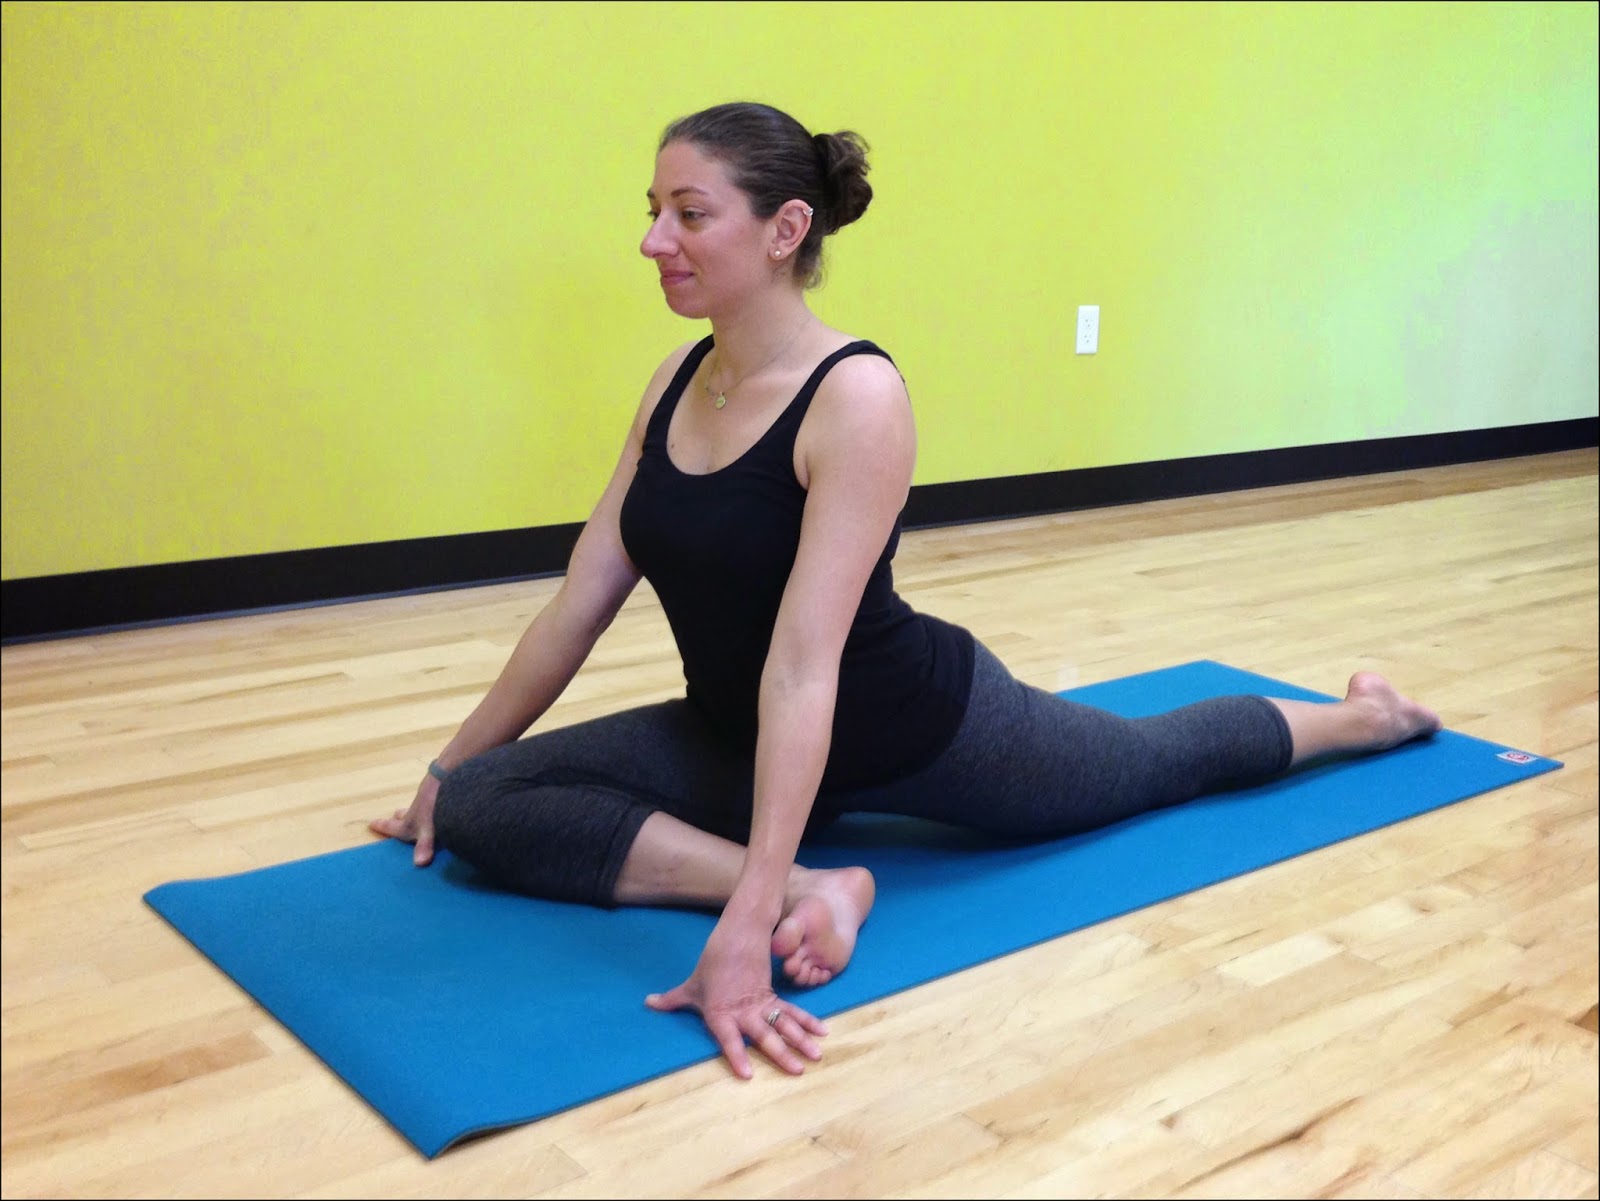
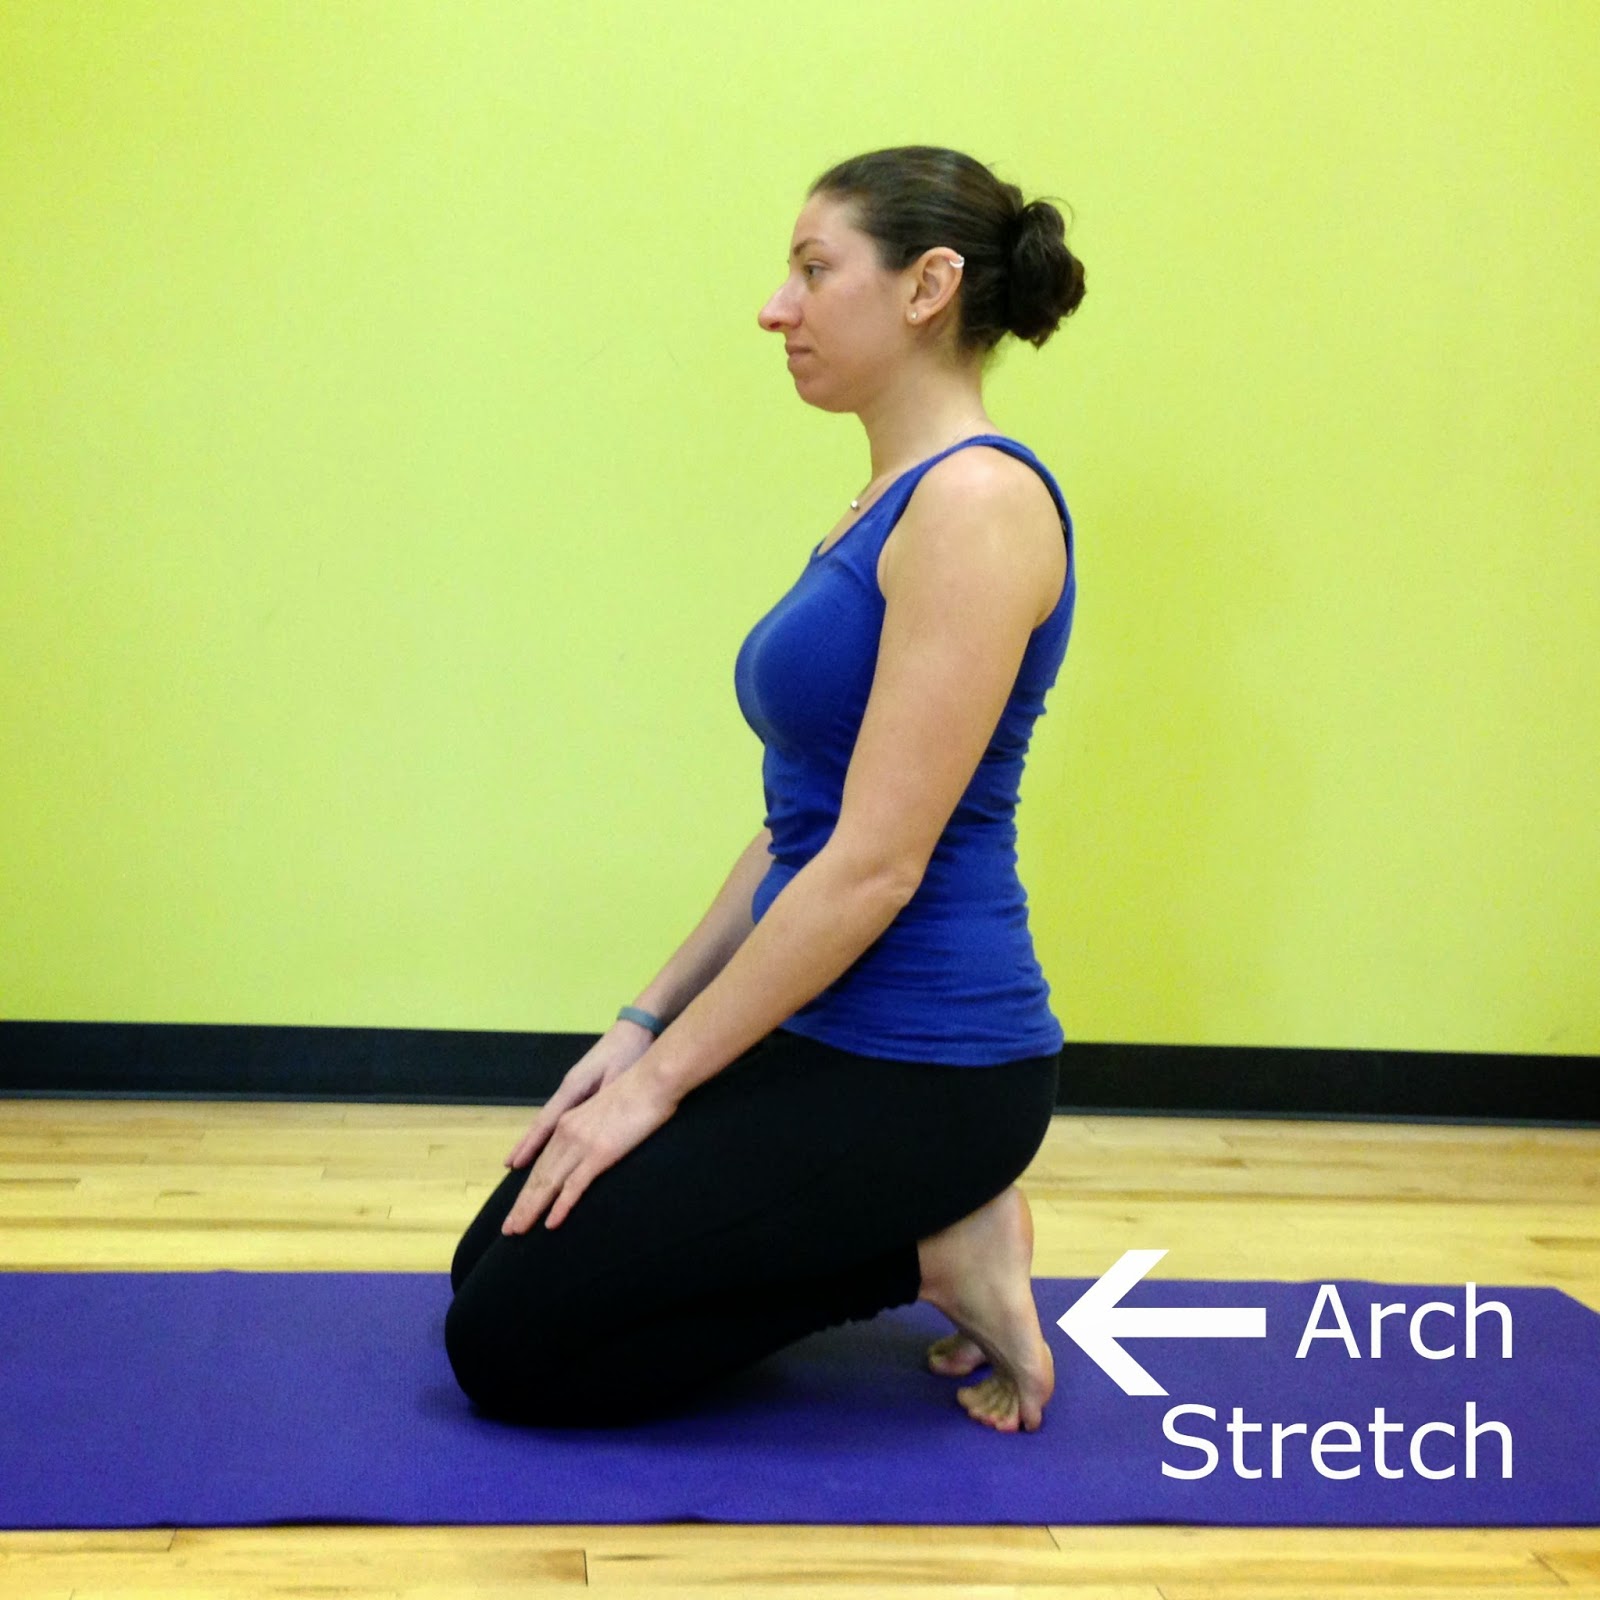
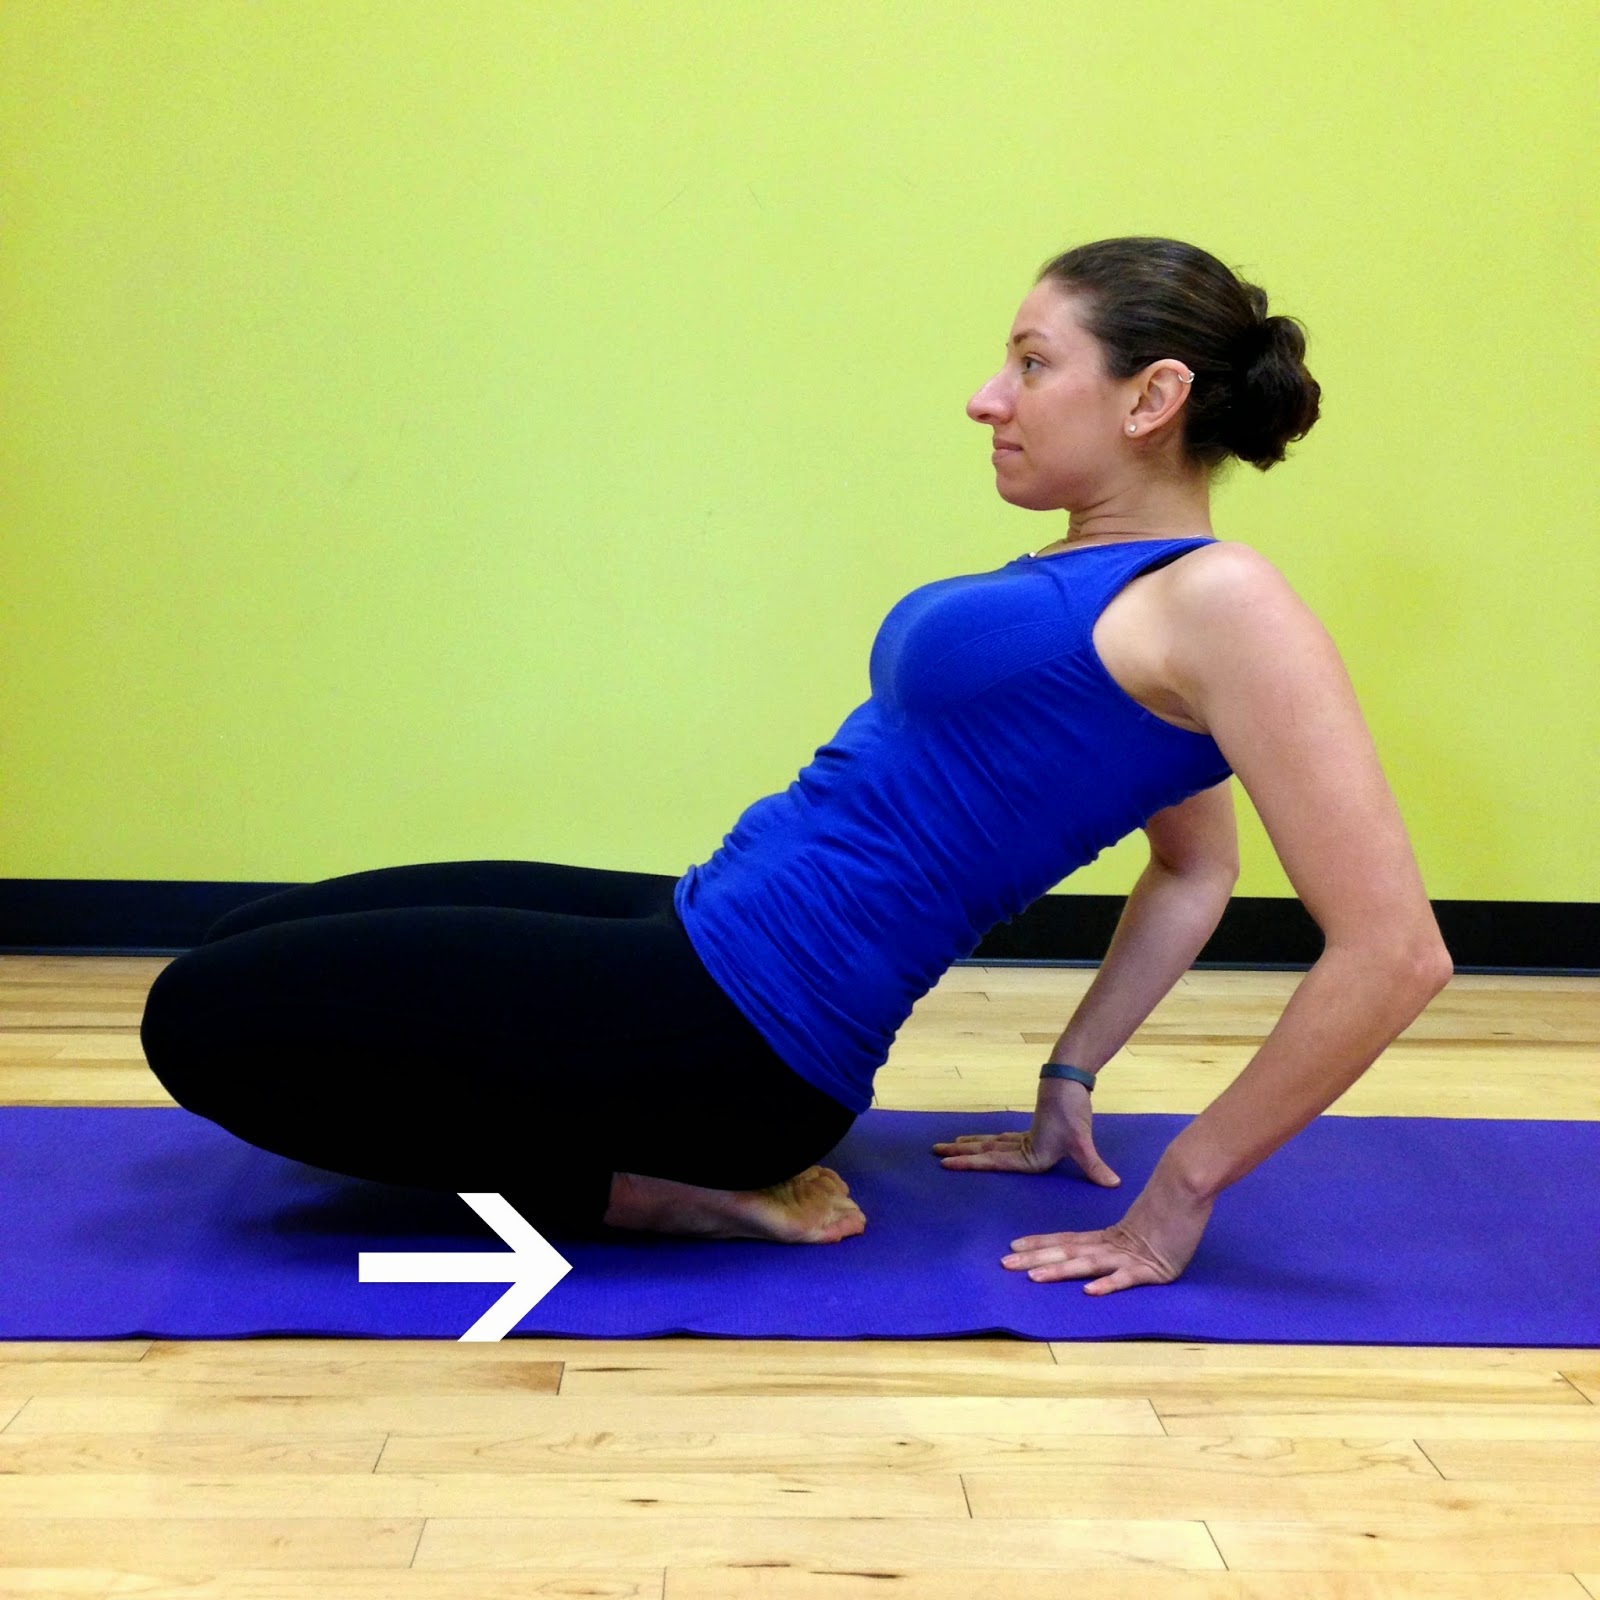
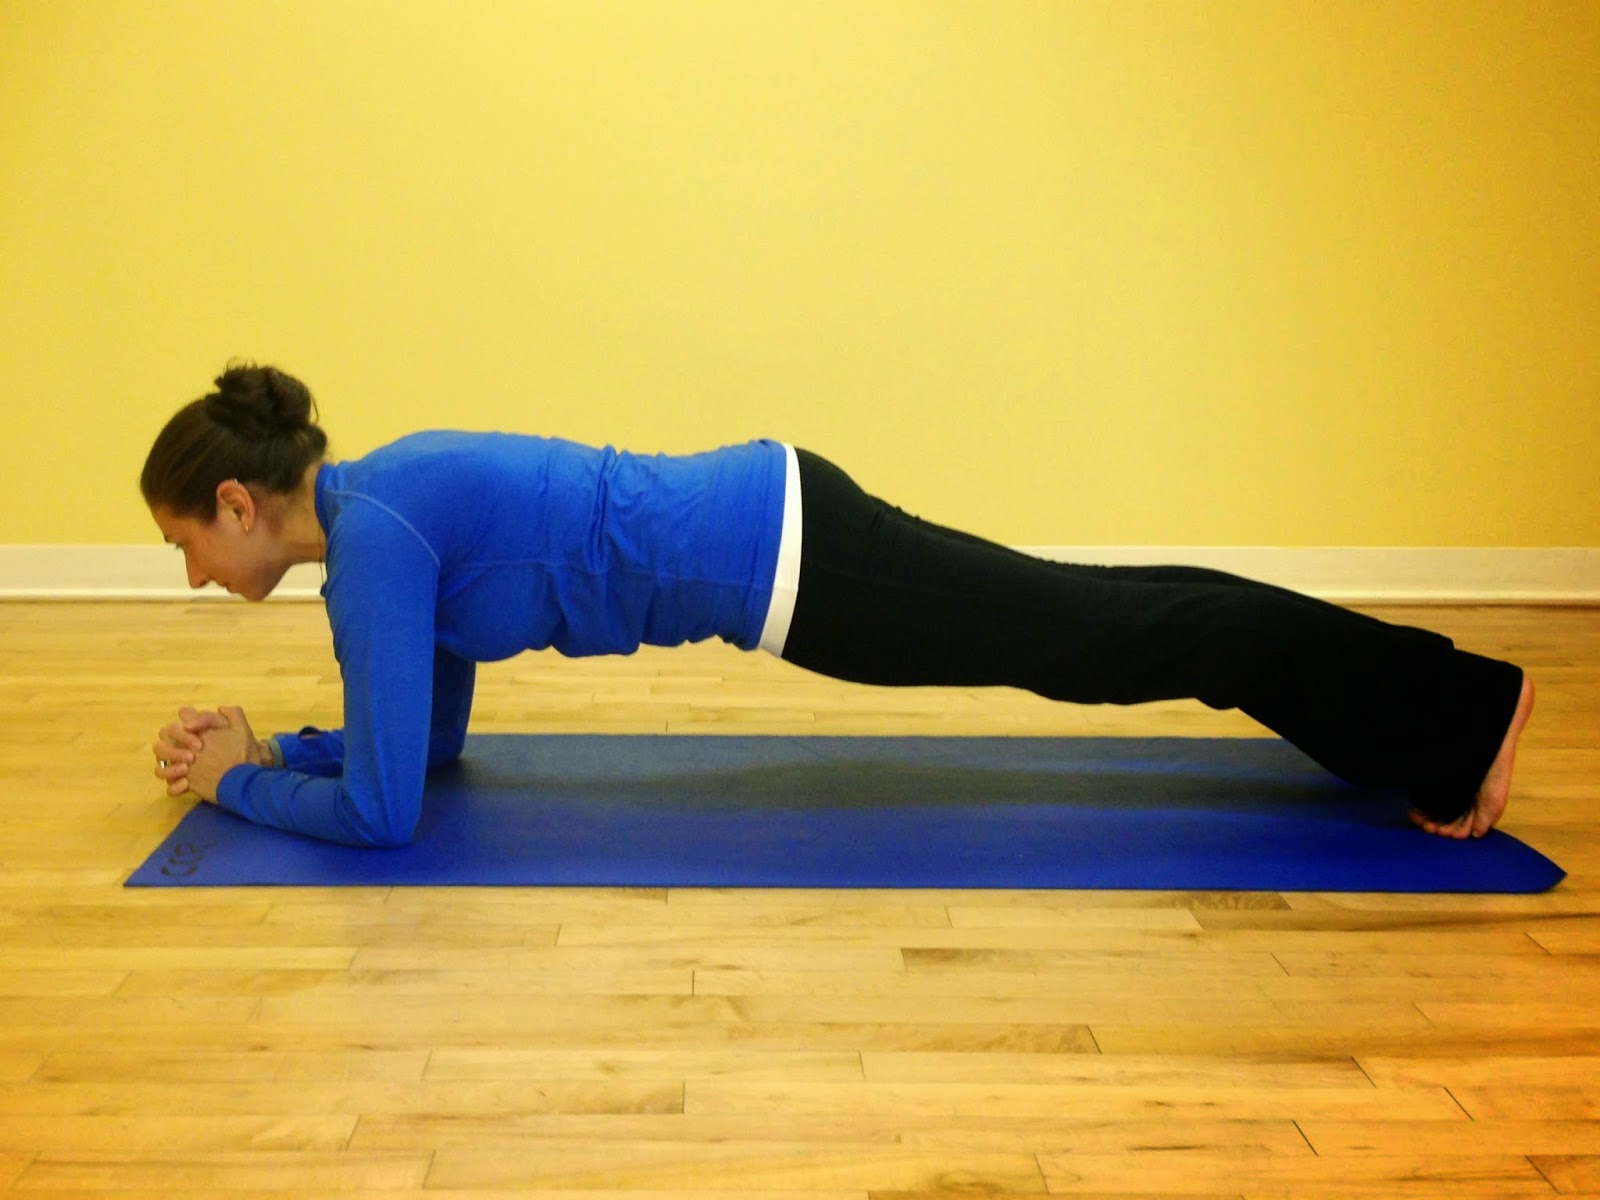
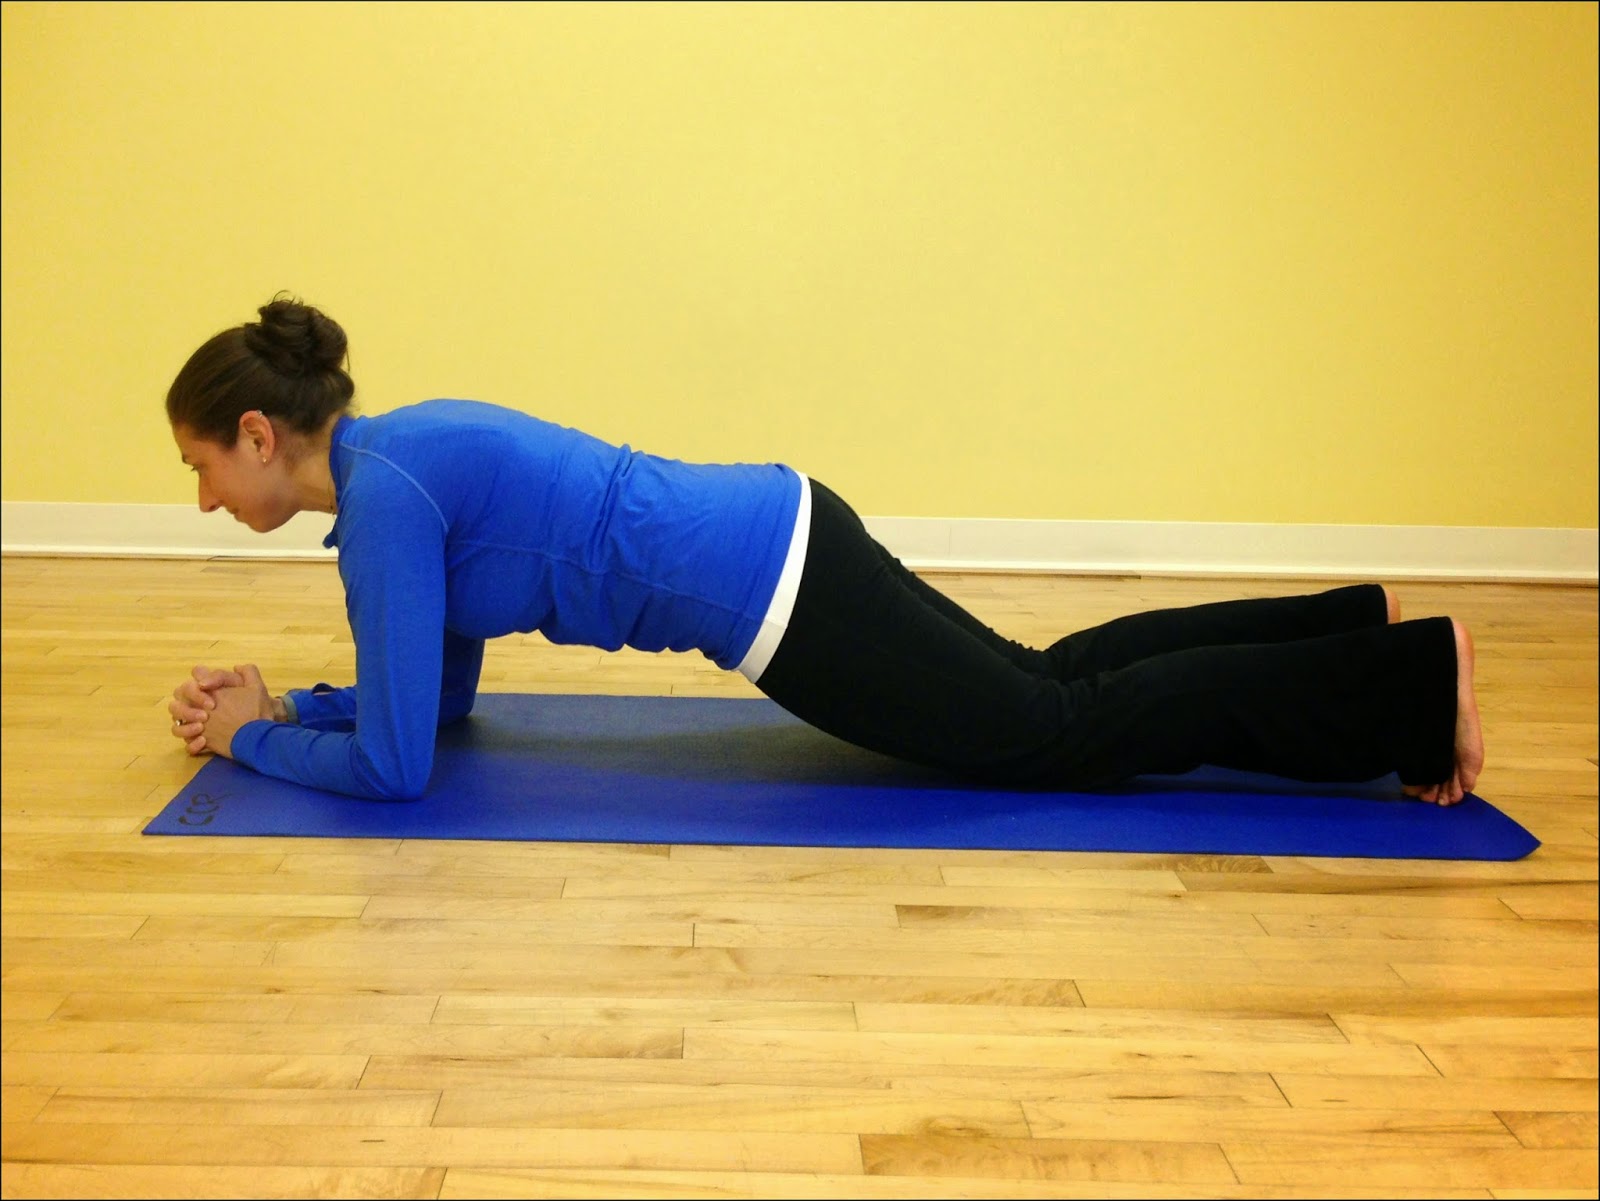
Frog Pose
This is one of those stretches that you
love to hate, hate to love, though the benefits of Frog Pose are absolutely
wonderful for your tight hips. You will
want to give yourself enough time to really sit in this stretch for at least
3-minutes, gradually increasing to 5, 7, or even 10-minutes. Frog Pose should be the last stretch you do
if you are following this series of stretches.
This is not a comfortable stretch at first. However, if you are willing to sit in this
stretch you will find that the deep muscles of your hips will want to open and
stretch, creating space in your hip joints.
I encourage all of my students to focus on steady breathing through the
stretch to keep your mind off of the discomfort this may cause.

- To begin Frog Pose you will need to come onto all 4s on the
floor. For those with knee issues I
recommend placing padding or pillows under your knees. You will NOT be directly on your kneecaps but
you will be on the medial (inside) part of the knee. - Start with your hips directly over your
knees. Come onto your forearms, shoulder
directly over elbows. - Make sure your feet are turned outward with your heels in-line
with your knees. Your legs create two 90
degree angles (hips/knees & lower knees/turned out toes). - Slowly move your knees outward,
maintaining alignment with your hips.
Your knees should move directly out to the sides, not forward or back. Check to be sure you are maintaining two 90
degree angles in your legs. - As you move your knees outward, draw
your navel (belly button) up toward your spine slightly to keep your lower back
from sagging too much. - Lastly, once you have moved your knees out as wide as you
can, knowing this in and of itself may become uncomfortable for you at first as
you stretch the inner part of your upper legs, slowly shift your torso and hips
slightly back between your legs just to break the plane, causing your hips to
be back further than your knees. (!!Be
sure not to sit your hips back too far.
This is only a slight movement back).
Once here, stay as long as you can.
Just don’t forget to breathe!

When performed correctly, each of these
stretches has great potential to help you open your hips, relieving stress in
tight muscles around the middle-section of your body, thus allowing you to
continue move forward with your life, your exercise program, or whatever it is
that keeps you going. As with any
exercise or stretch, if you experience pain in the joints or tearing than back
out of the position until the sensation is gone. Let this be your starting position and grow
from there. I encourage you to try these
at least once each week, maybe more.
Over time the benefits begin to reveal themselves as you feel looser in
your movements, less tightness and more mobility. Enjoy!
Blog
post by Jami Woods.
post by Jami Woods.