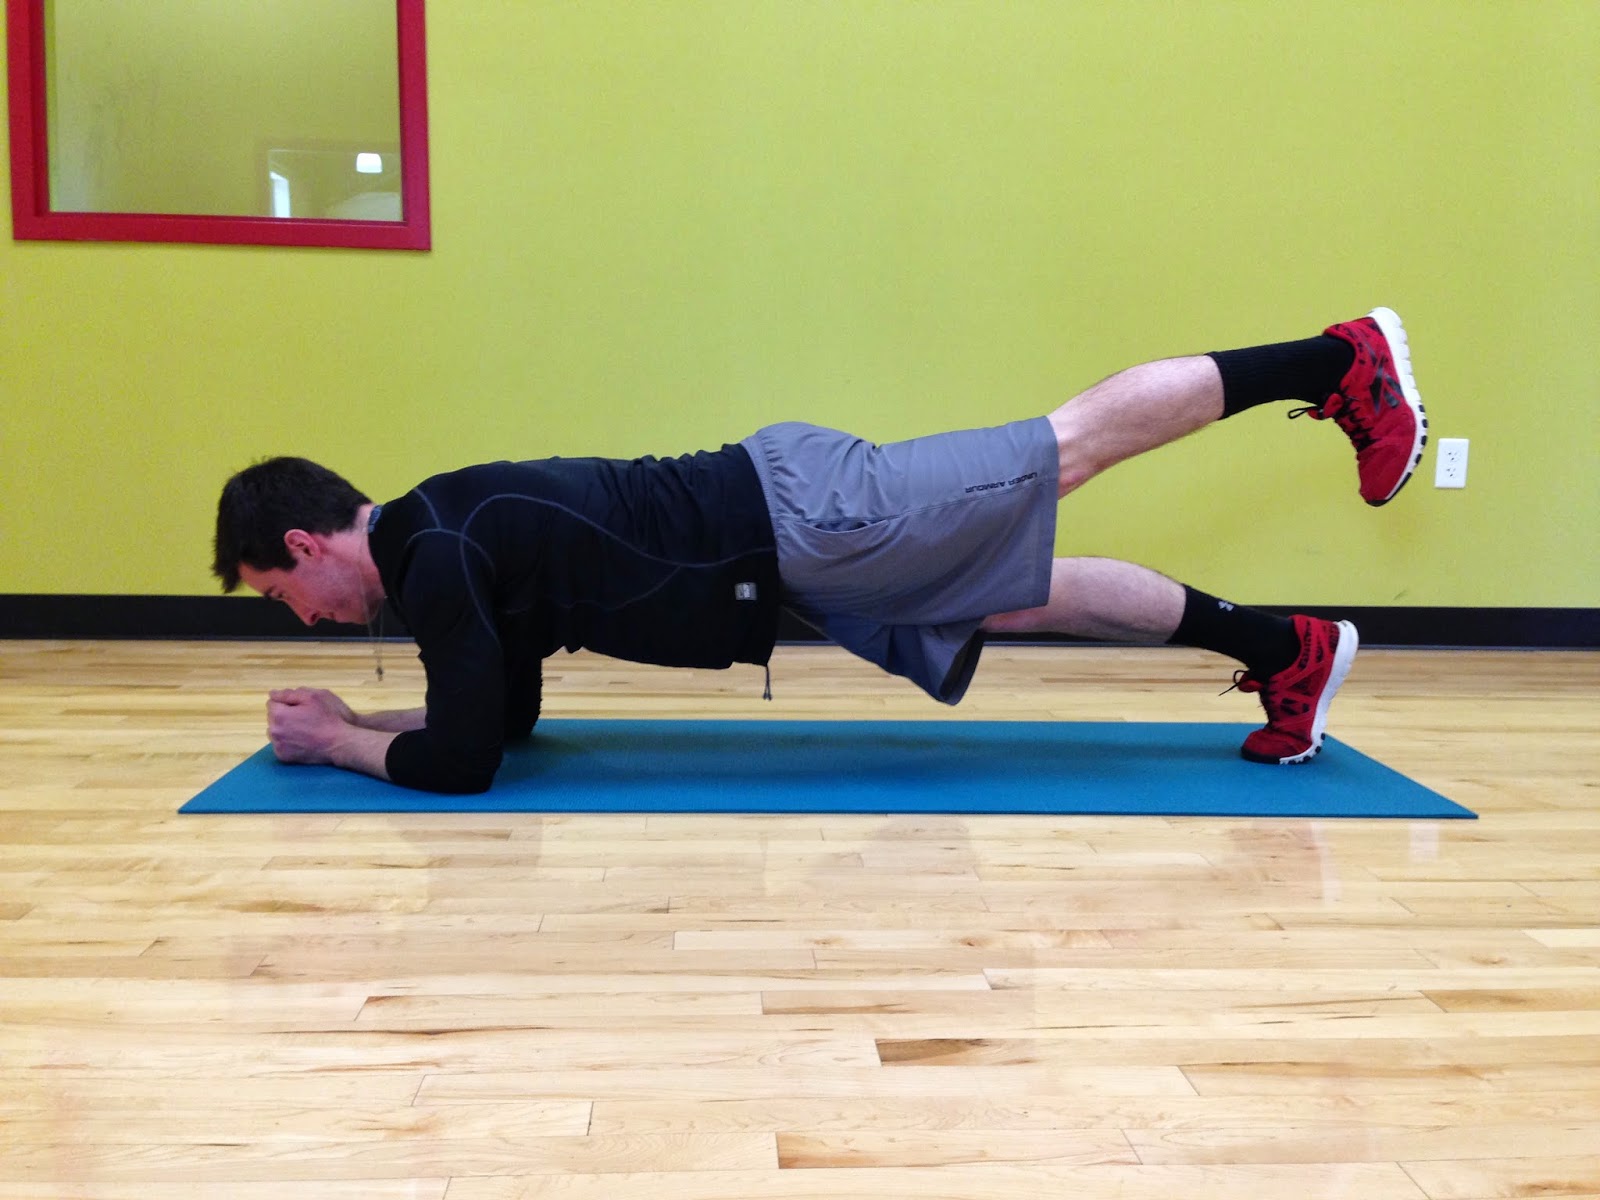
Plan. Progress. Perform with the TRX!

Progression is
essential to keep seeing improvements from your workout. When your
body becomes used to a work load, you plateau, stop seeing results and can
even lose what you’ve been working so hard to gain.  Progressing exercises on the TRX is super
simple if you understand the three principles behind suspension training. 
 

Pendulum 

The pendulum
principle is based on the fact that the straps will always travel back to a
neutral position, hanging straight down from the anchor. Gravity will work with
you or against you based on where you position the straps when you are
performing an exercise; they can be positioned in front of, behind, or at
neutral. This principle applies to most ground based exercises where the straps
are being moved to perform the exercise. The TRX Crunch is a good example.
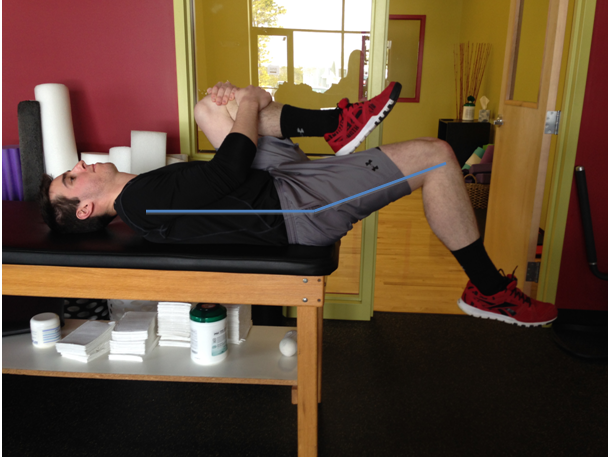
Progression
1:  Starting with your feet behind
neutral.  This will make it easier to draw your knees forward, since gravity will be
working with you to bring the straps back to their neutral position.

Progression 2:
Starting with feet at neutral. You have to work harder to pull the straps away
from neutral during the motion of the crunch but as you release, gravity will
assist you in brining your feet back to a neutral position.
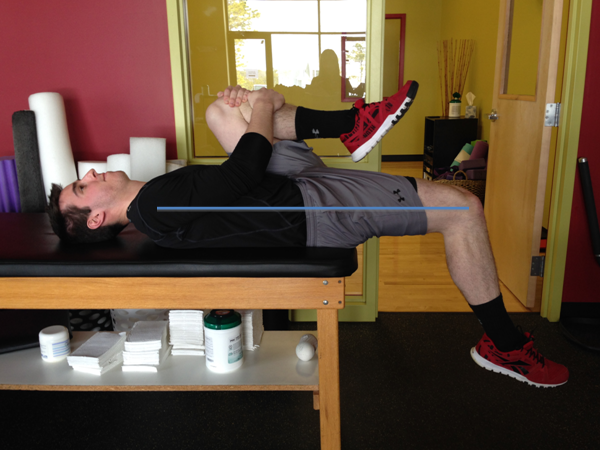
Progression 3:
Starting with feet in front of neutral. You have to fight against gravity to
keep the straps from going back to neutral as hold your plank and try to draw
the straps even further from their neutral position as you perform the crunch.
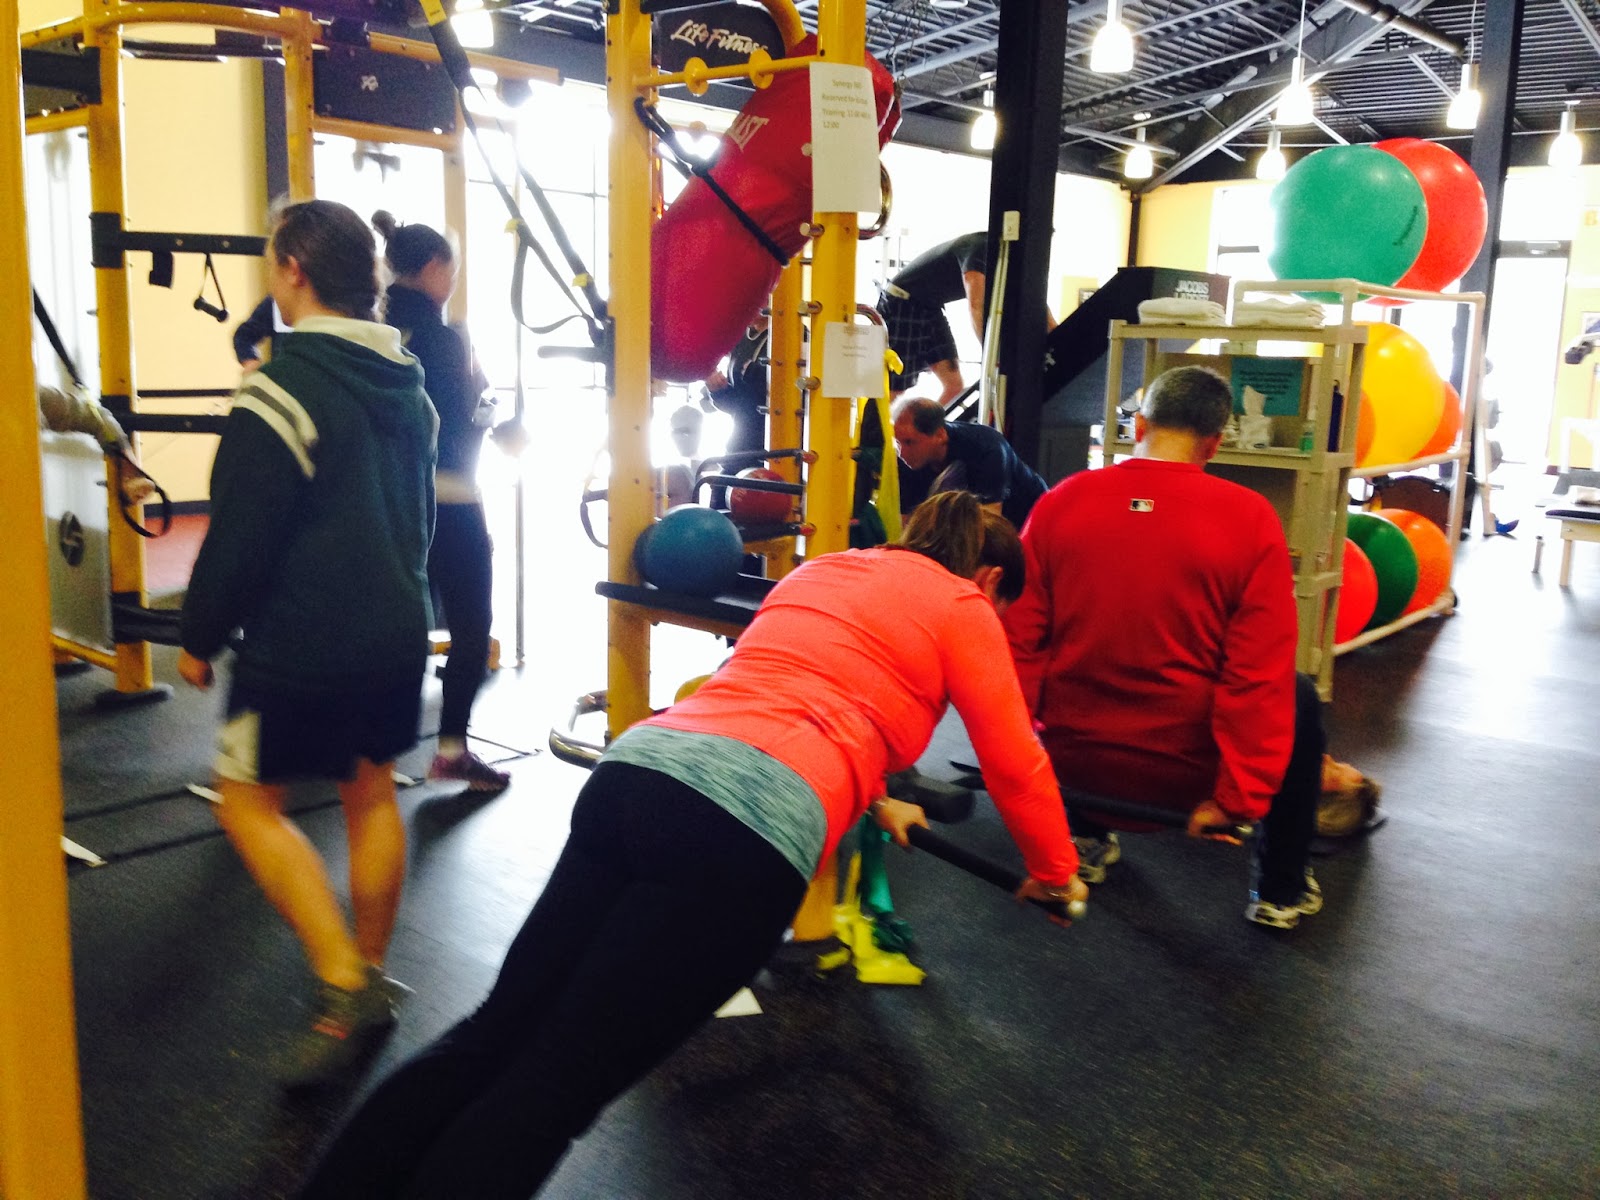
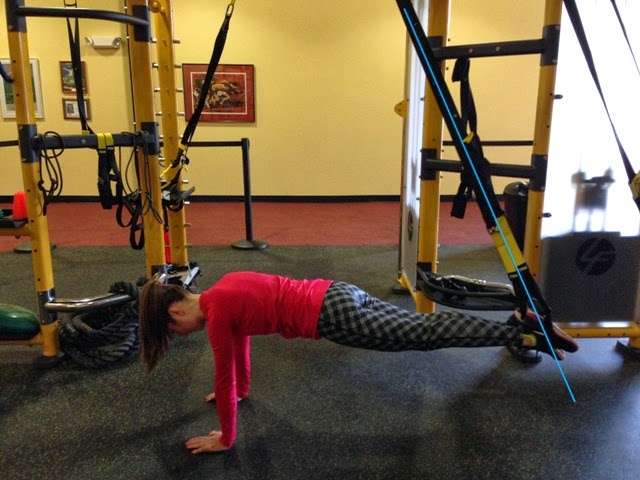
Vector
Resistance

The principle
of vector resistance has to do with body weight vs. body angle when performing
exercises. Take the TRX row for example; as you increase the angle of your body,
the resistance (body weight) you need to work against is increased, making it
more difficult to perform the exercise. The progressions with this principle are
simple; starting close to a vertical position will be the easiest, then
increasing the angle of your body and difficulty more and more until you are nearly
parallel to the ground.
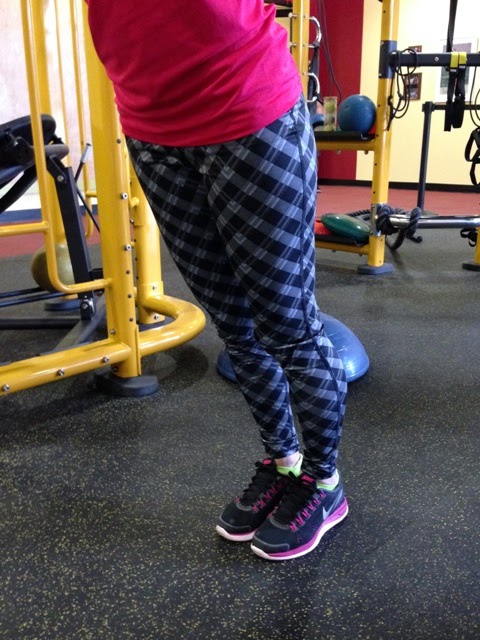
           

Stability

The stability
principle focuses on your center of gravity and base of support. As your
base of support gets smaller and your center of gravity shifts outside its
normal position, your body will become more unstable, making it more difficulty
to perform the exercise. By simply changing your foot position you will
increase or decrease you base of support and difficulty of the exercise. There
are four basic foot positions to progress through.
Progression 1:
Staggered stance. Place one foot in front of the other and hip width apart.
Progression 2:
Wide stance. Feet set outside the hips.
Progression 3:
Narrow stance. Feet set hip width apart or less.
Progression 4:
Single leg stance. Body weight is placed solely on one leg.

Vector
resistance and stability can be manipulated separately or together. Increasing
the resistance (body weight) and creating an unstable environment will generate
a greater challenge for you when performing your TRX exercise.
Blog post by Catie Furbush CSCS.

Got Back Pain?

It seems that at some point everyone encounters lower back pain and it can be a result of a number of different issues. Some are more serious than others but some of the
common causes can be corrected with simple stretches and strengthening
exercises.

Common causes of low back pain are:
tight hip flexors, weak abdominal muscles, and weak gluteal & lower back
muscles. This could be a result of excessive sitting, driving, bad training
habits, and overall laziness or “inactivity”.
Although pain can be attributed to a number
of different variables, hip tightness is a quite common reason. This is due to
the hip flexors anterior pull on the pelvis when excessively tight, creating a
more arched lower back. This exaggerated arch causes excessive pressure on the
posterior portion of the lumbar spine. Consequently that hip tightness can
actually inhibit the use of your glute muscles making them small and weak. Not
to mention, it forces your gut forward maybe making your appearance not as
flattering as you’d like.


“So your saying my gut looks bigger and
my butt smaller?!”
Yes I am. If your hip flexors are very
tight, it can actually impede the activation of your large gluteal muscles on a
daily basis and force your hamstrings to do all the work.
So if you’re an individual that doesn’t feel any glute soreness after a workout loaded with a bunch of squats and lunges,
then either your form is incorrect or your flexibility 
isn’t where it needs to
be to properly engage the correct muscles.
Strong gluteal muscles help absorb
impact on the spine, as well as keep it in proper 
stable alignment. If you experience lower back pain or you just can’t seem to strengthening your butt,
have a trainer or physical therapist check your hip flexors’ flexibility by performing the Thompson
Test.


If your thigh and trunk maintain
alignment with the table, your hip flexors are in a good flexible range.
If not, the first step is to stretch
this area. You can stretch the hip flexors by actually doing the Thomas Test
shown above or you can try these two alternatives:


The
next area to strengthen is the core & lower back. A plank or modified plank
is a great way to isolate those muscles while maintaining proper posture. As
you get stronger, progress this exercise by alternating straight leg lifts in
the plank position, this will add some new challenges of balance and glute
strengthening. Make sure when performing a plank that you don’t drop your hips
causing an arch in your lower back. You want to maintain a straight flat back
or a slightly rounded one (butt a little higher) to protect yourself when
beginning this exercise. 


Modified Plank
Plank
Plank with alternating Leg Lifts

Another
exercise that focuses in on these specific areas is quadruped reciprocal extension. Start by positioning yourself on all fours (hands and knees) with
hands underneath the shoulders and knees under the hips. Next engage the
abdominal muscles by tightening your core, then extend and straighten, one leg and arm at the same time (must be opposite; ex. right leg & left arm). Return to the start position and repeat to the other side.


The goal of this exercise is maintain a
flat back and neutral pelvis. Try to imagine a plate of food on your lower back
and you don’t want it to fall off. Keeping the core engaged throughout the
duration of this exercise is extremely important. Focus on using your glute muscles as the main muscular force in lifting and extending the legs.
The addition of resistance tubing and weights will take this exercise to the
next level.

The last exercise in this series is a
bent knee bridge on a physioball. The purpose of this exercise is to target the
hamstrings, quads, glutes, and abdominals. In order to perform properly, you
must focus on keeping your knee angle at 90 degrees at all times while you
contract your core and gluteal muscles to lift your lower back off the ground
and bring it back to the floor slowly.


Good progressions involve using only one
foot on the ball at a time or rolling the ball in and out by
bending and straightening the knees. Just make sure you maintain that pelvic
bridge for the duration.
So quit sitting around! If you have mild
lower back pain, try these stretches and exercises. Take it easy at first
and conqueror the modified versions before progressing. Make sure no pain is
present when doing any of these exercises. If pain is felt, immediately stop and
contact your doctor or physical therapist. Aim for 2-3 sets of 10-15 reps
for the exercises depending on your fitness level. When stretching shoot for
three 20-second holds and for the planks, try to maintain that steady position multiple times for 15-60 seconds. Doing these exercises 3-4
times/week will help increase flexibility, strength, and help to properly
realign the spine.

Blog post by Drew Sifflard CSCS.

Make Interval Training Work for You

High Intensity Interval
Training (HIIT), and other acronyms/names for interval workouts (tabatas,
anyone?), have become de rigueur
among fitness enthusiasts and trainers lately, and no wonder. The workouts,
which include brief periods of a burst of high intensity exercise, followed by
a set period of lower intensity “recovery” exercise, or even complete rest, are
shown to be quick, efficient, and they leave those doing the workouts feeling
like they’ve really killed themselves (in that way that fitness fiends and
athletes love).


The benefits of interval training are
pretty attractive, too. The high intensities push your heart rate up, helping
to improve your cardiovascular fitness (in some cases, even doubling your aerobic endurance
capacity); you can accomplish higher training levels (i.e. run farther at
higher intensities) because you allow your body to recover a bit in between
bouts; and it’s been shown in studies to improve time-trial performances (in
other words, can help you hit that PR you’re aiming for in a race). 

Chemically/metabolically, it’s helped improve muscle oxidative potential,
muscle buffering capacity, and muscle glycogen content–fancy ways of saying it
helps delay fatigue by getting the muscles to store/use energy more
efficiently.


The trick to intervals is
knowing what you’re training for, since the intensity/rest ratios can be
manipulated to target very specific energy systems. Are you a 100-m dash
specialist looking to gain an edge (in the form of maybe a tenth of a second
shaved off your time) for your upcoming meet? Are you looking to improve
your endurance for your next soccer season? Or are you looking to improve your
time in an upcoming marathon? Knowing your goals is the first step. The next is
knowing how intervals impact the energy systems in the body. There
are three major energy systems that we use:
  1. Phosphagen System
  2. Glycolysis
  3. Oxidative System
Knowing how long to let
the body recover so that the energy sources being used can “re-up” and be fully
taxed again means the difference between training that particular system and
having another energy source “step in.” (All three systems are at work at
any given point in time, but one is more dominant depending on the energy
sources available).
So what are some
good interval-to-rest ratios?
If you want to increase
power/strength–needed in short sprints and Olympic/heavy lifting–tax the
phosphagen system. The phosphagen system is mainly responsible for very
short-duration, high-intensity exercise. You’ll want a 1:12 or even a 1:20 work
interval to rest interval ratio. That means 10 seconds of hard, very high
intensity work to 120 seconds of rest. This kind of interval is best used
by elite athletes training for a very specific power improvement, and typically
done under supervision of a trainer.
For more moderate
intensities–good for improving performances in sports, like soccer, where
you need short bursts of speed and power (a sprint down the field) followed by
longer duration exercise (field positioning)–try working on the glycolytic
system. Those intervals, which can last from 15 seconds to three minutes, are
best targeted by intervals with a 1:3 or 1:5 ratio…a minute of
moderate-to-high intensity work and three to five minutes of lower intensity
recovery. If you have a solid aerobic base already, this is a good
interval system to try, but it’s suggested to have a fitness test done before
you start doing these.
If you’re looking to
improve your time for long races and endurance levels in general–good for beginners, and for
endurance athletes like marathoners–working with your oxidative system is your
best bet. Use 1:1 or 1:3 low-to-moderate intervals of work, followed by low
intensity recovery intervals. If you’re new to running, try jogging for a
minute and then walking for a minute.

Blog post by Ashley Crosby.

Are you ready to take on the Battle Ropes?

Have you ever wondered about the ropes coiled under the
LifeFitness Synrgy360?  Here is your
chance to learn all about them…
First off don’t be intimidated!  They may look threatening or difficult to use
but that’s only because they are new to you. 
The ropes are actually a relatively simple piece of equipment to use if
you know what to do. They come with a variety of different exercises and are a
great tool to shake up your current program. Not to mention all the benefits
you will by adding a few simple exercises to your routine.
The ropes give you a total body workout building muscular
strength, power, and endurance. It is a great way to develop grip and forearm
strength while working on core stabilization. And to top it off, it can be a
great cardiovascular and fat burning workout!
The intensity of these exercises can
easily be manipulated in a couple different ways.  First would be by your choice of rope. Most
gyms feature different sized ropes of different weights. You can also increase
or decrease the speed and size of the movements.
Slams and Waves are two basic exercises performed with the
ropes and the best place to start for beginners.

Rope slams

Begin in a squat position with both hands together. As you
come out of the squat position, lift the ropes as high as you can and move back
into your squat as you slam the ropes down to the ground as hard as you can.
Remember to keep you back straight and heels on the ground.
                                   

Rope waves

Start by standing straight with a slight bend in your
knees. Move both arms up and down together (or alternate left and right arms)
in small, fast, controlled movements. The ropes should create a smooth wave
pattern as you do this exercise. 
                                   
Incorporate these exercises in a circuit or interval
training session.  Start small and
gradually build up your endurance and strength. 
Once they become easy you can start to challenge yourself more by
incorporating different movements (li.e squats, lunges, or jumps) or pieces of
equipment (i.e physioball, or the BOSU) to these two exercises.

Blog post by Catie Furbush CSCS.

Aqua Jogging & the Benefits of H20

In the cold winter months when we can’t
get outside to exercise, the pool can be the place to turn. Whether you’re
rehabbing an injury or trying to prevent one, the water can be an effective
tool.
Exercising and running in deep water
provides resistance in all directions challenging opposing muscles to work
equally and can also improve cardiovascular endurance, strength &
flexibility. The hydrostatic pressure of water is great for reducing swelling
by promoting circulation and blood flow.
When running outside or even on a
treadmill, our joints take on stress by constant pounding on a hard surface. Wearing
a floatation belt in the deep water at neck level, we are about 10% weight
bearing. This may sound like deep water running would be easy but think again-
water has more resistance than air and there are plenty of ways to increase
that resistance. Different forms include: ankle cuffs (flotation), gloves,
barbells, and tethered running.
Aqua jogging in deep water draws
similarities to over-ground running in regards to body positioning, form and
stride -keep in mind these are key elements when in the water.  Maintaining a vertical position challenges
the core muscles and the resistance of the water challenges the arms which is
one difference from running on land. According to Dr. Robert Wilder,
physiologist and director of sports rehabilitation at the University of Virginia in “The
Sunday Times,” water running burns 11.5 calories per minute. Using this
figure, water running for 30 minutes will burn about 345 calories and an entire
hour of water jogging will burn about 690 calories! These numbers are just
estimates but in any case everyone has something to gain from deep water
running, no matter your fitness level.

Blog post
by
Farran Jalbert.

Tips for Safe Snow Cleanup

The forecast is calling for more
snow!  Snow can be great for recreational
activities such as skiing (downhill and cross country), snow shoeing, sledding
and more.  However, it can cause much
frustration with walking, clean up and travel.   

Here are some tips for safe snow clean up.

Shoveling

Warm up
before shoveling.  Shoveling can be a strenuous
activity and just like an athletic event, you should properly warm up.  A simple warm up would be to
walk around the house for a couple of minutes before heading outside.  Once you are outside, start by cleaning off
your car to help warm up the arms and shoulders.
When
possible try and shovel multiple times during a snow storm.   Shoveling 2 inches of snow at a time will be
less strenuous than letting the snow build up and doing it all at the end.
Push the
snow as you shovel.  This will be easier on your back.  If you do have to lift the snow, bend with your knees, use your legs and do not fill
the shovel completely!

Take it
slow! Take frequent breaks; do not work to the point of exhaustion.  If you feel tightness in your chest while
shoveling, stop immediately.
Dress
warmly and pay close attention to extremities.  These are the first areas to develop frost
bite (hands and feet, nose and ears).

Clearing your car

Use a
brush/ice scraper to remove snow and ice from windshield, side and rear
windows, side mirrors, and head lights/tail lights.
Make sure
your tailpipe is clear of snow before starting your vehicle.
Also make
sure to clear the snow from the roof of your car.  Sliding snow can be dangerous for yourself
and other drivers. If you have a taller vehicle such as an SUV or a truck, grab
a step stool or invest in a long handle brush.
Don’t
force the wipers; you may damage the motor. 
If your wipers are stuck to the windshield try pouring some windshield
washer/deicer fluid on them.  Do not use
hot water to remove ice from your windshield as this could cause your windshield
to shatter.
Blog post by
Eric Chandler CSCS.

Be Ready to Shred your Snowy Weekend Getaway

3 Exercises to
Increase Ski & Snowboard Performance In Season

It is
imperative as a winter athlete to develop lower extremity strength &
endurance in order to avoid injury, conqueror changes in terrain, and resist
muscle fatigue.

Forward & Lateral Lunge onto the Bosu
Ball

The
lunge is a great choice due to its activation of the
large leg muscles (gluteus maximus, quadriceps, hamstrings, hip flexors).
The
goal of the exercise is to take a large forward step onto the Bosu ball; lunge
by bending the front knee until 90 degrees of flexion is achieved, then
explosively pushing off the ball, returning back to the upright position.
When
performing the lateral lunge, the goal is to side step one foot onto the Bosu
Ball, bending that knee while keeping the other leg straight. 

Tips
for Both:
·  
Knees should never go over the toes.
·  
When performing laterally, try to sit back and
stick out the butt into a squat.
Increasing
the repetitions and alternating the legs enhances muscular endurance and
eliminates the ability for one leg to over compensation for the other.
The
addition of the Bosu Ball challenges balance making the ankle stabilizing
muscles work harder to maintain proper posture.
This
exercise can be performed with or without weight (dumbbells, medicine ball over
head, etc.)

Depth Jump

Improper
lower body mechanics is one of the leading causes for ski & snowboard knee
injuries.
The
depth jump focuses on the proper landing phase from a predetermined height.
The
goal of this exercise is:
·  
 To land
softly, receiving the weight through the balls of the feet.
·  
Then distributing it into the heels.
·  
While carrying that downward momentum into a Perfect Squat (Sit the butt back, knees
don’t go over toes, and maintain proper foot and knee alignment)

This
exercise focuses on the deceleration of one’s own body weight by forcing the
large leg muscles receive the weight, slow then stop that momentum. 


Russian Twists

Core
development is vital in order to maintain strong posture, form, and the ability
to turn rapidly from the waist or trunk.
The
Russian twist is performed with only the lower back in contact with ground,
while the body is positioned in a “V” shape.
Goal
of this exercise is to;
·  
Rotate the torso and arms side to side
·  
Both hands should make contact with the ground
or mat, clasp hands together.
To
progress this exercise a medicine ball should be added and held so each twist
involves contact of the medicine ball to the ground instead of hands.


Recommendations for
Intensity & Frequency

First step is to master perfect form and
correct range of motion before using any weight or large heights.
Second step is to increase your
repetitions per set until you can achieve 12 great reps per set.
Step three is to then incorporate weight
or increase height by small increments to ensure safety and correct form.
Incorporating
these exercises into your fitness routine 2-3 times/week will help prevent
injury, increase performance, and keep you feeling strong. You’ll be ready to
hit the slopes all winter long!
Blog post by Drew Sifflard CSCS.

Ready to Ski

Do you love hitting the slopes and cruising through the snow
all in the midst of beautiful scenery? If you have ever been out on the slopes,
you know how fun skiing is but also how exhausting it can be by the end of the
day. Downhill snow sports are some of the most challenging, vigorous, and exciting
forms of exercise around.

Skiing is a unique activity in that you can only participate
a few months out of the year. It is easy to be excited about getting on the
mountain and tell yourself it will just take a few runs to be acclimated but it
is important to physically prepare your body in advance.
There are a handful of factors that come into play while
skiing. These dynamic factors are the reason a skier can become so exhausted by
the end of a long day on the slopes:
·     
Changing terrain
·     
Shifts in center of gravity
·     
Balance
·     
Speed
·     
Visual perception of terrain
Adjusting to these factors is important for performance as
well as reducing the risk for injury. These are basic physical fitness
qualities that must be developed to control the dynamic challenges:
·     
Endurance
·     
Strength
o   Concentric
o   Eccentric
·     
Balance
·     
Flexibility
Developing all qualities in preparation for a ski trip is
simple, requires minimal equipment, and can be added into your regular routine
with ease.

Preparing for the slope: 

Cardiovascular
endurance

o   A
ski run can last from a few minutes to ten minutes. During this time of intense
activity, your body will get close to or above your anaerobic threshold
followed by periods of rest on the chair lift.
o   To
prepare for these bouts of exercise it is most beneficial to incorporate
interval training into your exercise routine for increased endurance and
cardiovascular recovery.

Dynamic
balance

o   The
terrain during a ski run varies tremendously. It is important to mimic this in
your training.
o   Exercise
using a variety of surfaces and equipment for simple body weight exercises that
will challenge both balance and stability.
§ 
Exercise using Bosu
§ 
Exercise using ½ roll
§ 
Exercise on grass
§ 
Exercise on hills

Lower
body endurance and strength

o   Skiing
requires whole body fitness but the lower half does the majority of work.
Concentric strength is needed for push off skating and jumping. The ability for
a muscle to eccentrically contract to absorb impact from jumps, bumps and other
terrain is just as important.  Also
isometric strength is required. Condition concentric, isometric, and eccentric
movement for strength and endurance to give the body the ability to maintain
performance throughout the day.
o   Focus
on performing these movements with:
§ 
High repetitions
§ 
All directions
§ 
Varied speeds
§ 
Different surfaces
§ 
Isometric holds

 Flexibility

o   As
in all physical activities and sports it is important to have both muscular and
joint mobility. This will improve performance and reduce the risk for injury.
o   It
is important to work on flexibility through stretching but also to increase
freedom of movement by training in varied directions.
Correctly prepare for a ski trip and it will be awesome!
Remember that preparation continues on the trip and it is import to warm up
before your first run. Check out this great dynamic warm-up prepared for skiers
from Certified Strength & Conditioning Specialist Eric Chandler and come back later this week for Drew Sifflard’s blog post on exercises to improve performance throughout
the ski season.

Normal
0

false
false
false

EN-US
JA
X-NONE

Blog post by Ryan Kempson.

Spin Heart Rate & Training Zones

Heart rate can be a very
beneficial tool for your training.  It
allows you to measure the effort of your workout and control intensity and
quality without overexertion.
All heart rate training
zones are based on max heart rate.  It is
not the easiest or safest test to administer, especially to untrained
individuals so a standard equation is 220-age (male) and 226-age (female).  Please be aware that this is only a
guide.  Your Age Predicted Max HR could
be up to 25 beats per minute off!
Next thing to consider are
your Training Zones.  In Spinning, we
focus on 5 different rides:
  • Recovery
  • Endurance
  • Strength
  • Interval
  • Race Day

Recovery

“Relaxation and energy
accumulation.”
During Recovery, you are
riding at 50-65% your max heart rate.  No
hills, no jumps, only light resistance is used. 
The goal of this ride is to focus on breathing, relaxation, and
circulating blood and oxygen throughout the body.

Endurance

“Even application of
energy for sustained periods.”
The next zone is Endurance.  Heart race increases to 65-75% max heart
rate.  This should also feel fairly easy
and a pace at which you can ride forever. 
This is where you will ride when focusing on your aerobic base
building.  It will increase aerobic
capacity, oxygen consumption, stamina, and improve fat metabolism.  A true Endurance ride is completed almost
entirely in the saddle with light to moderate resistance but variations include
standing flat, seated climb, and standing climb.

Strength

“Heavy resistance to
develop muscular endurance and power.”
During
the Strength training zone, you will be working hard for 5-8 minutes at a level
between 75-85% your max heart rate.  The
ride focuses on steady, consistent pedaling with heavy resistance to promote
muscular and cardiovascular development. 
While seated or standing, you should be thinking strong and
powerful.  There will be a point between
75-85% when you are switching over from aerobic to anaerobic activity.  This will cause lactic acid to accumulate.  A proper
cool down and stretching/foam rolling will be very beneficial to your
recovery. 

Interval

“Speed, tempo, timing,
and rhythm require a substantial fitness base.”
The goal of the Interval
training zone is to develop the ability to quickly recover after work efforts.  During intervals, heart rate ranges from
65-92% as you increase and decrease the intensity.  There are 3 types of Intervals:
  1. Aerobic – Work at about 75% / Recovery 65%, 3
    to 1 ratio
  2. Lactate Threshold – Work 85% / Recovery 65%, 1
    to 1 ratio
  3. Anaerobic – Work 92% / Recovery 65% – 1 to 3+
    ratio
One important factor to
note about Intervals: If heart rate is not dropping to recovery in the usual
amount of time, no further intervals should be conducted.

Race Day

“Peak Performance –
sustained “time trial” effort at anaerobic threshold. Requires a substantial
fitness base.”
The
final training zone is Race Day.  Heart
rate is 80-92%.  Race Day is treated like
a time trial.  If riders are not 100%
physically or mentally ready, they should not participate.

Blog post by Jen Skiba.