Sand Training Part 1: Ladder Agility Drills

Cape Cod offers us some of the
world’s best beaches and with almost 560 miles of coastline we can use these
beaches to take our agility workouts to the next level.
world’s best beaches and with almost 560 miles of coastline we can use these
beaches to take our agility workouts to the next level.
Although research varies, training
on sandy surfaces can have many benefits such as reduced impact during training
on your joint surfaces, increased physical and metabolic demands, and
increasing proprioception (understanding where your body is in time and space).
on sandy surfaces can have many benefits such as reduced impact during training
on your joint surfaces, increased physical and metabolic demands, and
increasing proprioception (understanding where your body is in time and space).
It is also important to understand
that due to the unstable surface ground force production changes and
alterations in form may occur. Some research has proven that sprint times have
been shown to actually decrease due to altered running mechanics. It is highly
important to start slow and to maintain proper body alignment if you want to
reap the most benefit from your workout.
Clients should be primarily
focused on explosiveness and strength of the movements as this is where the
majority of benefits can be gained. With the exercises below, we are going to
focus on Ladder Agility Drills that can improve lower body agility and
explosiveness.
focused on explosiveness and strength of the movements as this is where the
majority of benefits can be gained. With the exercises below, we are going to
focus on Ladder Agility Drills that can improve lower body agility and
explosiveness.
Forward 2 Feet In Each
Moving straight through the ladder
quickly get both feet into a box before moving to the next one.
quickly get both feet into a box before moving to the next one.
Lateral 2 Feet In Each
Moving to the right through the ladder
quickly get both feet into a box before moving to the next one. Return back to
the left.
quickly get both feet into a box before moving to the next one. Return back to
the left.
Diagonal 2 Feet In, 1 Foot Out
“Icky Shuffle”
Start with both feet out of the
ladder to the right, step in with the left foot then the right foot as you cross to
the other side of the ladder, touch the left foot outside of the ladder and
return back touching right foot then left foot back into the ladder.
ladder to the right, step in with the left foot then the right foot as you cross to
the other side of the ladder, touch the left foot outside of the ladder and
return back touching right foot then left foot back into the ladder.
Lateral Step In, Step Outs
Leading with the left foot
alternate stepping feet into the ladder and out of the ladder as you move to
the left. Return back to the right leading with the right foot.
alternate stepping feet into the ladder and out of the ladder as you move to
the left. Return back to the right leading with the right foot.
2 Feet Out, 1 Foot Cross Behind
“Scorpion”
Stepping in place take your
outside leg and swing it behind your body and tap the foot inside of the ladder
as you move forward along the outside of the ladder.
outside leg and swing it behind your body and tap the foot inside of the ladder
as you move forward along the outside of the ladder.
Single Leg In Outs
Starting outside of the ladder on
your left leg, perform single leg hop in and out of the ladder as you move forward. Return
back on the right leg.
your left leg, perform single leg hop in and out of the ladder as you move forward. Return
back on the right leg.
Single Leg Hop & Squat
Alternate performing a single leg hop
into the ladder to hopping onto both feet outside of the ladder and performing
a squat, return back into the ladder on the opposite leg.
into the ladder to hopping onto both feet outside of the ladder and performing
a squat, return back into the ladder on the opposite leg.
Blog post by Craig Moody.
3 Beginner Barbell Landmine Exercises
You may be asking yourself what a
barbell landmine exercise is and first things first, there are no explosives
involved. Landmine exercises are performed by wedging one end of a barbell
either into a corner of the room or into a special floor mounted bracket that
allows for greater bar stability for the weight that is being lifted while
allowing the individual challenges in every plane of motion. This could prevent
injuries that some of the common mistakes caused by improper technique and core
instability can create.
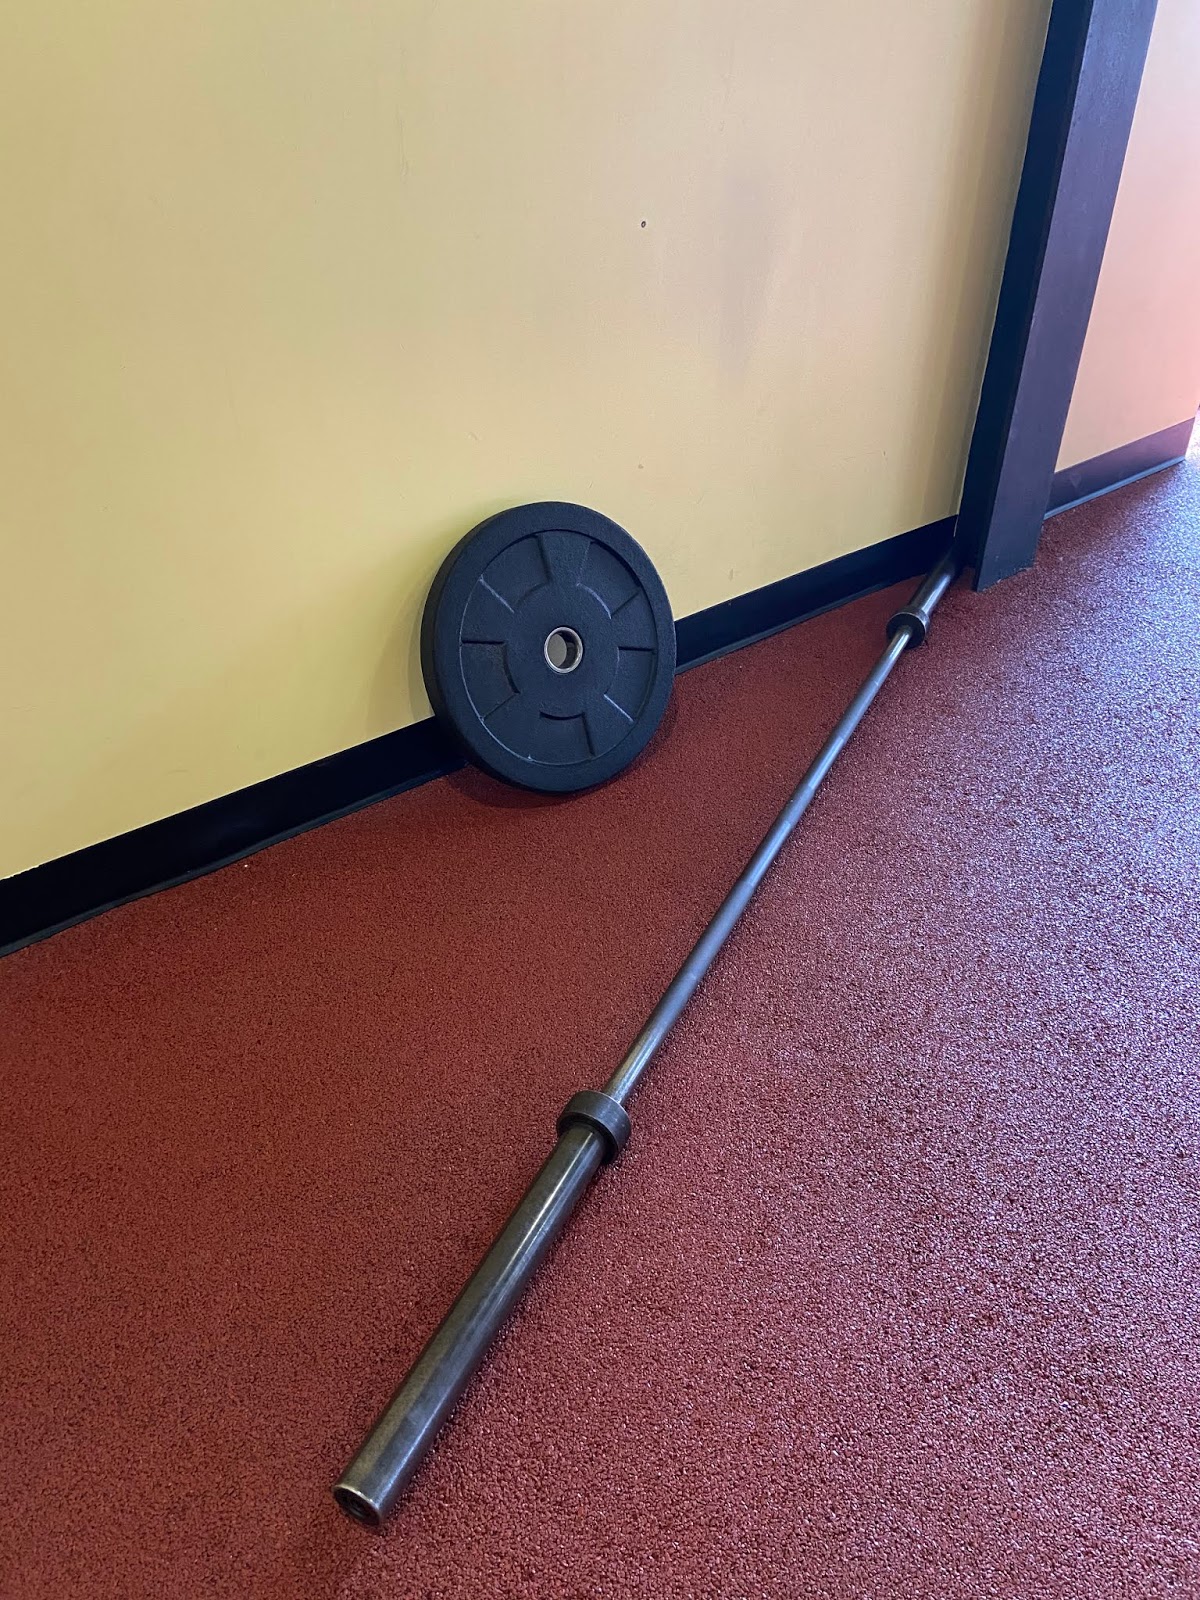
When utilizing the landmine technique
clients can first begin by choosing the proper weighted barbell for the users
level of ability. Barbells come in 3 different sizes
here at Mashpee Fitness:
clients can first begin by choosing the proper weighted barbell for the users
level of ability. Barbells come in 3 different sizes
here at Mashpee Fitness:
- 84” Training Barbell: 16#
- 84” Olympic Barbell: 45#
- 60” Olympic Barball: 26#

Once you have selected the bar that
is comfortable for you to use place one end of the bar into the corner or
mounted bracket on the floor, get ready to try out my top 3 Beginner Barbell Landmine
Exercises.
is comfortable for you to use place one end of the bar into the corner or
mounted bracket on the floor, get ready to try out my top 3 Beginner Barbell Landmine
Exercises.
Top 3 Beginner Barbell Landmine Exercises
*For a quick total body workout try
to perform 6-10 repetitions of each exercise for 3-5 sets at a controlled
tempo.
to perform 6-10 repetitions of each exercise for 3-5 sets at a controlled
tempo.
1.
Landmine Squat
Keep weight through heels with feet
hip width apart. Avoid letting the knees bend over the toes, to do so walk your
feet back until a comfortable squat position is achieved. You should feel this
in your thighs and not in the knees.
hip width apart. Avoid letting the knees bend over the toes, to do so walk your
feet back until a comfortable squat position is achieved. You should feel this
in your thighs and not in the knees.
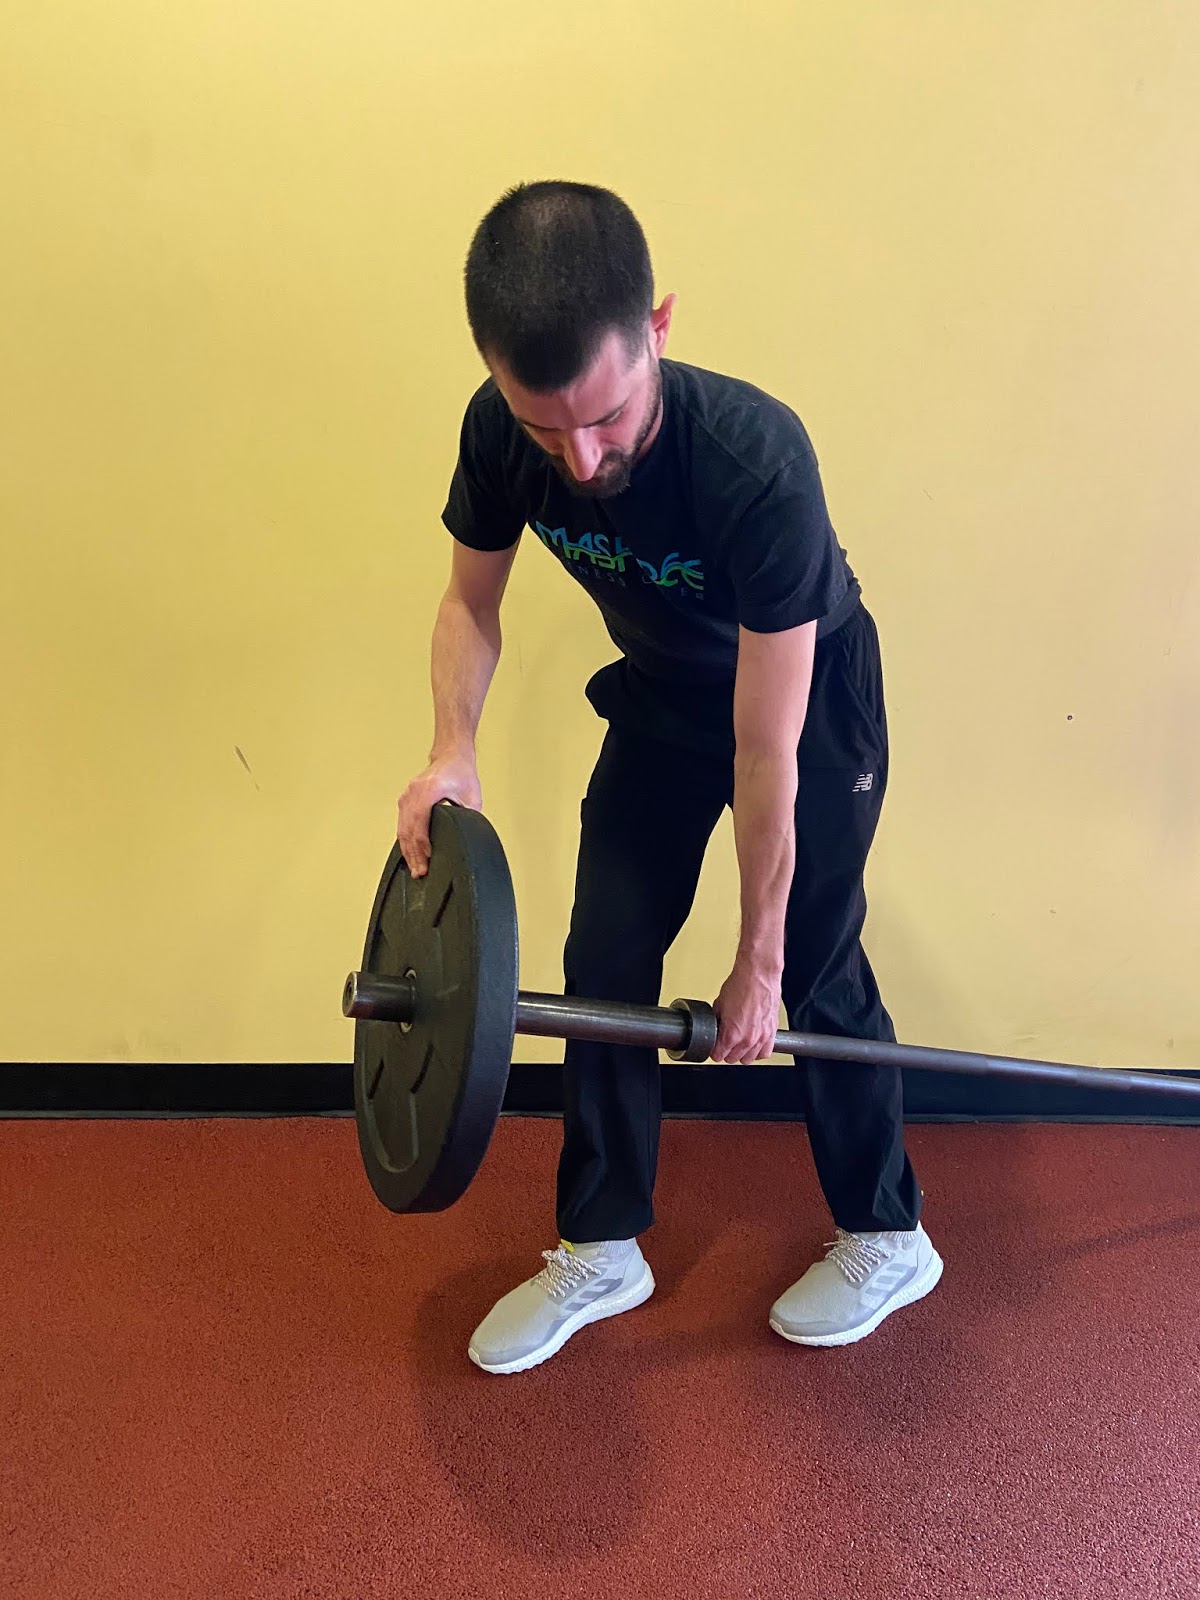
2.
Landmine Split Stance Anti-Flexion
Split one foot forward and the other
back, shift your weight to your front thigh and control the weight using your core
over your front leg. Keep your abdominal muscles as tight as you can to keep
spine straight and aligned. Try to prevent any side bending (anti-flexion) of
your back as your hands travel away from the midline.
back, shift your weight to your front thigh and control the weight using your core
over your front leg. Keep your abdominal muscles as tight as you can to keep
spine straight and aligned. Try to prevent any side bending (anti-flexion) of
your back as your hands travel away from the midline.
3.
Landmine Half Kneeling 1-Arm Overhead Press
Go down into a half kneeling position
and adjust the barbell to be on the side that has the knee down on the ground.
Keeping your core tight use the muscles in the top of your shoulder and arm to
press the weight in a straight line as you lean forward to achieve the full
overhead press.
and adjust the barbell to be on the side that has the knee down on the ground.
Keeping your core tight use the muscles in the top of your shoulder and arm to
press the weight in a straight line as you lean forward to achieve the full
overhead press.
Blog
post by Craig Moody.
post by Craig Moody.
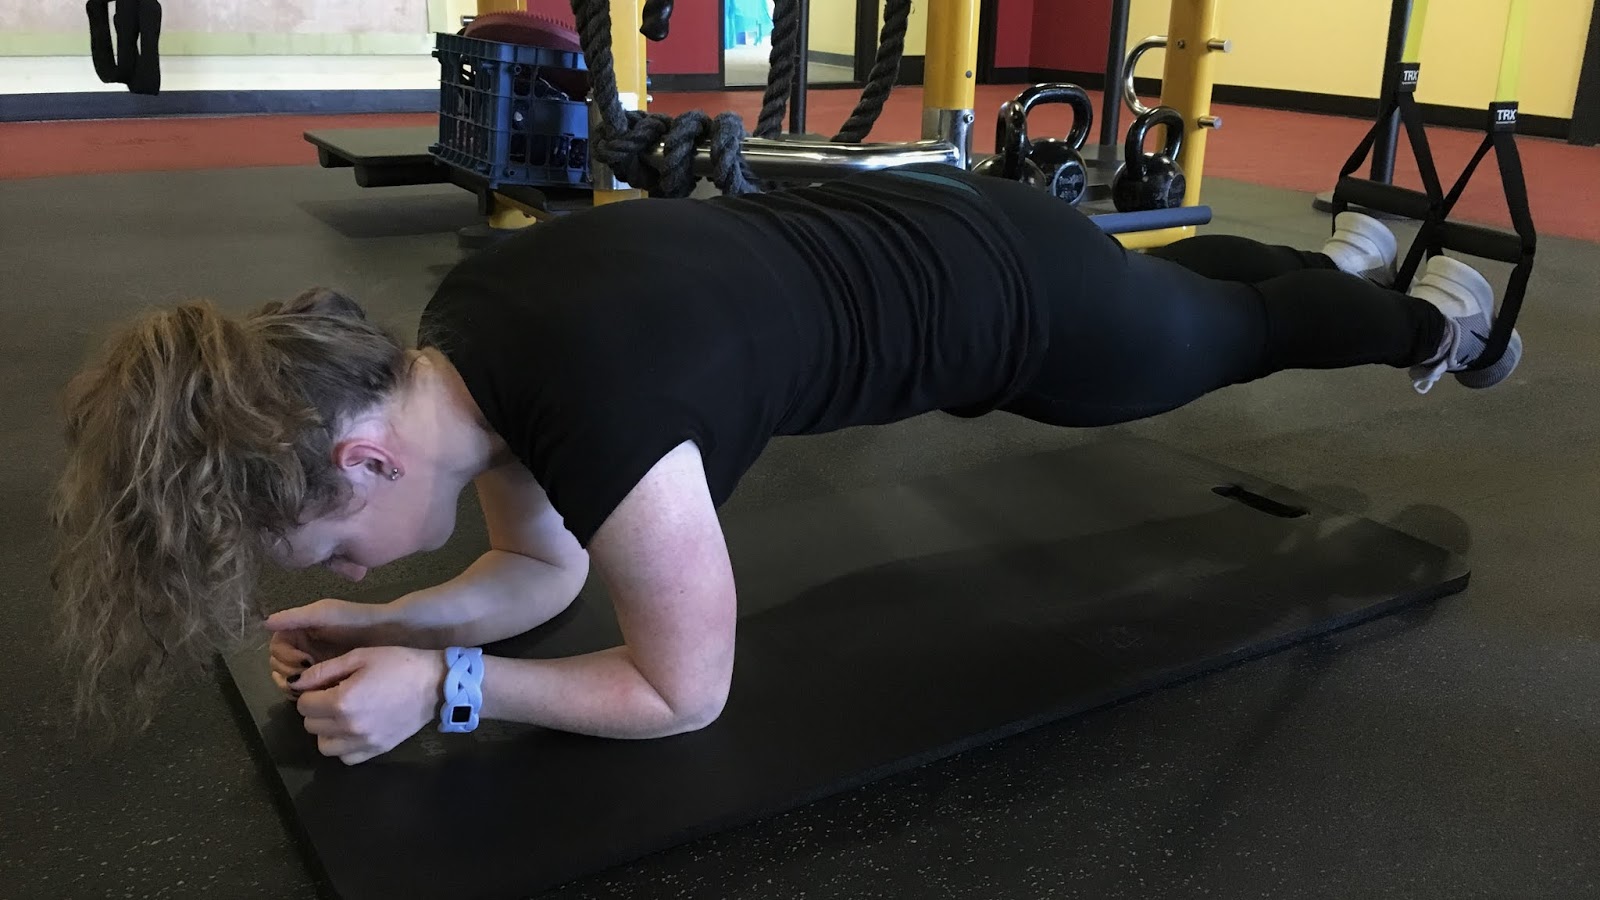
Planks!
While data on
exercise changes as new studies are done, one thing that remains constant is that planks
are great… but only when you do them properly!
exercise changes as new studies are done, one thing that remains constant is that planks
are great… but only when you do them properly!
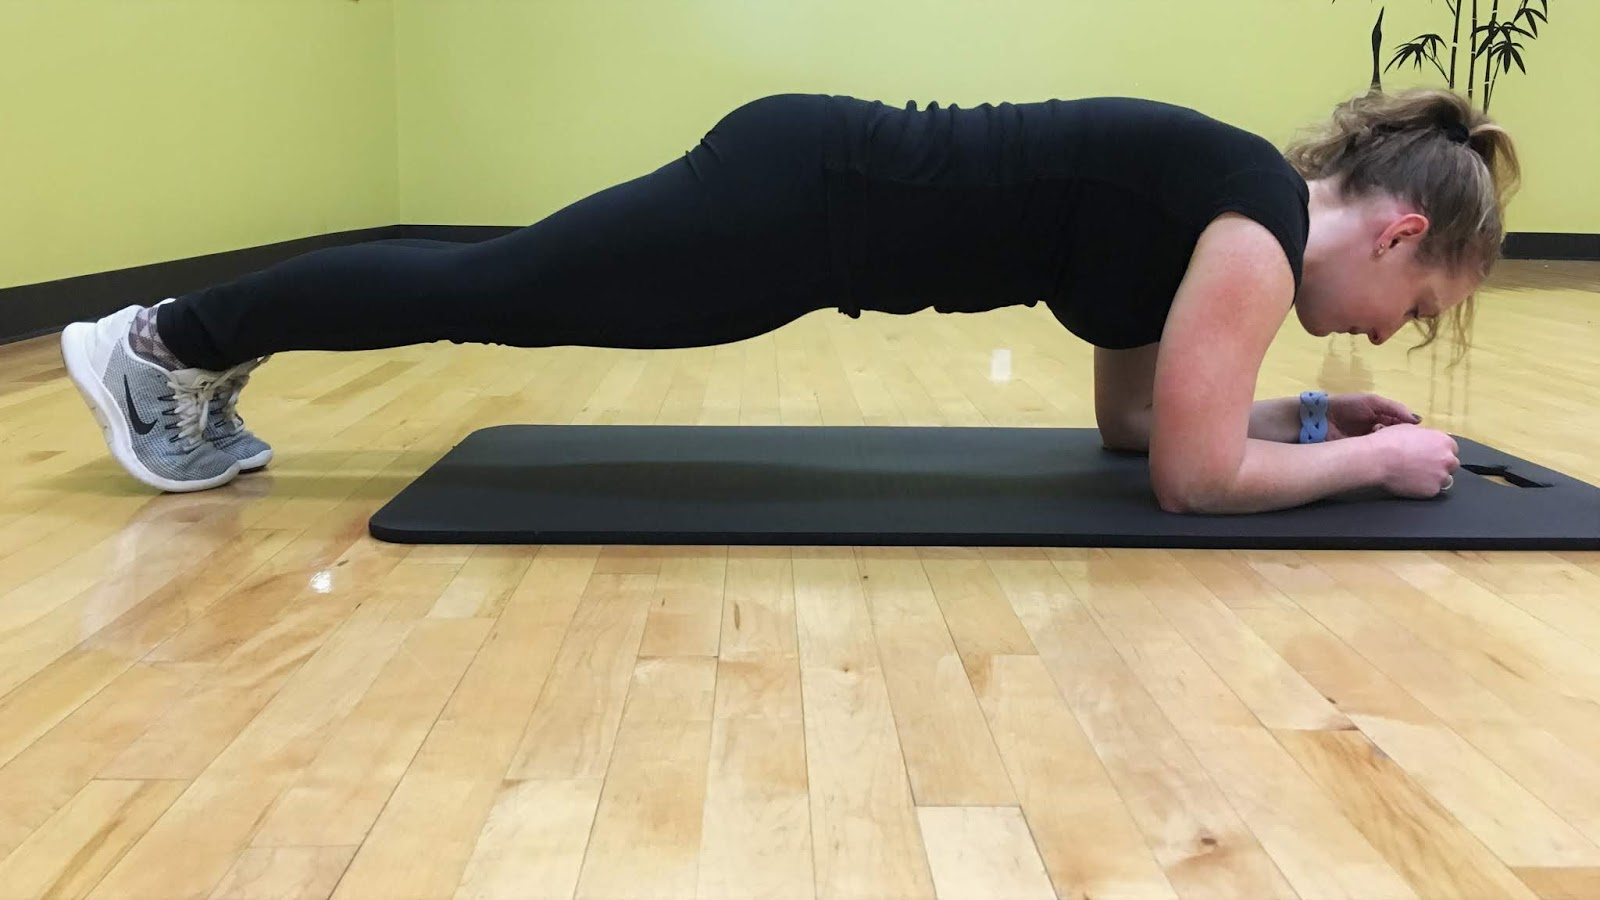
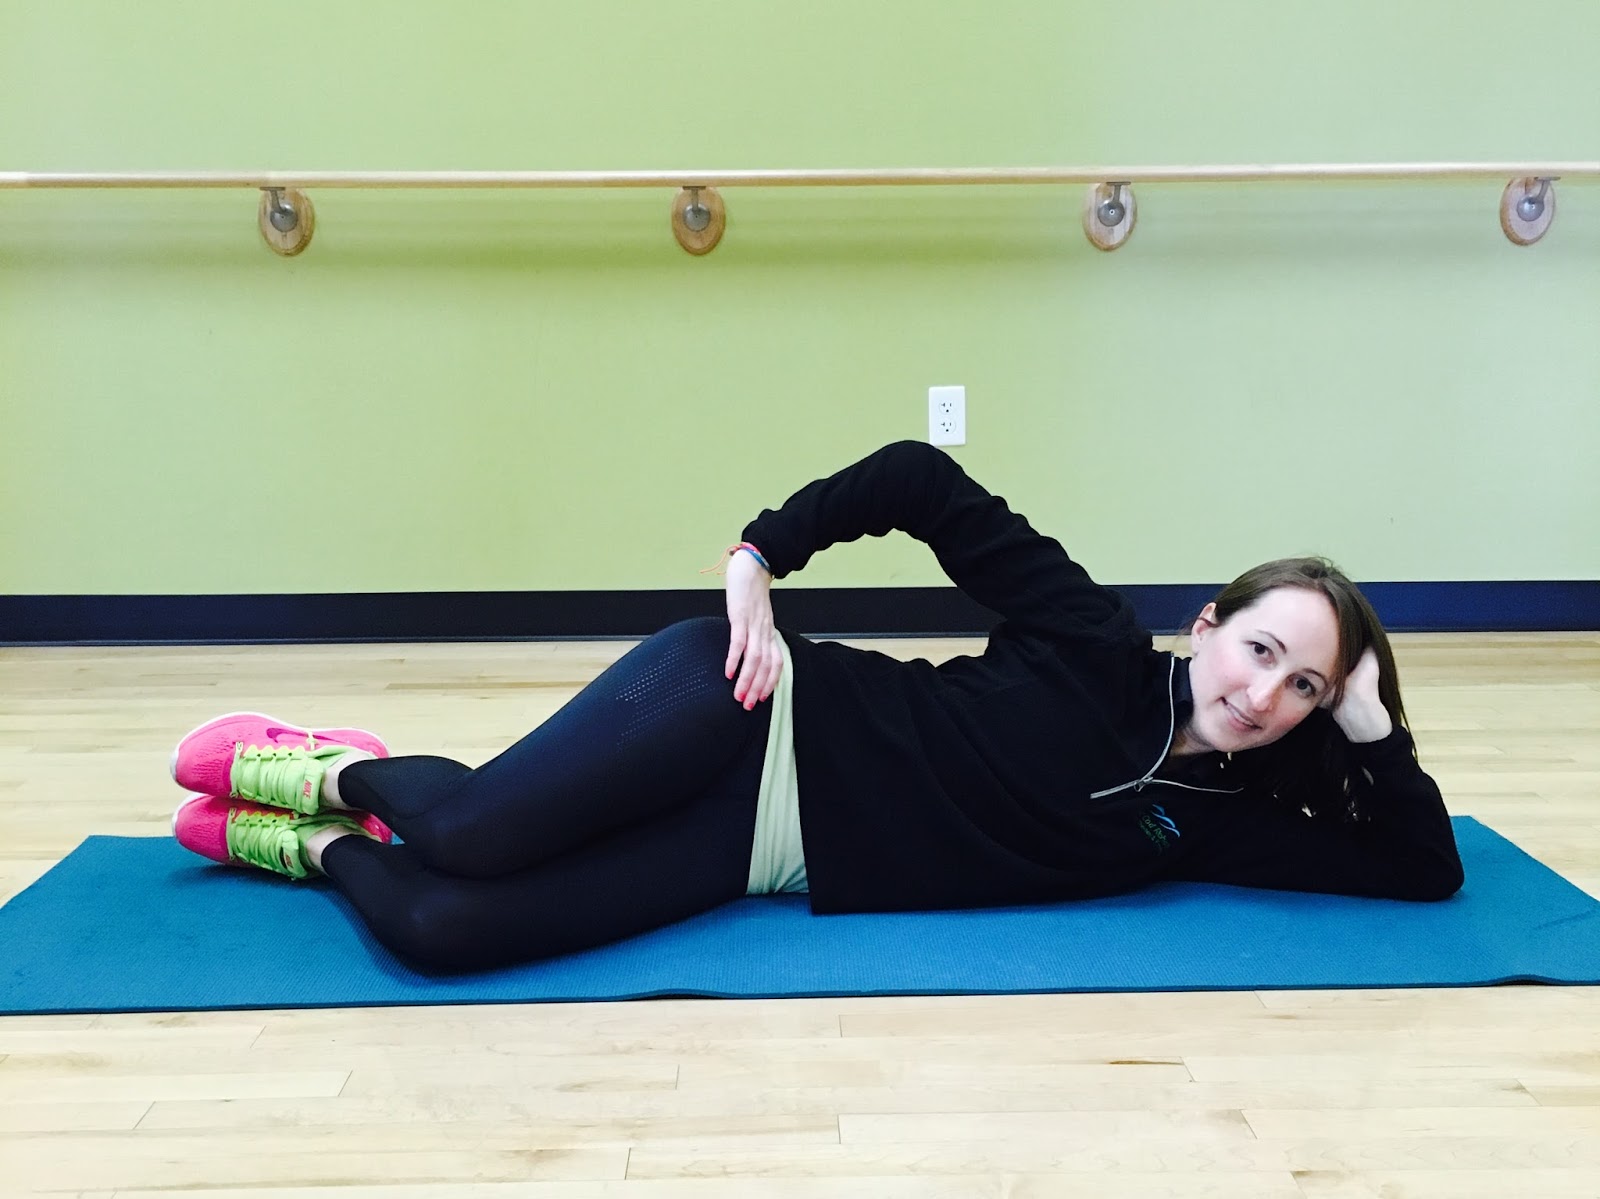
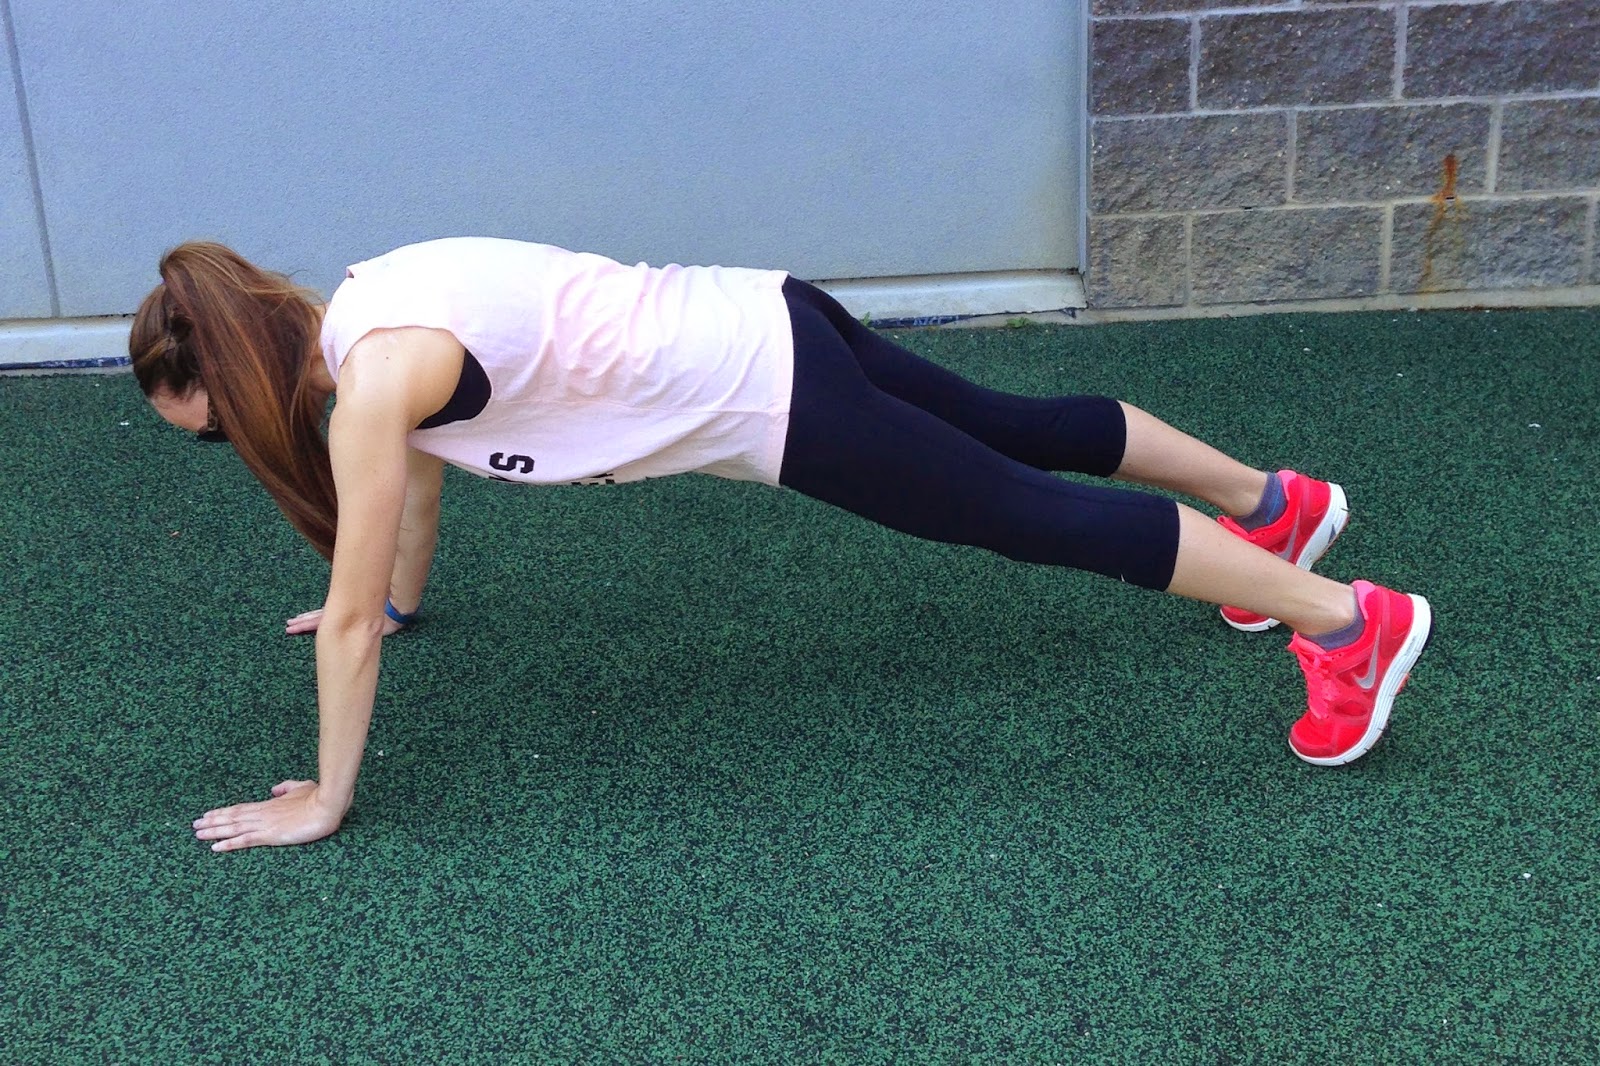
The traditional plank (shown above) targets more than just your
abdominals. It requires contraction of the quads, glutes, shoulders, biceps and
triceps. It is a stabilizing exercise that can lead to improvements in other
exercise moves.
3 Common Plank Form Mistakes
Arched Back
Note: In this position your abs will be inactive. This also put a lot of strain on your lower back!

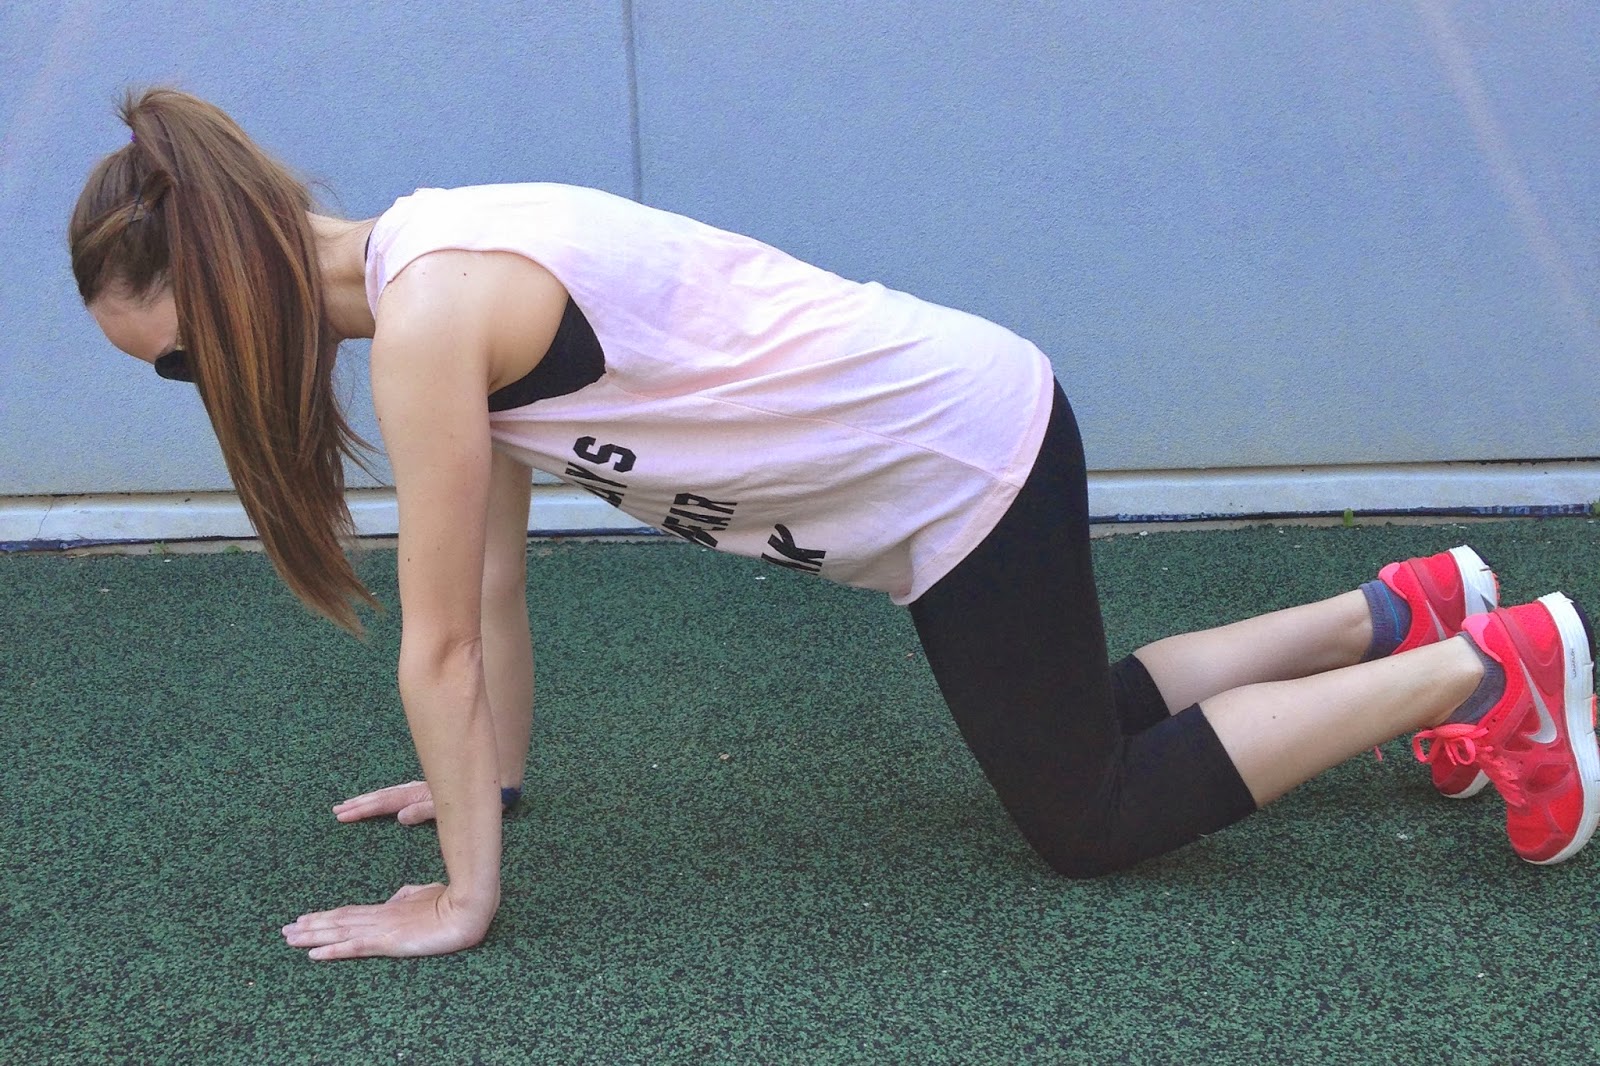
Hips Too High

Uneven Hips

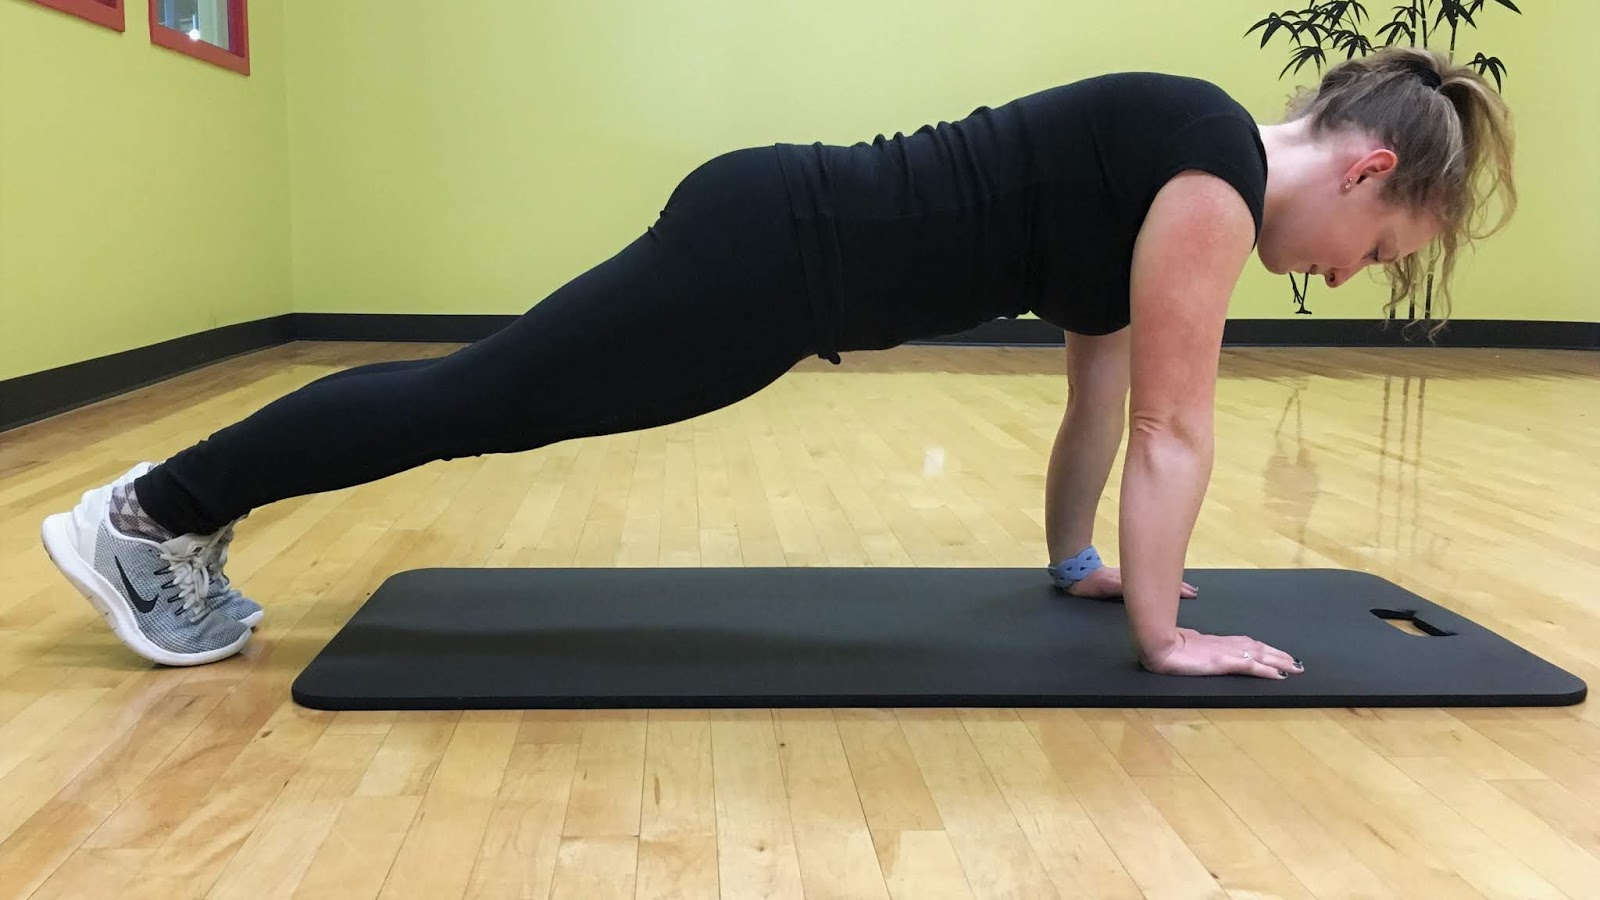
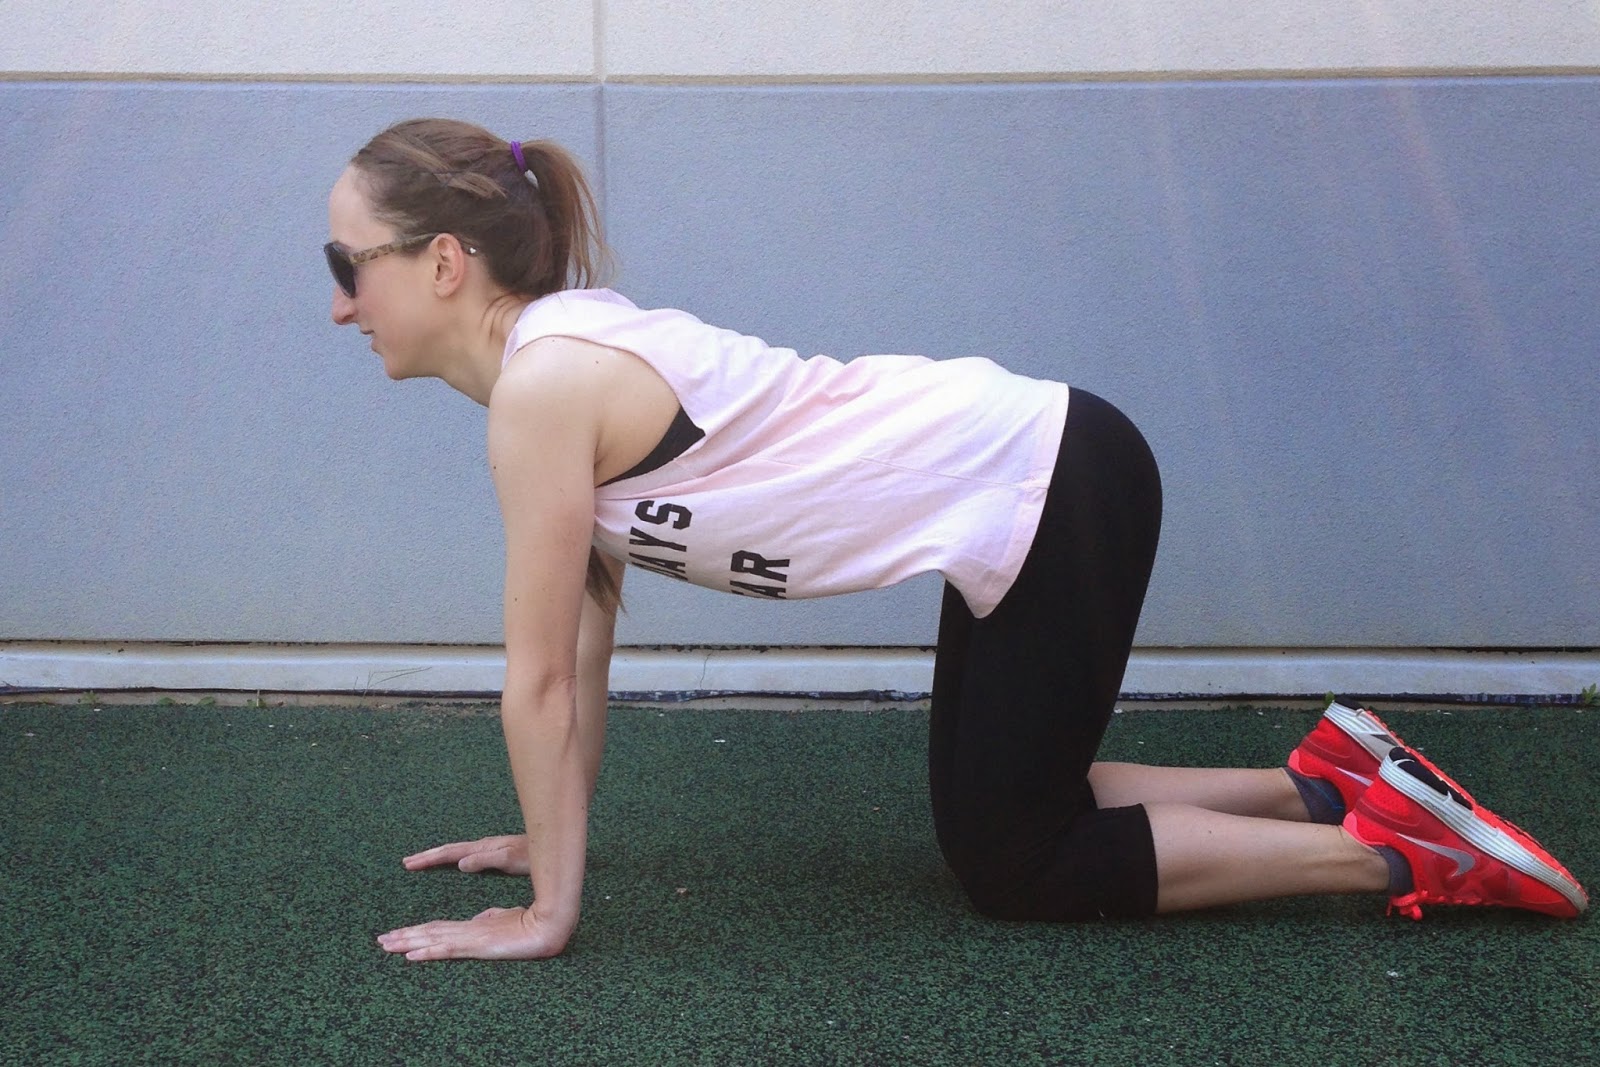
Other Plank Variations
On Hands
Side Plank

Taking Your Plank to the Next Level
Alternating Leg Lifts
Up, Up, Down, Down
Side Plank with Rotation
Side Plank with Hip Dips
Physioball Planks

TRX Plank
Planks can assist in many other areas!
Balance
The core
stability provides and increases in your overall stability and balance. Example: if you are
bumped into while walking, having a stronger core can assist you in regaining
your balance faster.
stability provides and increases in your overall stability and balance. Example: if you are
bumped into while walking, having a stronger core can assist you in regaining
your balance faster.
Maintain Proper Running Form
A stable core helps a runner’s body stay in proper alignment, rather than twisting mid stride.
Maintain Form in Many Other Lifts
One of the first steps in many lifting exercises is to
engage your core. Having a stronger core can make it easier to keep proper form
in many activities and can prevent injury to the back.
engage your core. Having a stronger core can make it easier to keep proper form
in many activities and can prevent injury to the back.
Happy Planking!
Blog
post by Erin Womboldt.
post by Erin Womboldt.
GLUTES

The gluteal region of the body is made
up of several muscles that help stabilize and move the pelvis around. A few
standout muscles are the glute medius and the glute minimus. These muscles have
an important role in stabilizing the pelvis during movement as well as during
single leg exercise. If you are standing and raise your leg, the opposite glute
medius and minimus will contract to prevent the pelvis from dropping on that
side. The primary actions of these two muscles is to assist in hip abduction
and medial rotation of the lower limb. During movement, it prevents pelvic drop
of the opposite limb.
Often times we overlook these muscles in
our training programs, and over time, this can lead to pelvic instability and
even low back and knee pain. A 2016 study tested the tensor fascia lata, gluteus
medius and gluteus maximus of over 150 subjects with chronic low back pain. They
found that the gluteus medius was weaker in people that had chronic low back
pain. Another study, which looked at over 800 novice runners, concluded that
runners who lack hip abduction strength were at a higher risk for knee pain. Aside
from low back and knee pain, there are some other signs that the glutes may be
weak or “turned off”. Poor mechanics in squat, hinge and lunges patterns, more
specifically knees caving in, may indicate weak glutes. Some other signs may
include a lack of soreness in the glutes when the aforementioned movements are
trained.
As you can see from the research,
strengthening your glute muscles, particularly your gluteus medius, is very
important as a preventative measure for possible chronic issues down the road.
As an athlete, having weak glutes can be detrimental to stability, mobility,
power and strength.
strengthening your glute muscles, particularly your gluteus medius, is very
important as a preventative measure for possible chronic issues down the road.
As an athlete, having weak glutes can be detrimental to stability, mobility,
power and strength.
Here are a few glute activation and
strengthening exercises you can do on your own.
strengthening exercises you can do on your own.
- Supine Glute Bridge with Band Resistance
- Sidelying Clamshell with Band Resistance
(External Rotation) - Sidelying Clamshell with Band Resistance
(Internal Rotation) - Single Leg RDL with Contralateral Reach
- Pull-Through
*Depending on your fitness level, you
can use this as its own workout. I would work through each exercise performing
2-3 sets of 10 repetitions of each. If you are a little more advanced with your
fitness, I would include these exercises into your warm up prior to any lower
body work days. Perform 1 set of each exercise for 10 repetitions each as an
activation drill prior to your lower body work (specifically squatting or
deadlifting).
1.
Supine Glute Bridge with Band Resistance
Supine Glute Bridge with Band Resistance
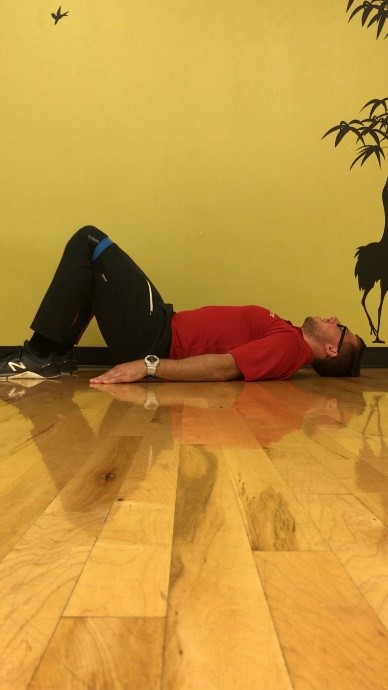

- Begin by placing a band around your legs
(just above the knee) and lay on your back with bent knees and your feet
pressed firmly into the floor. - To begin, start with a deep inhale
through your nose (a deep belly breathe is ideal). - While exhaling slowly yet forcefully,
squeeze your glutes and extend your hips upward. - Hold at the top position for 2-3 seconds
before relaxing and returning to the start position.
Tip: Proper breathing is a key component on this exercise,
especially for those with excessive low back curvature. The forceful exhale
will help to brace the core muscles which in turn will prevent excessive
extension of the lower back.
especially for those with excessive low back curvature. The forceful exhale
will help to brace the core muscles which in turn will prevent excessive
extension of the lower back.
2.
Sidelying Clam Shell with Band Resistance (External
Rotation)
Sidelying Clam Shell with Band Resistance (External
Rotation)


- Begin by placing a band around your legs
(just above the knee) and lying on your side with your legs/feet stacked on top
of each other and your knees and hips slightly flexed (You are looking to
achieve a neutral flat back). - Keeping your
feet together, externally rotate your hip while turning your torso down
slightly. - Squeeze
at the top and return to the start position is a controlled fashion.
Tip:
You really want to focus on isolating
the glute in this exercise. Try only to rotate at your hip and not at your
lower back as well.
You really want to focus on isolating
the glute in this exercise. Try only to rotate at your hip and not at your
lower back as well.
3.
Sidelying Clam Shell with Band Resistance (Internal Rotation)
Sidelying Clam Shell with Band Resistance (Internal Rotation)


- Begin by placing a band around your
ankles and lying on your side with your legs/feet stacked on top of each other
and your knees and hips slightly flexed (You are looking to achieve a neutral
flat back). - Keeping your knees together, internally
rotate your hip by lifting your foot upward. - Squeeze at the top and return to the
start position is a controlled fashion.
Tip:
Work hard to lower back to the
starting position with as much control as possible.
Work hard to lower back to the
starting position with as much control as possible.
4.
Single Leg RDL with Contralateral Arm Reach
Single Leg RDL with Contralateral Arm Reach


- Begin by standing next to a wall in a
normal upright standing position. - With a soft bend in the knee, slowly
begin to reach your hip back (hip hinge) on the leg closest to the wall while
simultaneously reaching the opposite arm forward and opposite leg straight
back. - Once you have achieved an optimal hinge,
engage your glutes and return to the start position.
Tip:
Do your best to maintain a neutral
spine throughout the movement. Be mindful to push your leg straight back. You
do not want to rotate at the hip during the movement.
Do your best to maintain a neutral
spine throughout the movement. Be mindful to push your leg straight back. You
do not want to rotate at the hip during the movement.
5.
Pull-Through
Pull-Through
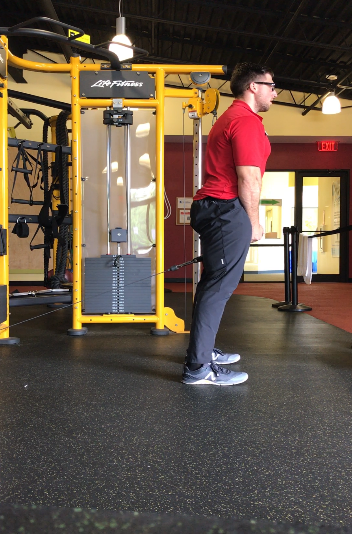

- Attach a rope to a cable machine.
- Begin by stepping over the cable (back
to the weight stacks) while grasping the rope with both hands resting on your
groin. Feet should be between hip and shoulder width apart. Soft bend in your
knees. - While inhaling, allow the weight to pull
you into a hip hinge. Maintain a neutral spine. - Once you have reached your optimal hinge
position, squeeze your glutes and extend your hips forward back to the start
while forcefully exhaling.
Tip:
Do your best to hinge and not squat
during this exercise. Your shins should remain as vertical as possible during
the movement. Keep your weight centered through your whole foot rather than
shifting from heel to toe during the movement.
Do your best to hinge and not squat
during this exercise. Your shins should remain as vertical as possible during
the movement. Keep your weight centered through your whole foot rather than
shifting from heel to toe during the movement.
Blog post by Greg Wilson.
Spring into Action & Get in Shape for Gardening!

Did you know?
1 hour of gardening can:
- Reduce stress
- Boost done density
- Burn about 300 calories!
With all that bending, squatting and raking proper technique and
strength are a must! Here is what you need to know…
strength are a must! Here is what you need to know…
Bending
Muscles used: Abs, back, legs.
The right way to do it: Focus on
tightening your leg muscles (your quadriceps and your hamstrings) as you bend
forward. Keep your knees slightly bent.
tightening your leg muscles (your quadriceps and your hamstrings) as you bend
forward. Keep your knees slightly bent.
Try this exercise: Bird dog

Get down on all fours, with your hands underneath your shoulders and your
knees underneath your hips. Tighten your abdominal muscles while simultaneously
raising your right arm and straightening your left leg, keeping your back
straight. Hold for 6 seconds. Return to the starting position, switch sides and
repeat 10 times.
knees underneath your hips. Tighten your abdominal muscles while simultaneously
raising your right arm and straightening your left leg, keeping your back
straight. Hold for 6 seconds. Return to the starting position, switch sides and
repeat 10 times.
Raking
Muscles used: Core, shoulders,
arms.
arms.
The right way to do it: Use short, quick
motions, and keep the rake close to your body. Switch sides every 2 to 3
minutes.
motions, and keep the rake close to your body. Switch sides every 2 to 3
minutes.
Try this exercise: Countertop
pushup
pushup
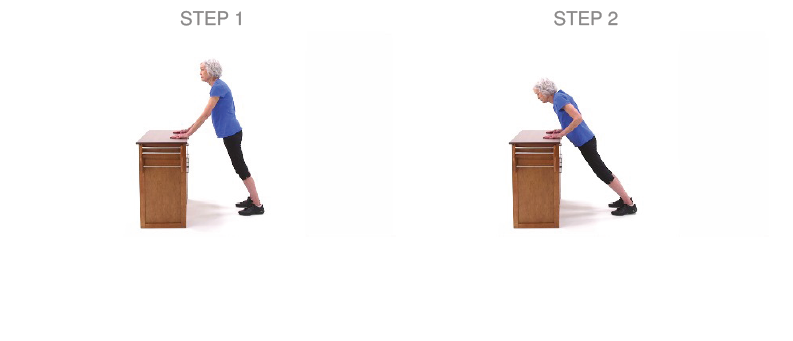
Stand facing a countertop, with your hands shoulder width apart on the
counter. Tighten your abdominal muscles and keep your back straight as you bend
your arms into a pushup position. Straighten your arms, and repeat 15 times Use
short, quick motions, and keep the rake close to your body. Switch sides every
2 to 3 minutes.
counter. Tighten your abdominal muscles and keep your back straight as you bend
your arms into a pushup position. Straighten your arms, and repeat 15 times Use
short, quick motions, and keep the rake close to your body. Switch sides every
2 to 3 minutes.
Pushing a Wheelbarrow
Muscles used: Core, quadriceps,
hamstrings, chest, shoulders, arms.
hamstrings, chest, shoulders, arms.
The right way to do it: Load the
wheelbarrow with only as much weight as you can handle without straining.
First, use your leg muscles, not your back to lift the wheelbarrow; next, use
your arm muscles to push the load forward.
wheelbarrow with only as much weight as you can handle without straining.
First, use your leg muscles, not your back to lift the wheelbarrow; next, use
your arm muscles to push the load forward.
Try this exercise: Modified plank

Lie on a mat, supporting your upper body with your forearms and your lower
body with your knees; your stomach stays raised as you keep your body in a
straight line without arching your back. Hold for 15 seconds, working up to 60
seconds.
body with your knees; your stomach stays raised as you keep your body in a
straight line without arching your back. Hold for 15 seconds, working up to 60
seconds.
Squatting
Muscles used: Glutes, quadriceps,
hamstrings.
hamstrings.
The right way to do it: Keeping your
torso upright, lower yourself until your bottom almost touches the ground. Try
to keep your weight on your heels.
torso upright, lower yourself until your bottom almost touches the ground. Try
to keep your weight on your heels.
Try this exercise: Chair squat

Stand in front of a chair, feet shoulder-width apart, arms in front of you.
Bend your knees and slowly squat, gently touching the chair without fully
sitting down, then stand up using only your legs. Repeat 10 times.
Bend your knees and slowly squat, gently touching the chair without fully
sitting down, then stand up using only your legs. Repeat 10 times.
All photos from Home Exercise Program at medbridgeeducation.com.
Blog post by Farran Jalbert.
Marathon Training Tip #6: Strength Train
What do most runners do
to train? Run.
to train? Run.
The majority of
distance runners started running because they love to run. There are many health benefits to running and
it is also convenient to just walk out the door and run. Often overlooked or ignored by runners is the
importance of strength training. Complimenting your running program with
strength training will improve your performance and also reduce your risk for
injury.
Here is a TRX series of exercises that
will help strengthen your total body with exercises specifically selected to
address weaknesses typically seen in runners.
They will help strengthen the core, upper body and lower body and should
be performed 2-3x per week, with a day of rest in between.
will help strengthen your total body with exercises specifically selected to
address weaknesses typically seen in runners.
They will help strengthen the core, upper body and lower body and should
be performed 2-3x per week, with a day of rest in between.
Note:
Do not perform any exercise that causes or increases pain.
Do not perform any exercise that causes or increases pain.
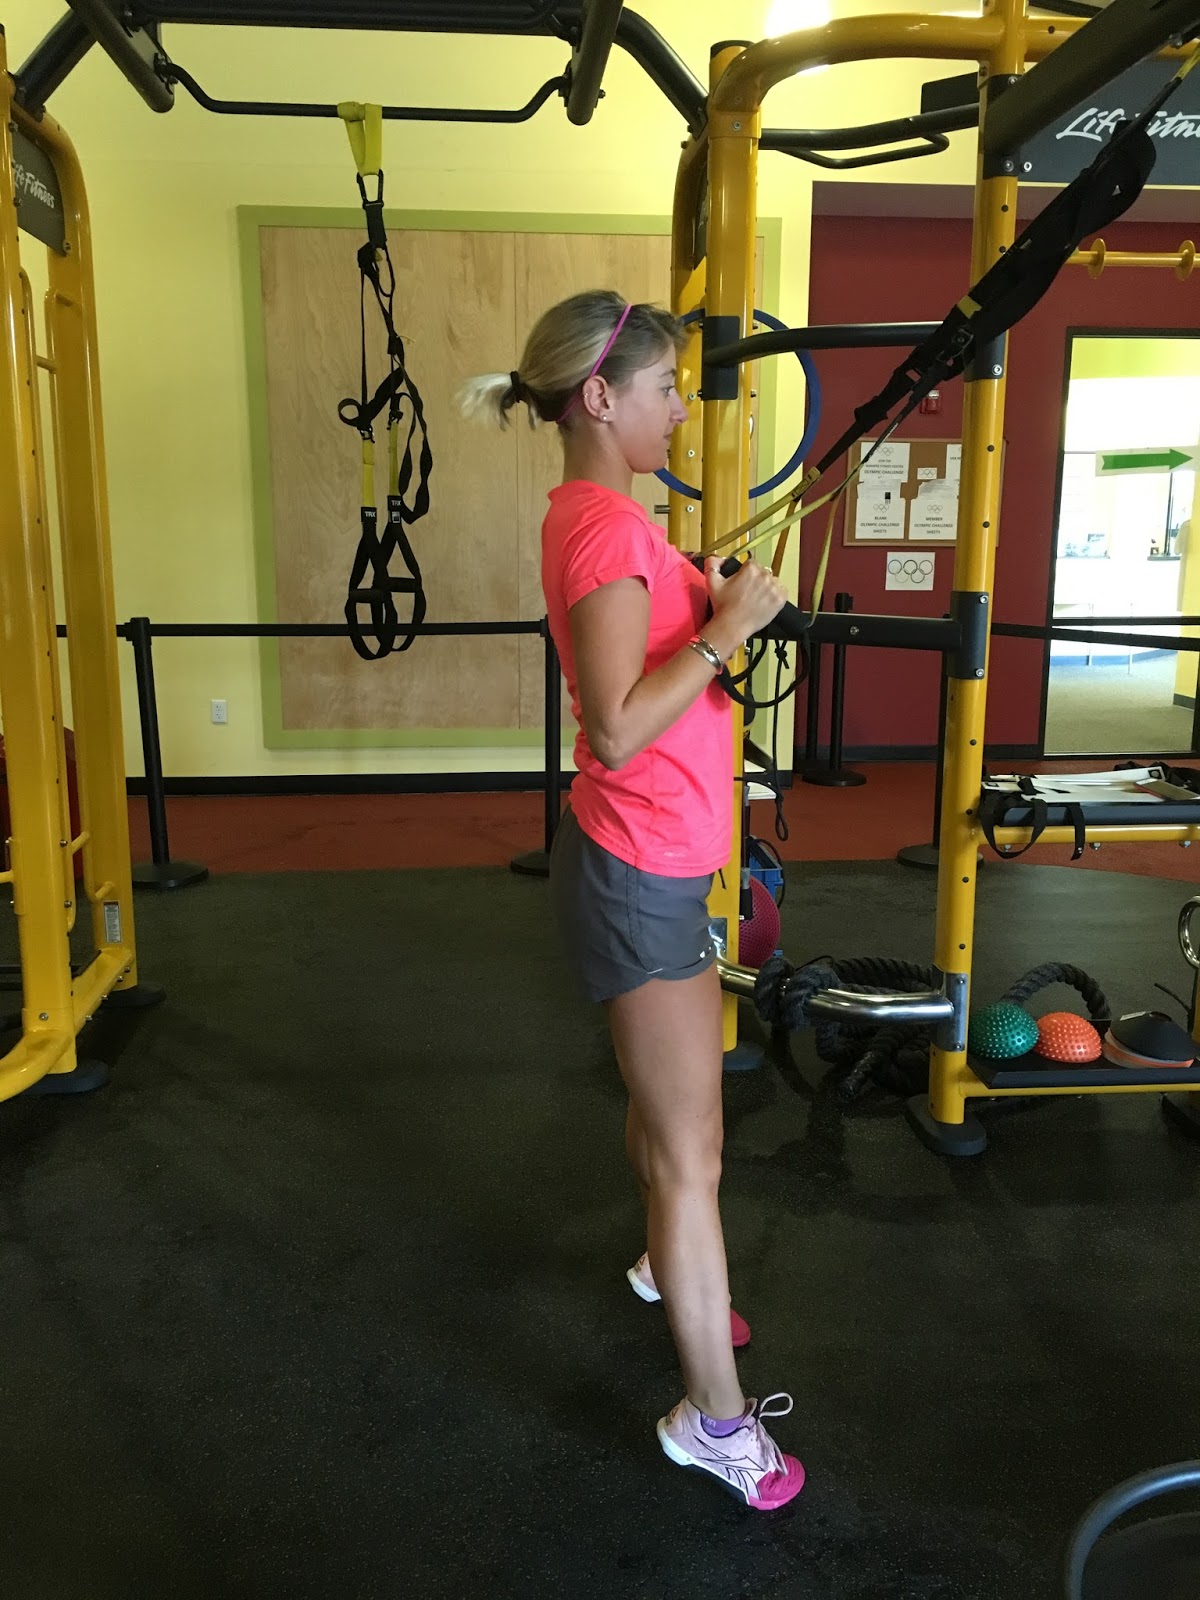
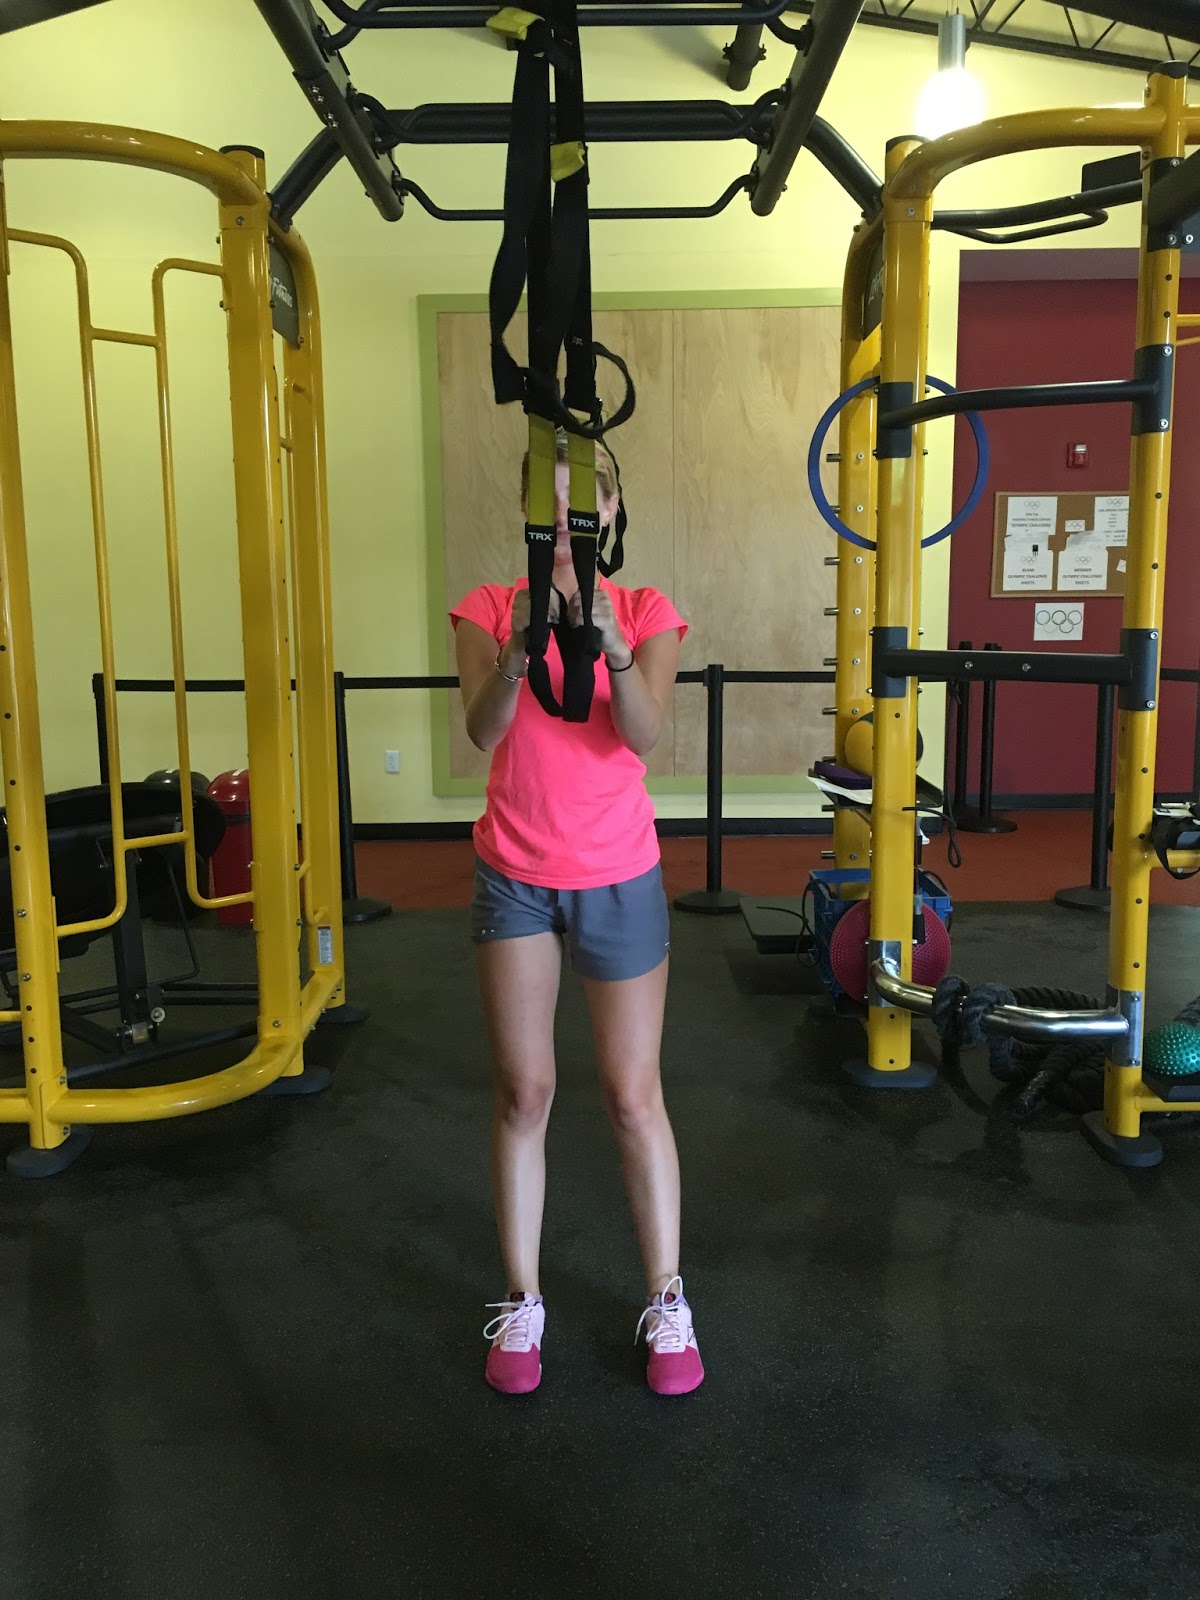
Warm Up
Squat/Row to Heel Raise
Hold the TRX handles with arms bent and your feet shoulder width apart. Sit back
into a squat keeping your heels on the ground and extend arms. Stand back up
pushing through your heels and pulling with your arms. Once fully standing
raise up on to your toes.
into a squat keeping your heels on the ground and extend arms. Stand back up
pushing through your heels and pulling with your arms. Once fully standing
raise up on to your toes.
2×15


The Workout
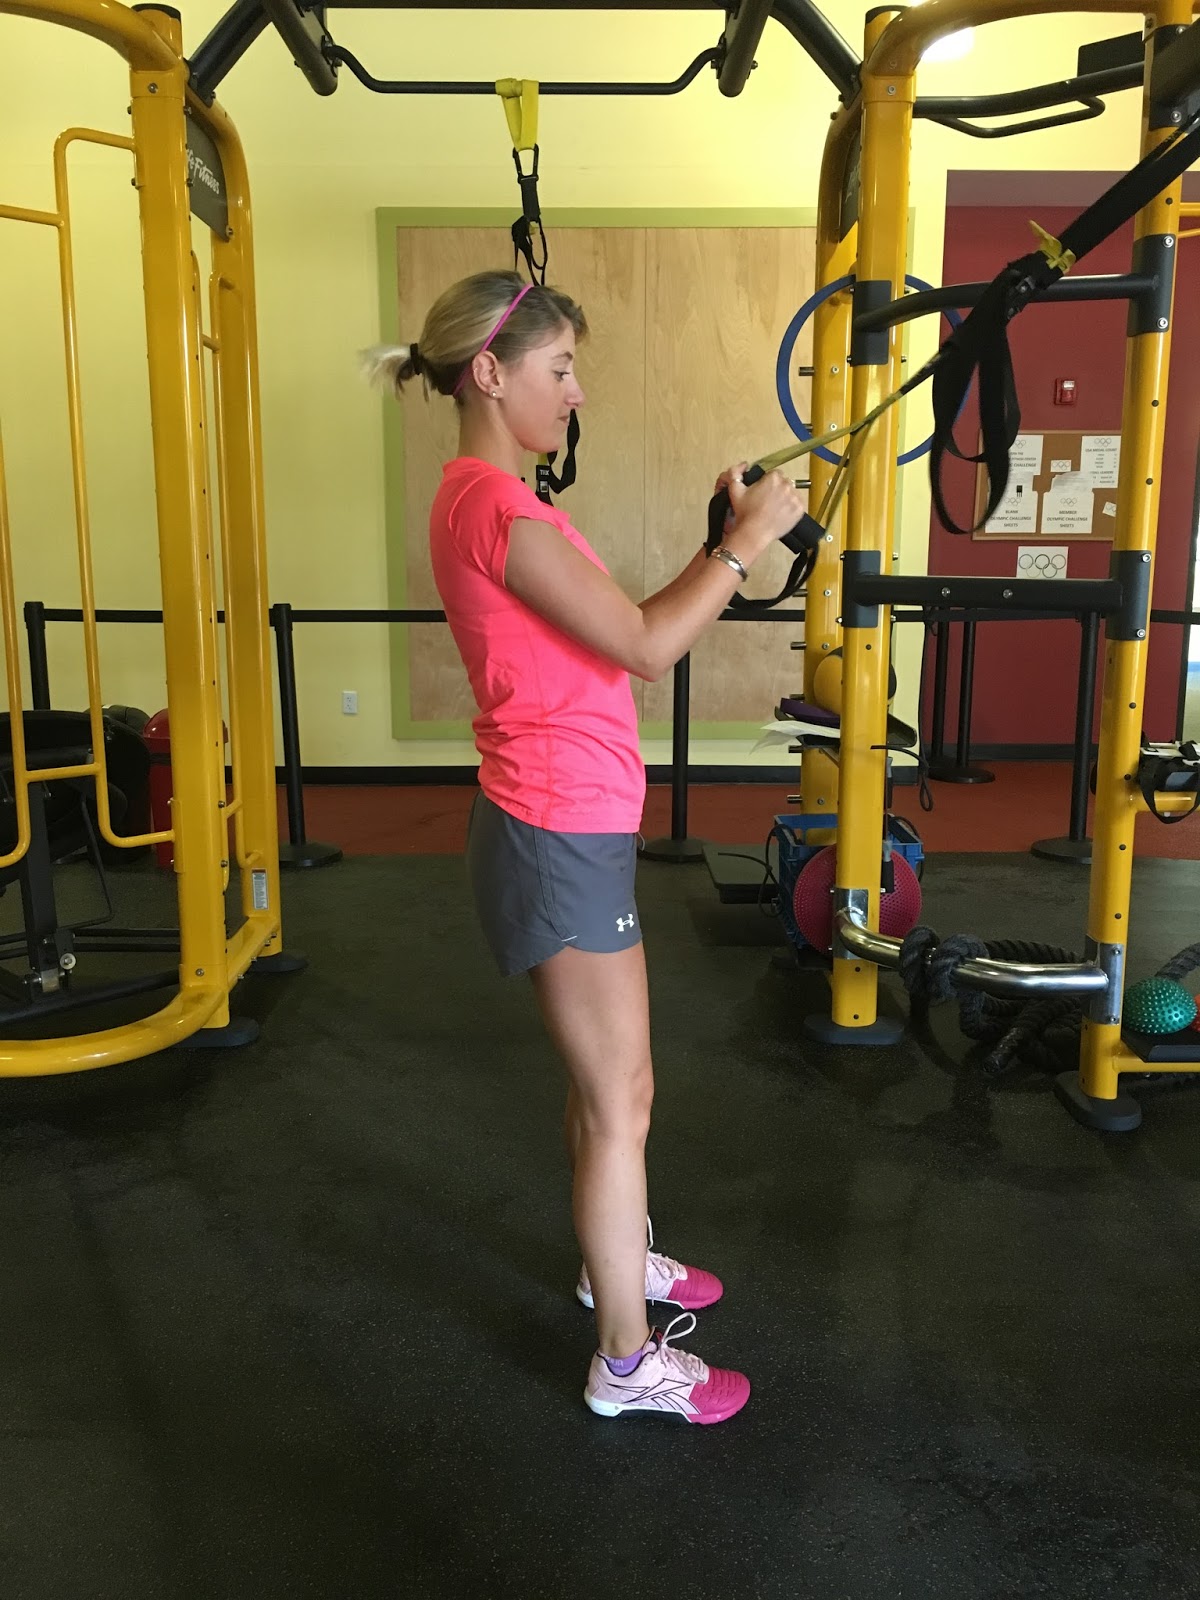
Power Pull
Hold the TRX handle in single handle position with one hand. Keep elbow bent at the start and feet shoulder
width apart. Extend arm holding handle
and drop back into a squat. Reach back
with your other arm towards the ground.
Return to the start position by pulling with your arm and driving up
with your legs.
width apart. Extend arm holding handle
and drop back into a squat. Reach back
with your other arm towards the ground.
Return to the start position by pulling with your arm and driving up
with your legs.
2×10 each arm


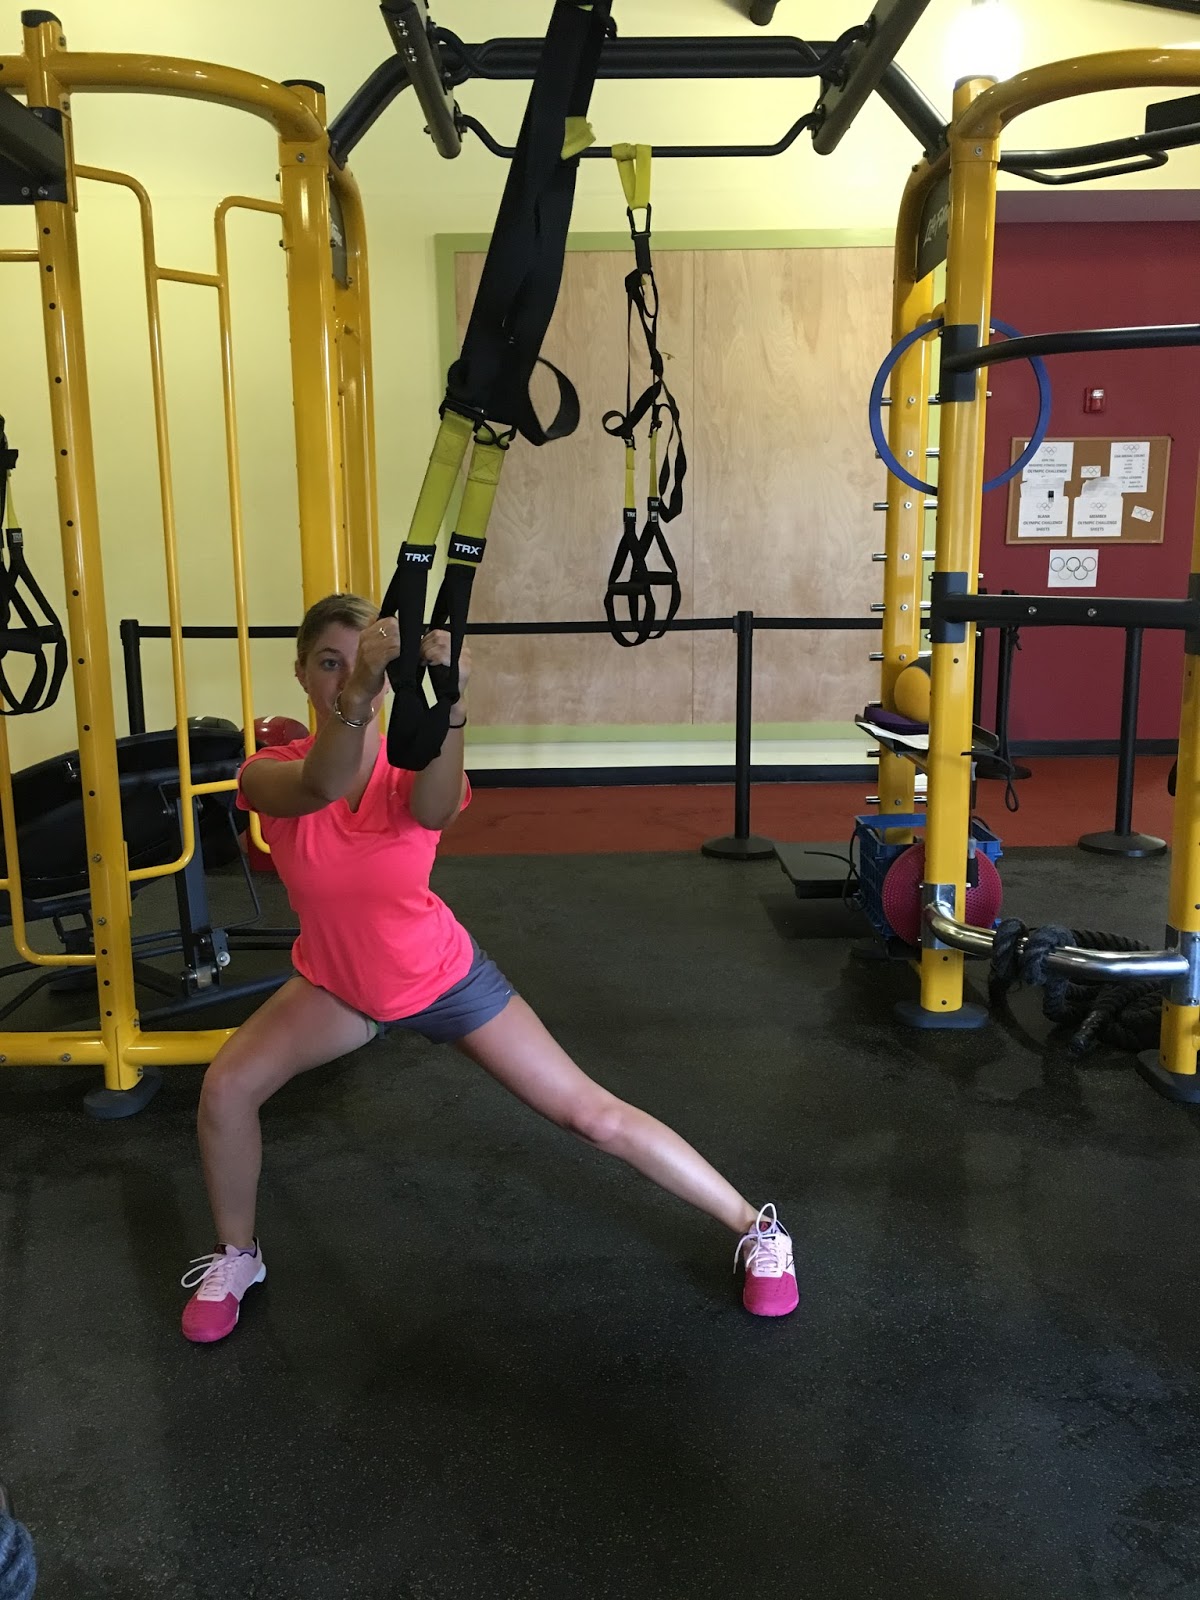
Alternating Side Lunge
Hold the TRX handles and stand with your feet together. Take a large step out the side keeping toes
pointed straight ahead. Bend the knee that you took a step with pushing hips
back and sitting into a side lunge position. Return to the start position and step
to the other side.
pointed straight ahead. Bend the knee that you took a step with pushing hips
back and sitting into a side lunge position. Return to the start position and step
to the other side.
2×10
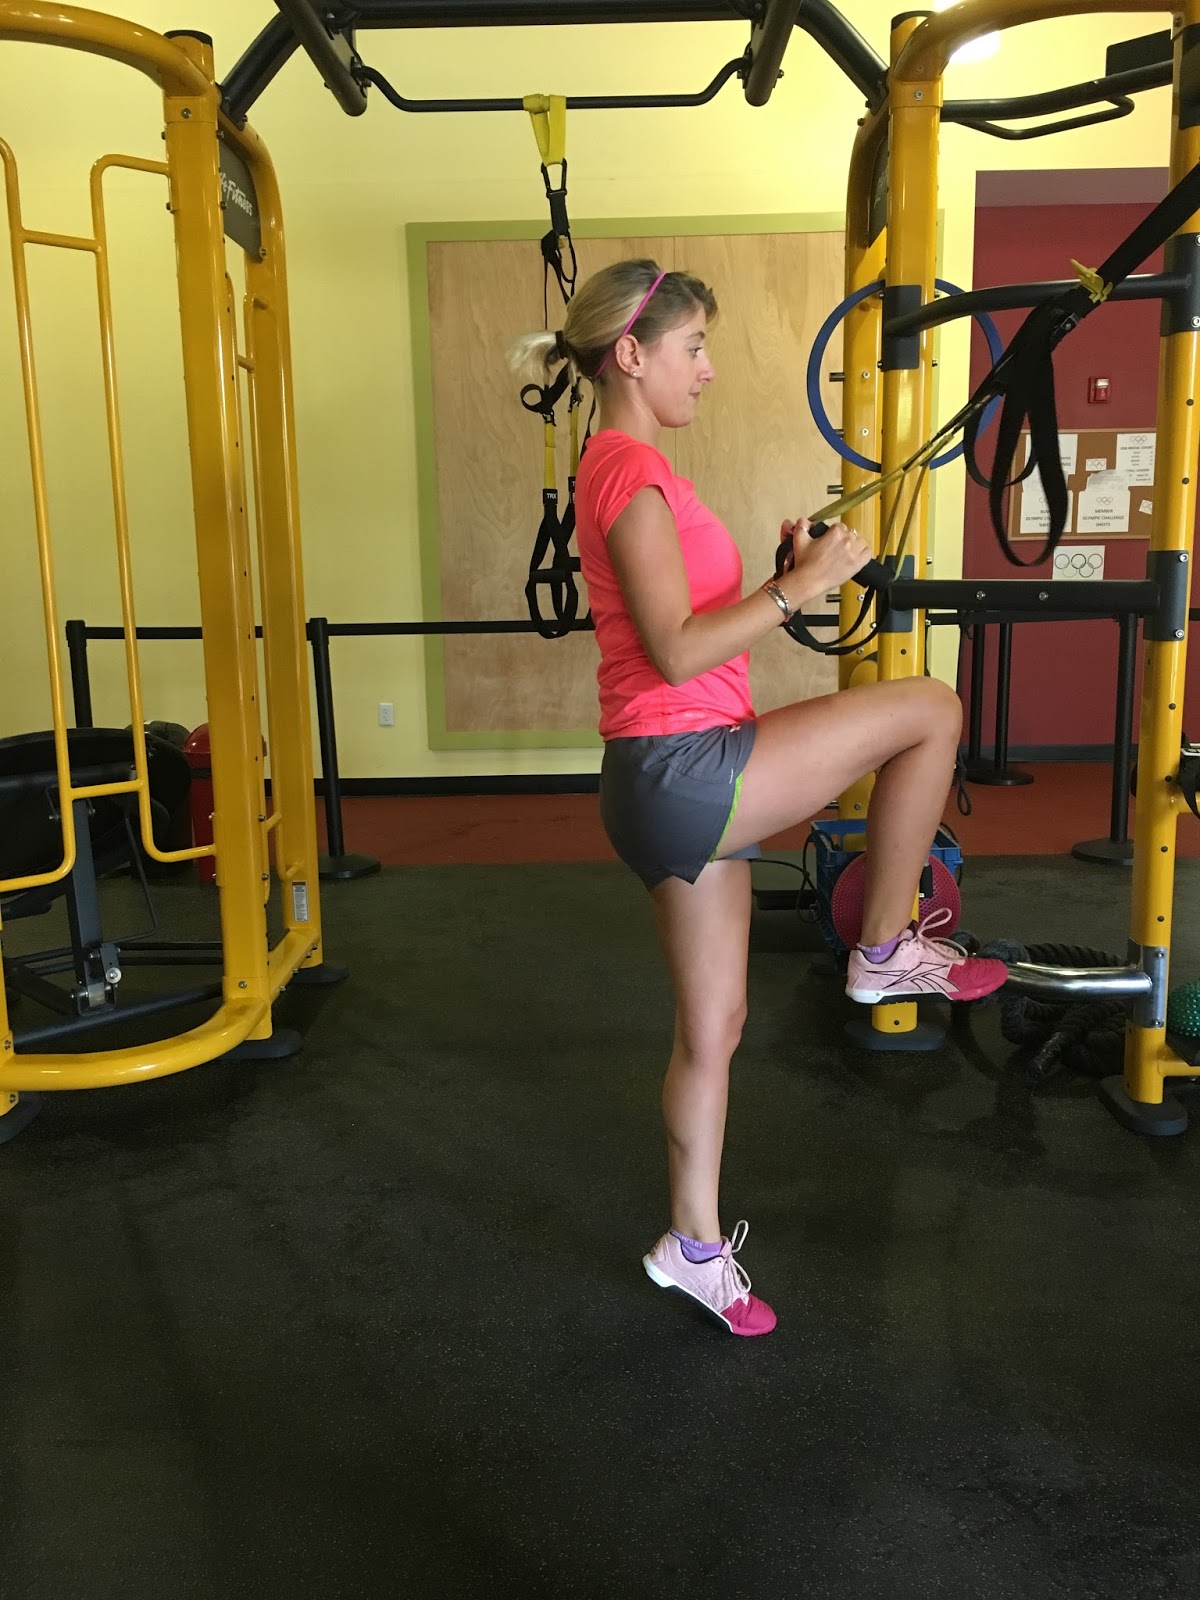
Balance Lunge with Knee Drive
Hold the TRX handles and stand with your
feet together. Step back into a reverse lunge. For a challenge: keep the back foot off the floor in a
balanced position! Stand up on your
stance leg driving your knee forward into a march position. Do all repetitions on one side then the
other.
feet together. Step back into a reverse lunge. For a challenge: keep the back foot off the floor in a
balanced position! Stand up on your
stance leg driving your knee forward into a march position. Do all repetitions on one side then the
other.
2×10 each

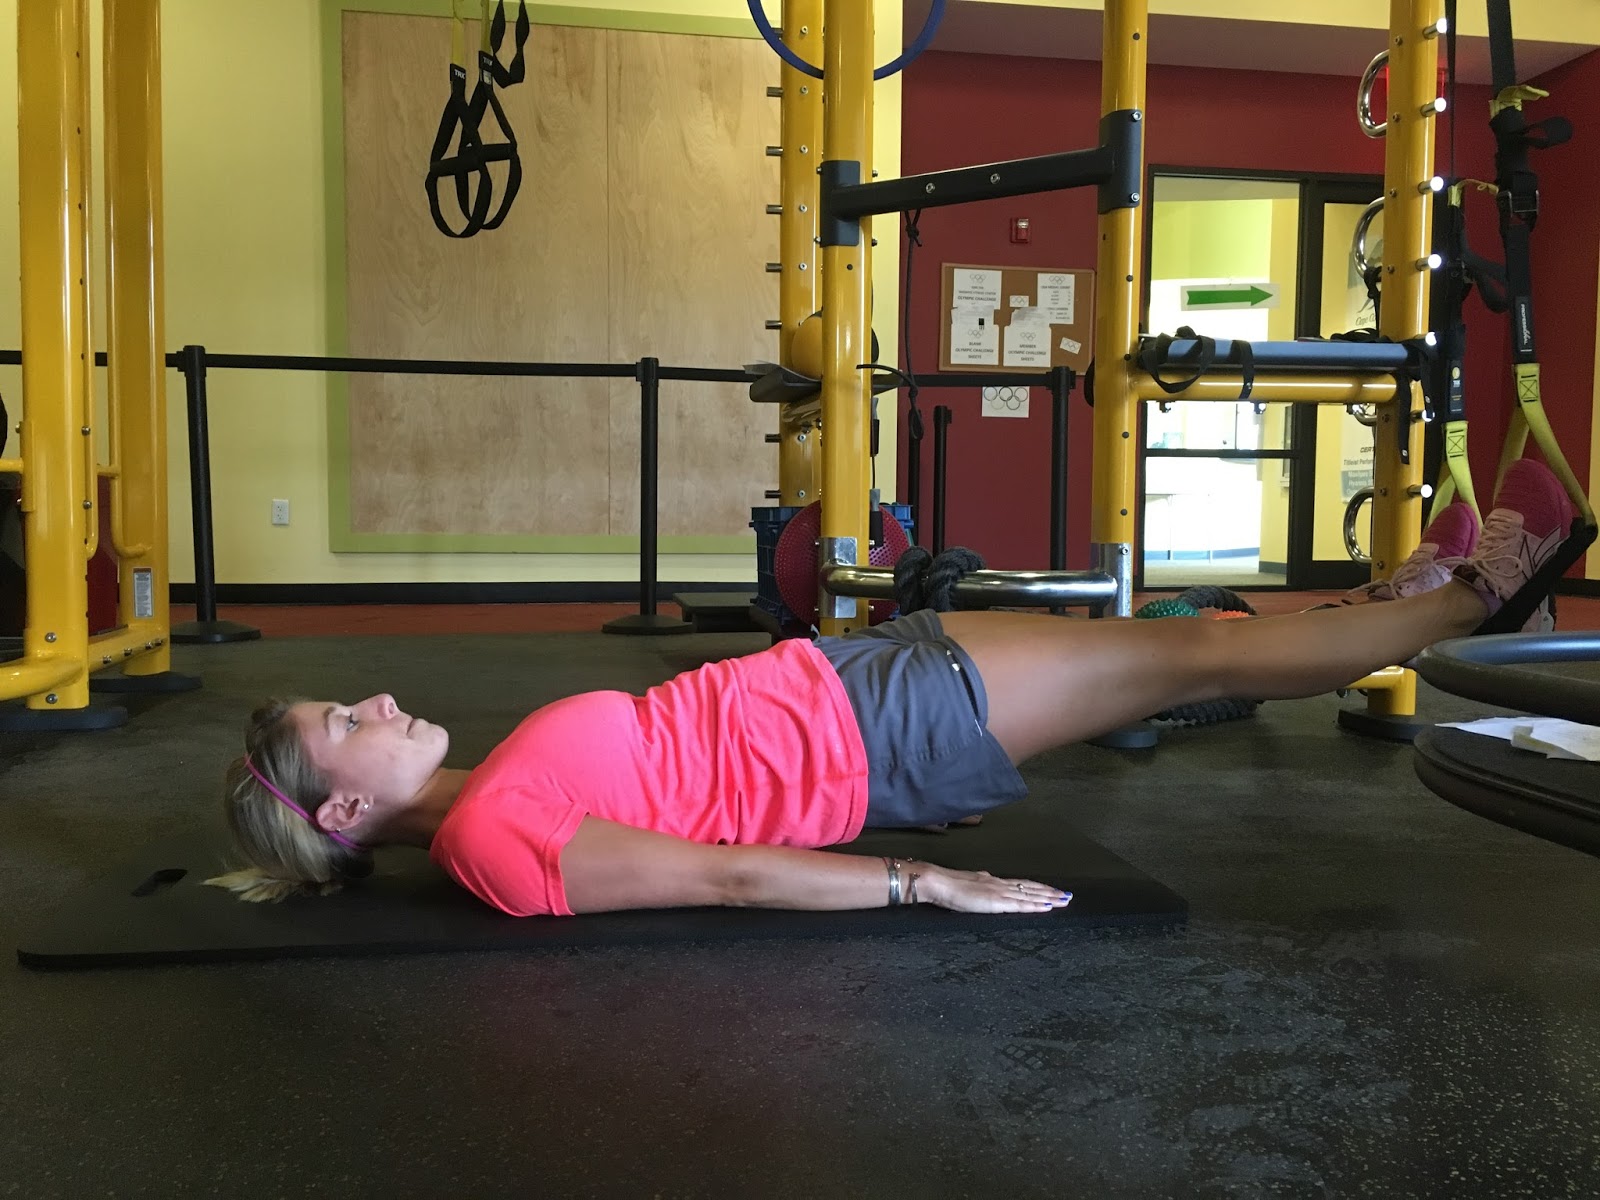
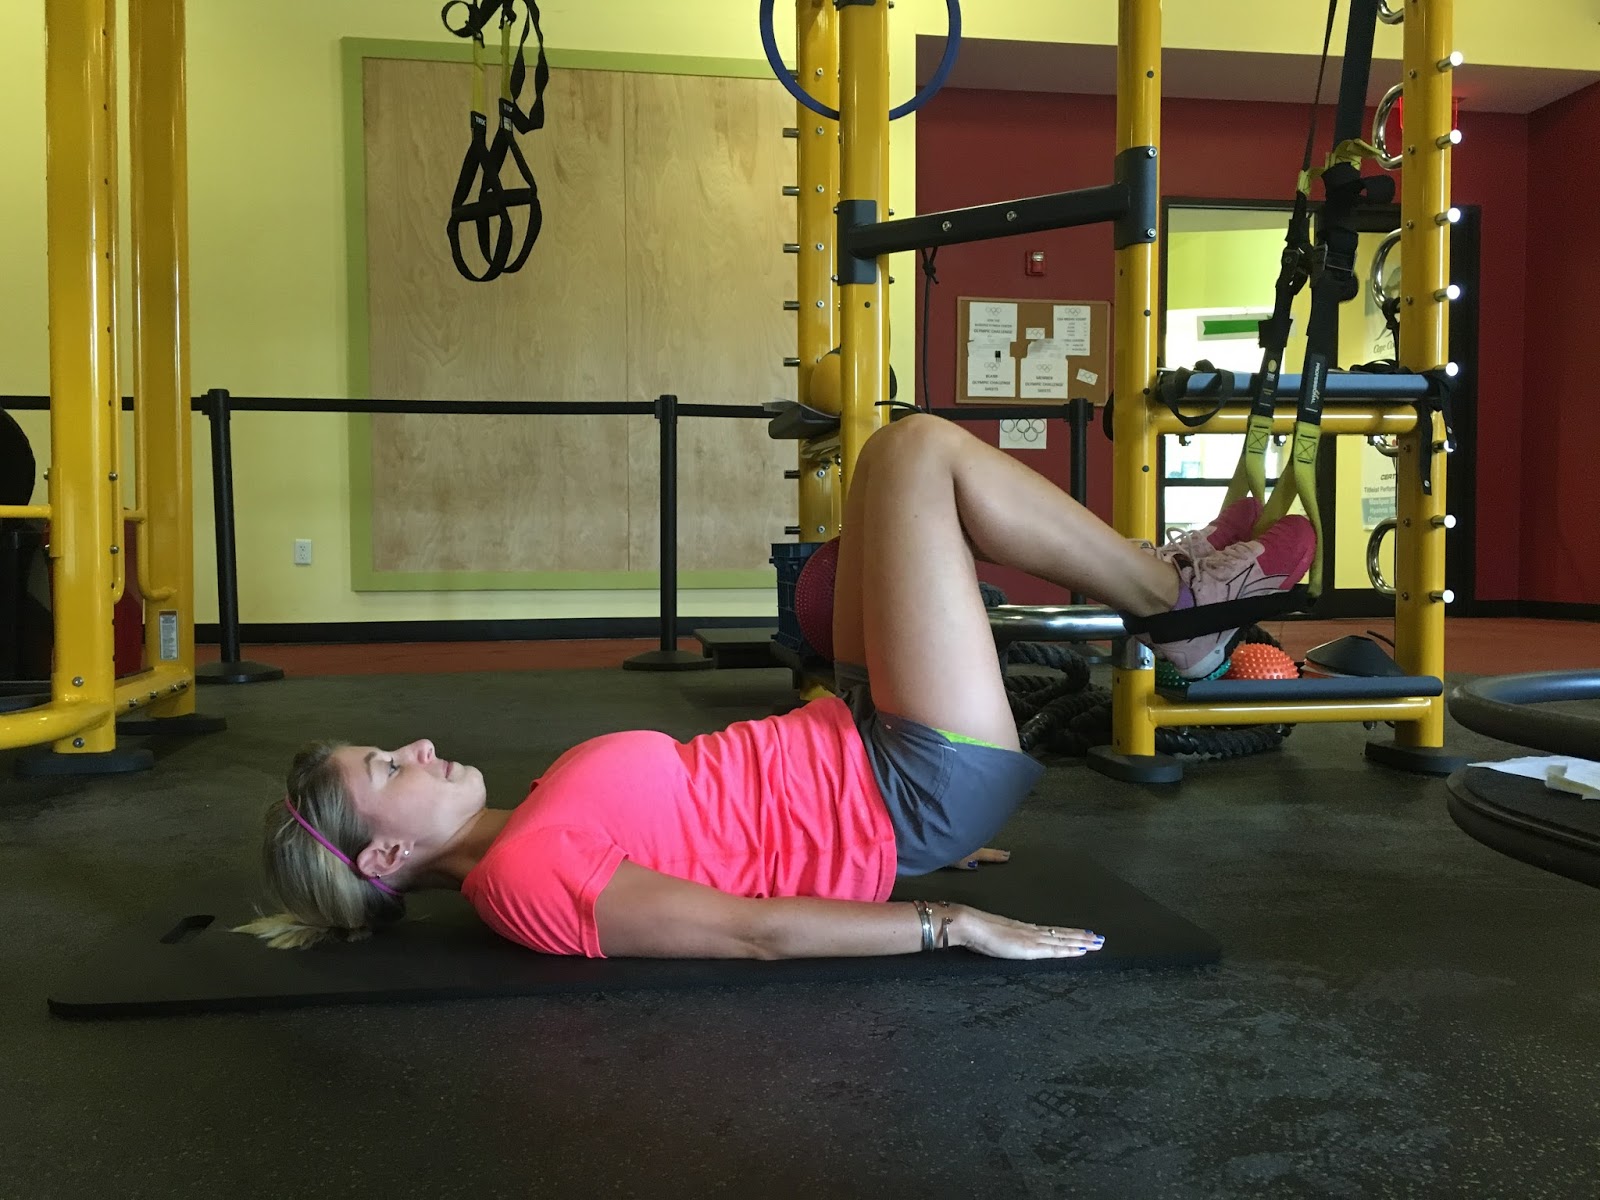
Bridge with Hamstring Curl Series
Lay on the floor with your heels in the TRX cradles (handles should be about 12” off
the ground). Raise your hips into a bridge position. Keeping hips level draw one knee in towards
your body. Extend leg out and repeat
with the other leg. Repeat with both legs. Lower body back to the floor.
the ground). Raise your hips into a bridge position. Keeping hips level draw one knee in towards
your body. Extend leg out and repeat
with the other leg. Repeat with both legs. Lower body back to the floor.
2×10


Watch Meaghan demonstrate all the TRX Strength Training for Runners exercises…
Bonus! Runner’s TRX Core Circuit
Complete the three exercises in a row
without rest. Try the circuit 3 times.
without rest. Try the circuit 3 times.
Mountain Climbers
Start in a push up position with your feet in the straps.
Maintain a flat back as you march knees towards your chest in an alternating
pattern. As the knee comes in towards
your body your hips should rise slightly.
Maintain a flat back as you march knees towards your chest in an alternating
pattern. As the knee comes in towards
your body your hips should rise slightly.
10x
Three Position Crunch
Start in a push up position with your feet in the straps. Maintain a flat back as pull both your
knees towards your chest. Return to the start position and pull both knees in
towards your right elbow, return to the start position and pull both knees
towards your left elbow. Repeat the series of 3 movements 5x.
knees towards your chest. Return to the start position and pull both knees in
towards your right elbow, return to the start position and pull both knees
towards your left elbow. Repeat the series of 3 movements 5x.
Pike
Start in a push up position with your feet in the straps. Keep your legs straight and drive your hips
towards the ceiling as you pull your feet towards your hands.
towards the ceiling as you pull your feet towards your hands.
10x
Blog post by Eric Chandler.
About
Eric Chandler
Eric joins the Cape Cod Rehab Running
Team with a background in Exercise Science. He is a Certified Strength &
Conditioning Specialist (CSCS), certified in Part I & Part II of the
Burdenko Method, a Certified Functional Movement Screen (FMS) Specialist, and
has also been training in the TRX Suspension Training Method. Eric looks for
his clients’ strengths and uses those strengths to help them get the most out
of each session. A recreational runner, Eric has served on many of the CCR
Flyers Cape Cod Marathon relay teams as has a goal of breaking 20 minutes in
the 5k.
3 Glute Exercises to Improve your Golf Game
The Titleist
Performance Institute (TPI) calls the glutes the “King of the Golf Swing.” Why?
Performance Institute (TPI) calls the glutes the “King of the Golf Swing.” Why?
Your glutes
play a very important role in the golf swing.
Two words: Power and consistency.
play a very important role in the golf swing.
Two words: Power and consistency.
One of the
main roles of the glutes is to stabilize the hips. In the golf swing you generate power from the
ground up. To maintain power throughout
the backswing, your glutes must maintain pelvic stability as you internally
rotate on the back leg and your upper body rotates. Stability is also important to allow rotation
in the downstwing and the follow through.
If you’re lacking stability, your consistency will suffer and it could
even lead to some swaying and sliding swing characteristics.
If your glutes
are not firing properly, other muscles may compensate and could also lead to
overuse injuries of the hamstrings and lower back.
are not firing properly, other muscles may compensate and could also lead to
overuse injuries of the hamstrings and lower back.
Strengthen your glutes for more power and consistency! Here are 3 glute exercises to try…
Clamshell
What: Glute
Medius, Hip External Rotation
Medius, Hip External Rotation
How: Lay on
your side with your knees bent and your legs stacked on top of each other. Keep your feet together and lift your top
knee as far as possible without rocking.
I like to suggest putting your hand on your hip so you can feel any
rocking. Try 2 sets of 10 repetitions
then repeat on the other side.
your side with your knees bent and your legs stacked on top of each other. Keep your feet together and lift your top
knee as far as possible without rocking.
I like to suggest putting your hand on your hip so you can feel any
rocking. Try 2 sets of 10 repetitions
then repeat on the other side.

Reverse Clamshell
What: Hip Internal
Rotation
Rotation
How: Lay on
your side with your knees bent and your legs stacked on top of each other. Keep your knees together and lift your top
foot as far as possible. Try 2 sets of
10 repetitions then repeat on the other side.
your side with your knees bent and your legs stacked on top of each other. Keep your knees together and lift your top
foot as far as possible. Try 2 sets of
10 repetitions then repeat on the other side.

Bridge
What: Glutes
How: Lay on
your back with your knees bent and your feet flat on the ground. Lift your hips off the ground. Hold for 1-2 seconds then lower. Try 2 sets of 10 repetitions and focus on
using your glutes. If you feel your
hamstrings, your glutes are not firing correctly!
your back with your knees bent and your feet flat on the ground. Lift your hips off the ground. Hold for 1-2 seconds then lower. Try 2 sets of 10 repetitions and focus on
using your glutes. If you feel your
hamstrings, your glutes are not firing correctly!


Blog post by Jen Skiba.
Halloween Workout
Celebrate Halloween with this spooky workout!
Warm up before trying any of these moves. Begin with 10 repetitions each. Do not
perform any exercise that causes or increases pain.
perform any exercise that causes or increases pain.
Jack O’Lantern Squats
Begin in an upright position. Take a small hop forward, landing with soft
feet into a squat position, weight in your heels and arms raise parallel to the
ground. Stand up, lowing arms to your side and repeat 10x.
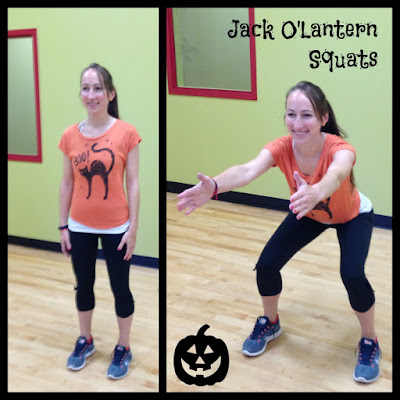
feet into a squat position, weight in your heels and arms raise parallel to the
ground. Stand up, lowing arms to your side and repeat 10x.

Pumpkin Lift
Begin in an upright position holding a medicine
ball. Squat down and tap the floor with
your medicine ball then stand up tall and reach the medicine ball
overhead. Practice good squat form
keeping your knees behind your toes. Repeat
10x.

ball. Squat down and tap the floor with
your medicine ball then stand up tall and reach the medicine ball
overhead. Practice good squat form
keeping your knees behind your toes. Repeat
10x.

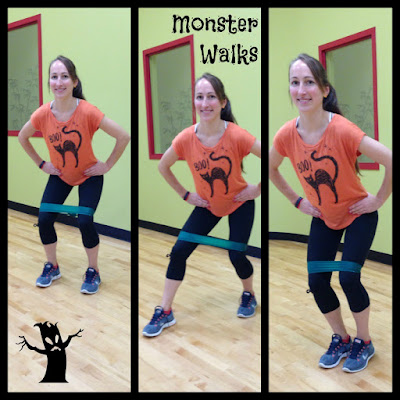
Monster Walks
Tie a theraband around your legs, just above
your knees. Begin in an athletic stance
with knees slightly bent and back straight.
Take big steps forward while staying in that athletic stance and keeping
tension in the theraband. Feel the burn
in your glutes!
your knees. Begin in an athletic stance
with knees slightly bent and back straight.
Take big steps forward while staying in that athletic stance and keeping
tension in the theraband. Feel the burn
in your glutes!

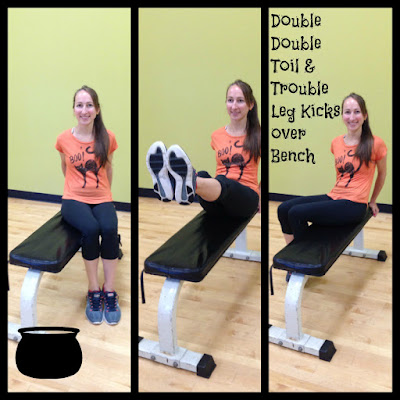
Double Double Toil & Trouble Leg Kicks over
Bench
Bench
For the scary version of this popular Burdenko
exercise, begin seated on a bench with both legs on one side. Sit back on your tailbone, holding a pelvic
tilt with your back straight. Hold on
the bench behind you for support. Kick
both legs straight over the bench together.
Tap the floor with your feet then repeat to the other side, alternating
for 10 repetitions.

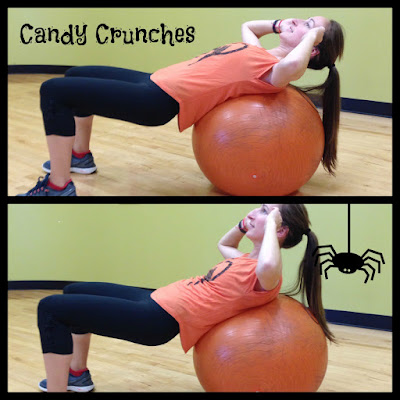
Candy Crunches
Begin by sitting on a physioball. Walk your feet forward until the physioball
rests on your upper back, shoulders and neck hanging off the physioball ball. Keep your hipss elevated and perform a crunch
with your head and neck in a neutral position. Repeat 10 repetitions.
rests on your upper back, shoulders and neck hanging off the physioball ball. Keep your hipss elevated and perform a crunch
with your head and neck in a neutral position. Repeat 10 repetitions.

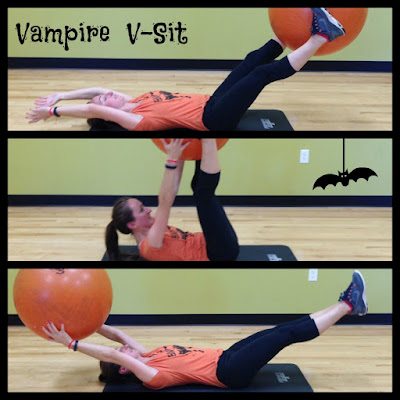
Vampire V-Sit
Lay on your back holding a physioball between
your feet. Pelvic tilt pressing your
lower back into the mat and lift the ball off the ground. Pass the physioball from your feet to your
hands. Continue to lower the ball to the
ground in your hands. This is a
challenging core exercise and it’s important that you only lower the ball as
far as you can hold a pelvic tilt.
Continue to pass the ball back and forth for 10 repetitions.

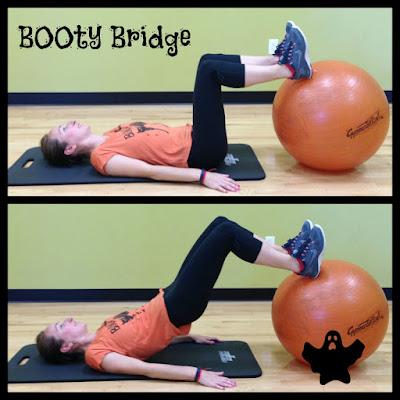
BOOty Bridge
Lay on your back with your heels on a
physioball. Dig your heels into the
physioball as you squeeze your glutes and lift your hips off the ground. Hold for 2-3 seconds and lower. Repeat 10x.
physioball. Dig your heels into the
physioball as you squeeze your glutes and lift your hips off the ground. Hold for 2-3 seconds and lower. Repeat 10x.

Spiderman Plank
Begin in a plank position. Bring your knee to
your elbow (same side) while keeping your leg parallel to the floor. Repeat on the other side, alternating for 10
repetitions.

your elbow (same side) while keeping your leg parallel to the floor. Repeat on the other side, alternating for 10
repetitions.

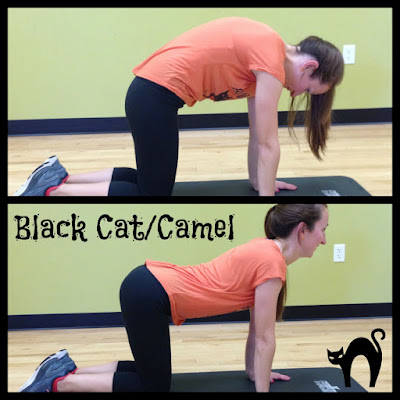
Black Cat/Camel
Finish up your workout with this stretch for
mobility in your back.
mobility in your back.
Begin on all 4s (hands under your shoulders, knees
under your hips). Start with your back
in a neutral position then alternate between arching your spine upward toward
the ceiling (cat) and rounding your back (camel) by relaxing your back and
allowing your stomach to fall towards the ground. Repeat 10x.
under your hips). Start with your back
in a neutral position then alternate between arching your spine upward toward
the ceiling (cat) and rounding your back (camel) by relaxing your back and
allowing your stomach to fall towards the ground. Repeat 10x.

Boo!
Blog post by Jen Skiba.
7 BOSU Moves for Runners
Have
you ever tried exercises on a BOSU Balance Trainer? This half-dome stability ball is great for
building a strong core, ankle stability and work on overall strength, balance
and coordination. Challenge yourself by
adding a BOSU Balance Trainer to your current strength routine. Below are 7 BOSU exercises with runners in
mind focusing on the lower body, glutes and core—all super important for
strong, fast, injury-free running!
Warm
up before trying any of these moves.
Begin with 10 repetitions each. Do not perform any exercise that causes or
increases pain.
up before trying any of these moves.
Begin with 10 repetitions each. Do not perform any exercise that causes or
increases pain.
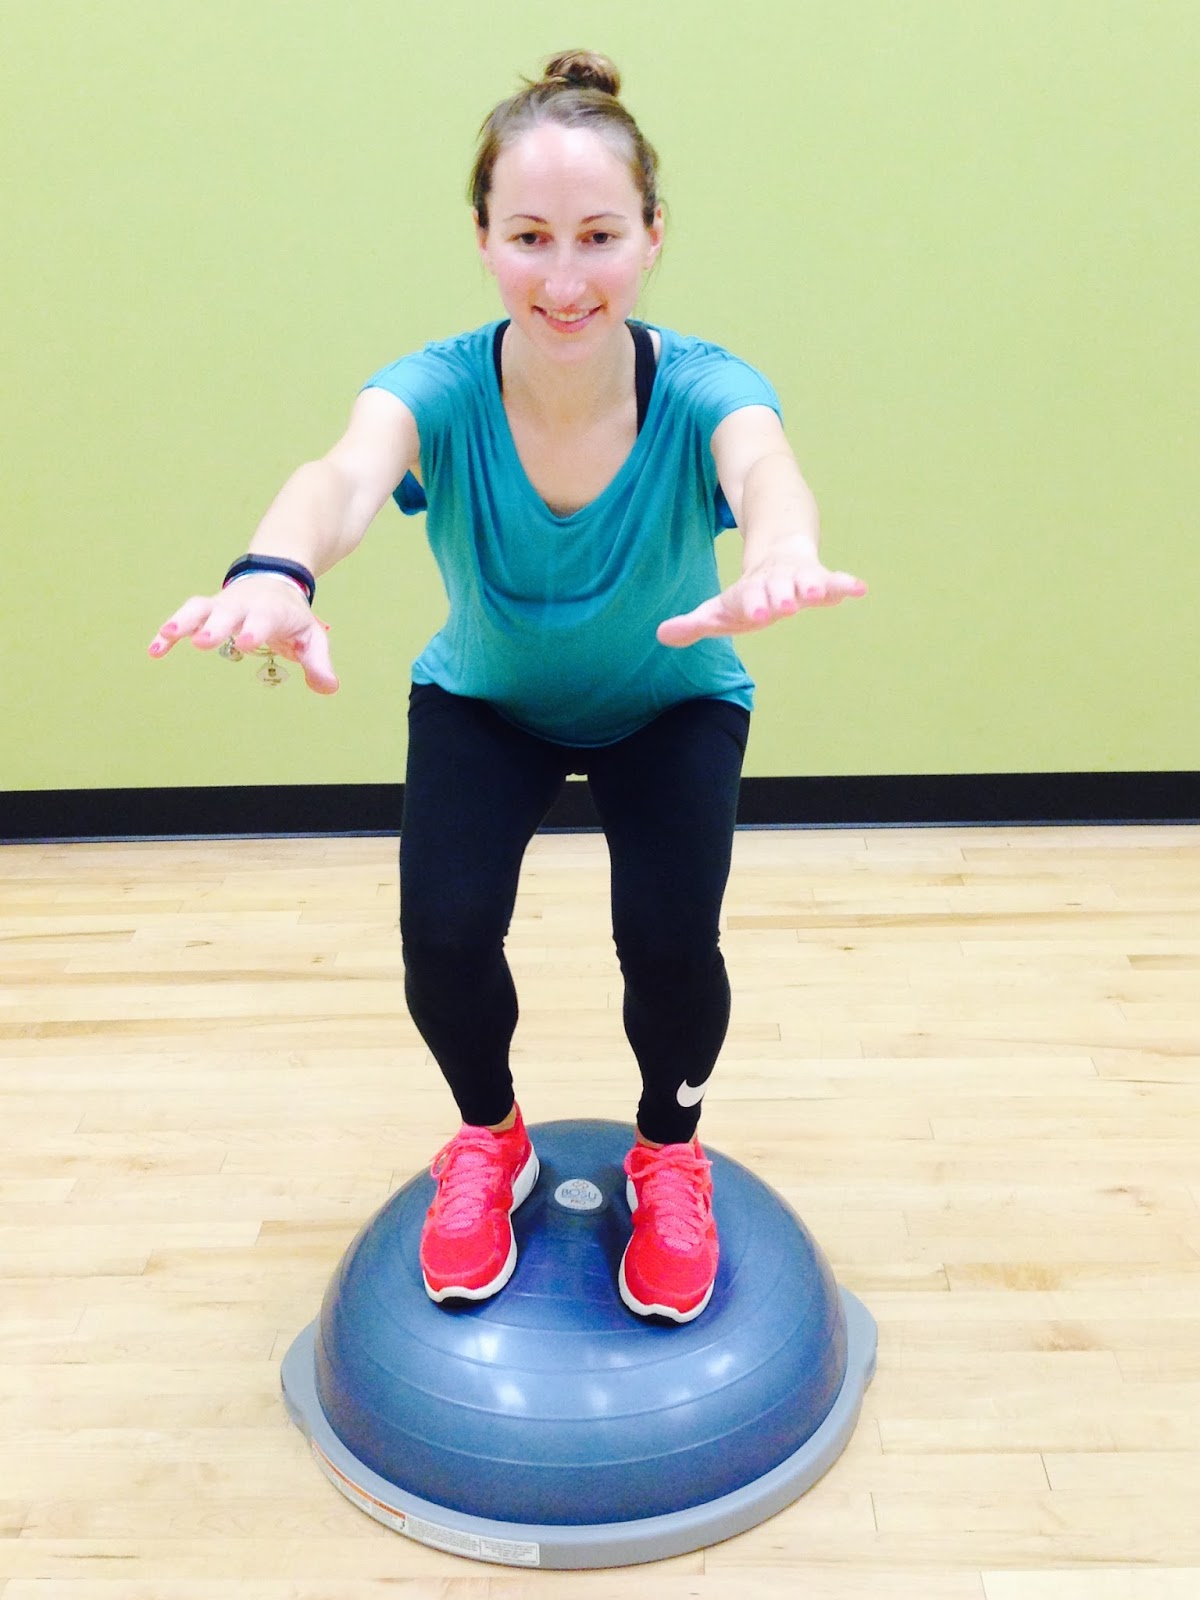
BOSU
Squats
Stand on the BOSU Balance Trainer, dome side up. Perform a squat, keeping good form and your weight in your heels. Stand up and repeat 10x.
BOSU
Lunges
Stand on the ground facing the BOSU. Take a big step forward onto the BOSU into a lunge position with knee at 90 degrees. Push off the BOSU back to the upright starting position. Repeat with the other leg, alternating for 10 repetitions.

BOSU
Side Lunges
Stand on the ground next to the BOSU. Take a lateral step onto the BOSU bending that knee while keeping the other leg straight. Your weight should be in your heels with your knee behind your toes and not past your ankles laterally. Return to start position. Perform 10 repetitions then repeat on the other side.

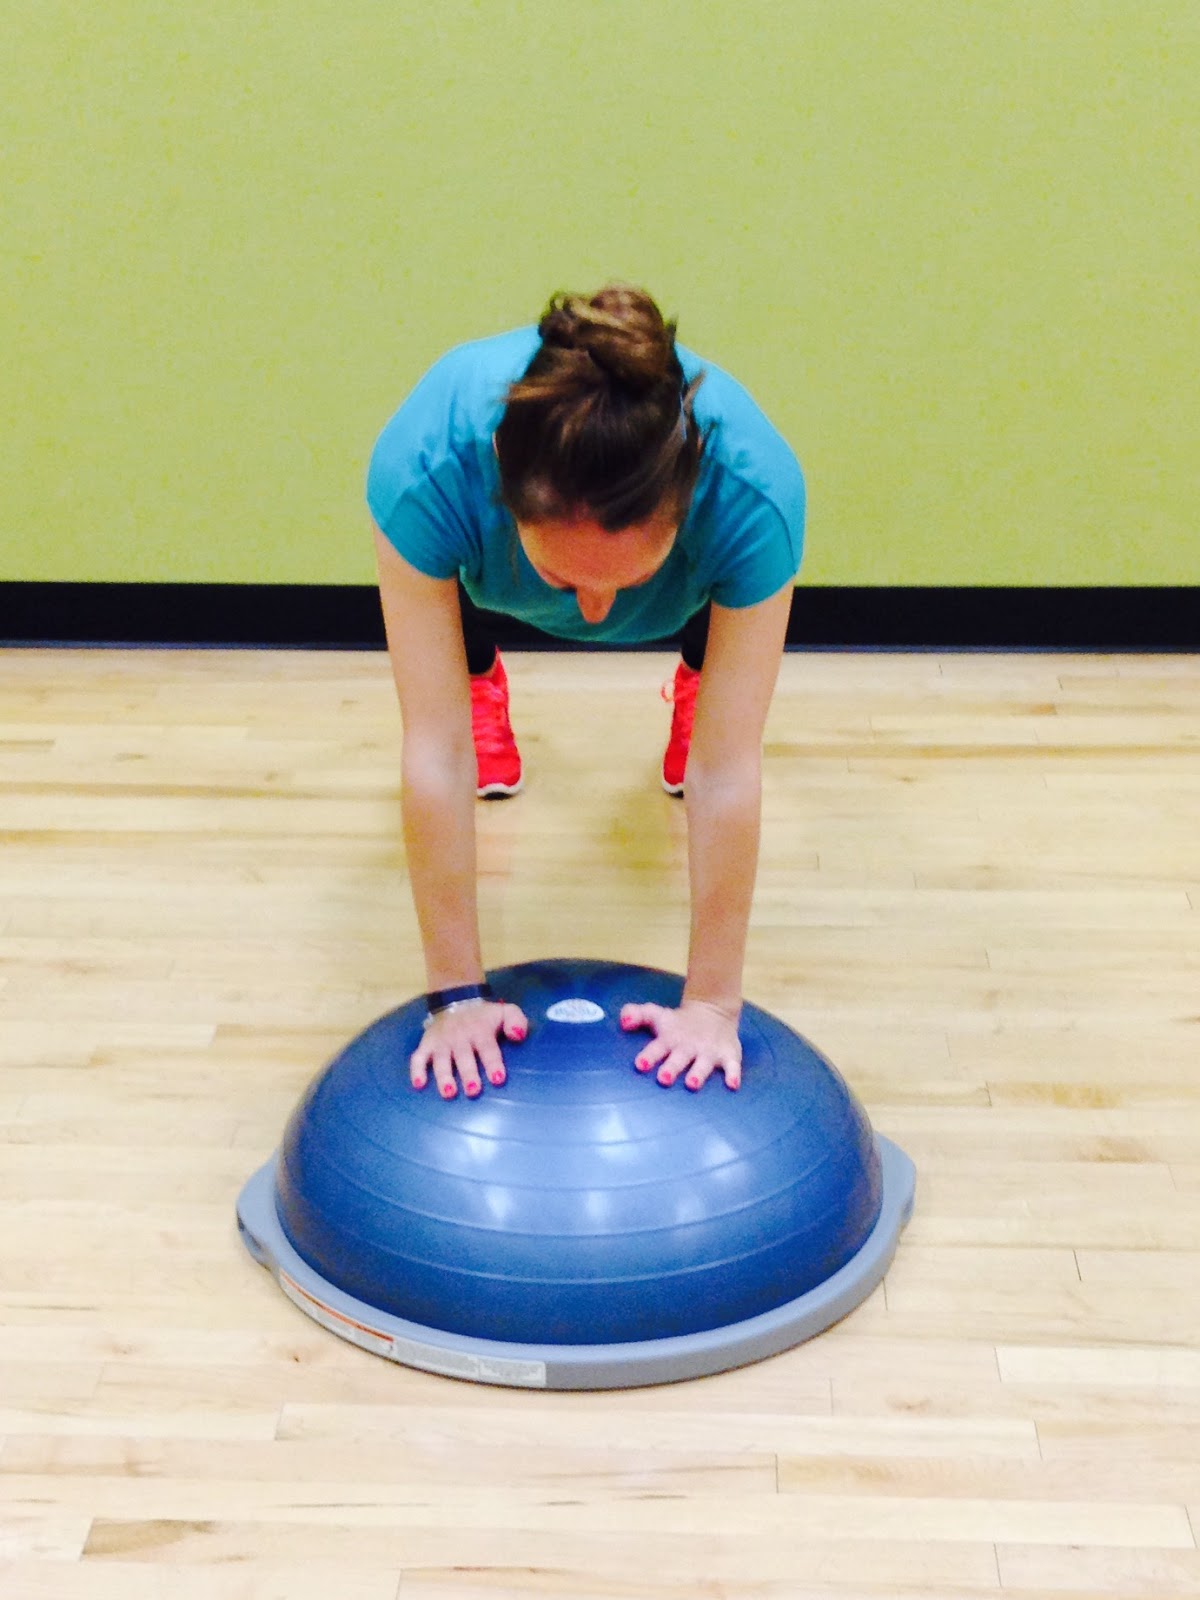
BOSU
Side to Side Push Ups
Begin in a plank position with your hands on the BOSU, dome side up. Walk one hand laterally off the BOSU and perform a push up. Walk you hands back onto the BOSU and repeat on the other side, alternating for 10 repetitions.

BOSU
Plank with Leg Lifts
Begin in a plank position with your hands on the BOSU, this time with the dome facing down. Engage your glute muscles and lift one leg off the floor, foot flexed. Hold for 1-3 seconds and return to start position. Repeat with the other leg, alternating for 10 repetitions.
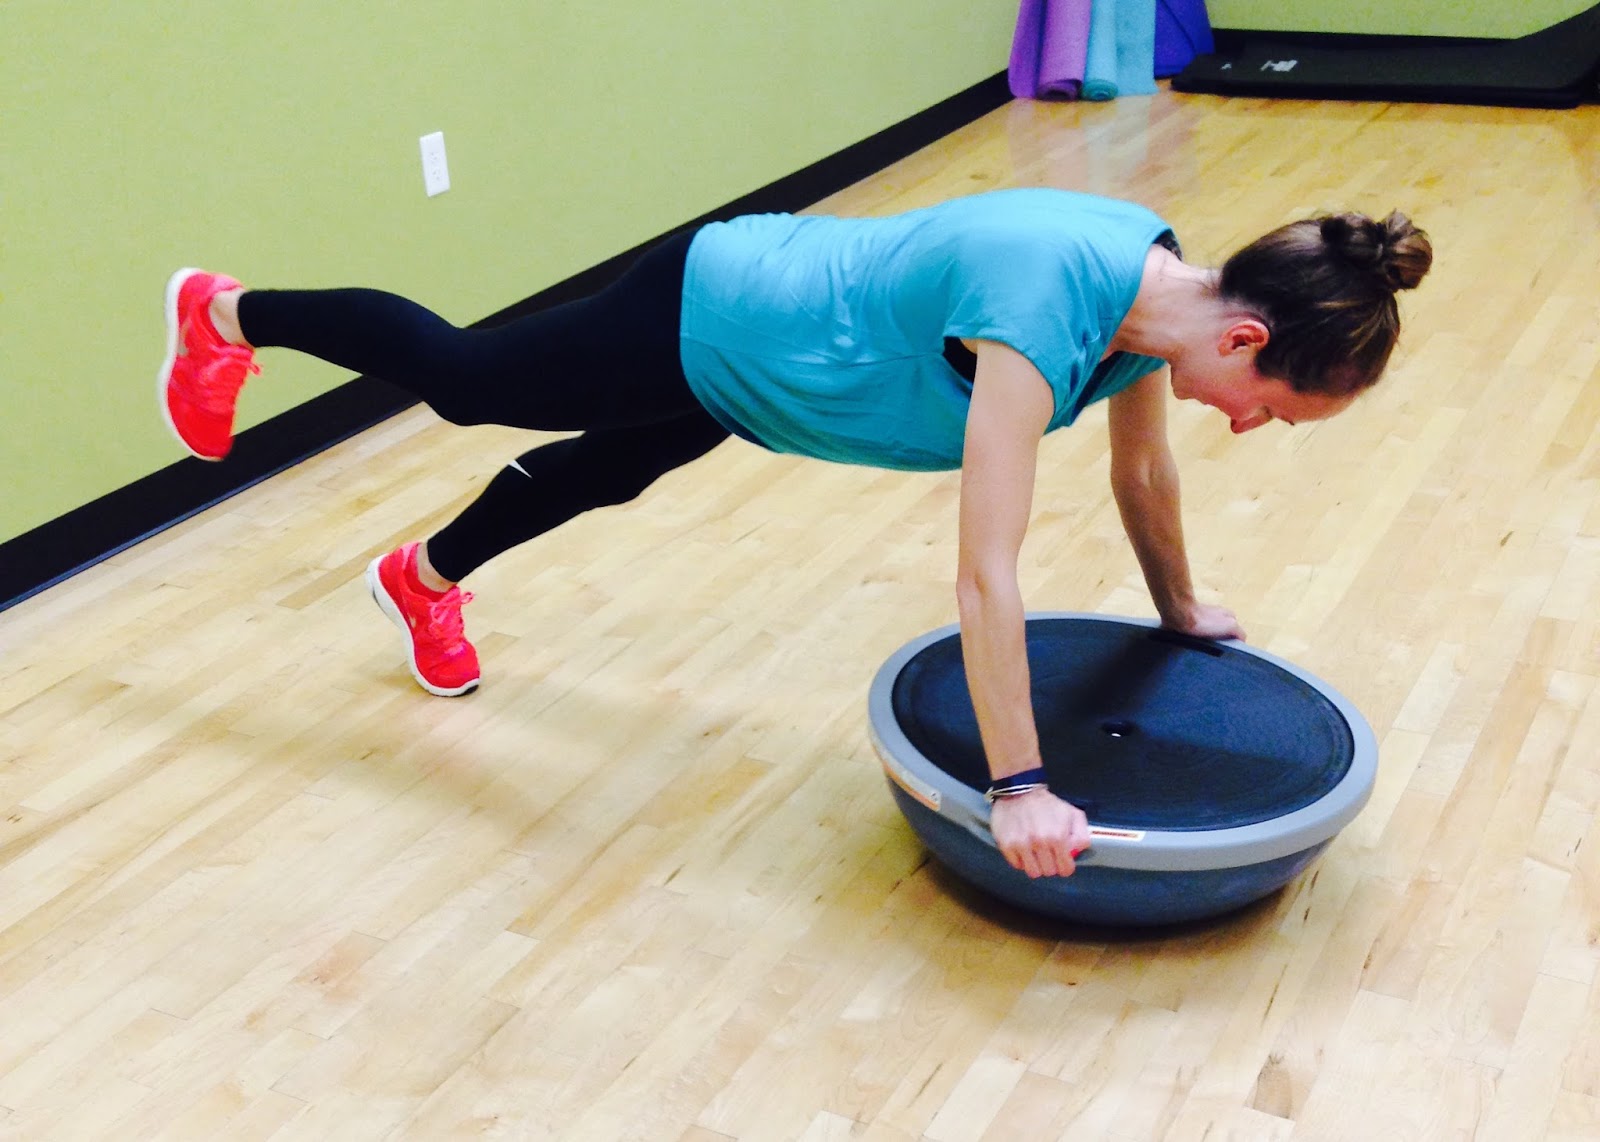
BOSU
Plank with Mountain Climbers
Begin in a plank position with your hands on the BOSU, dome facing down. Alternate knees to chest starting slow and building to a faster pace. Repeat 10x.

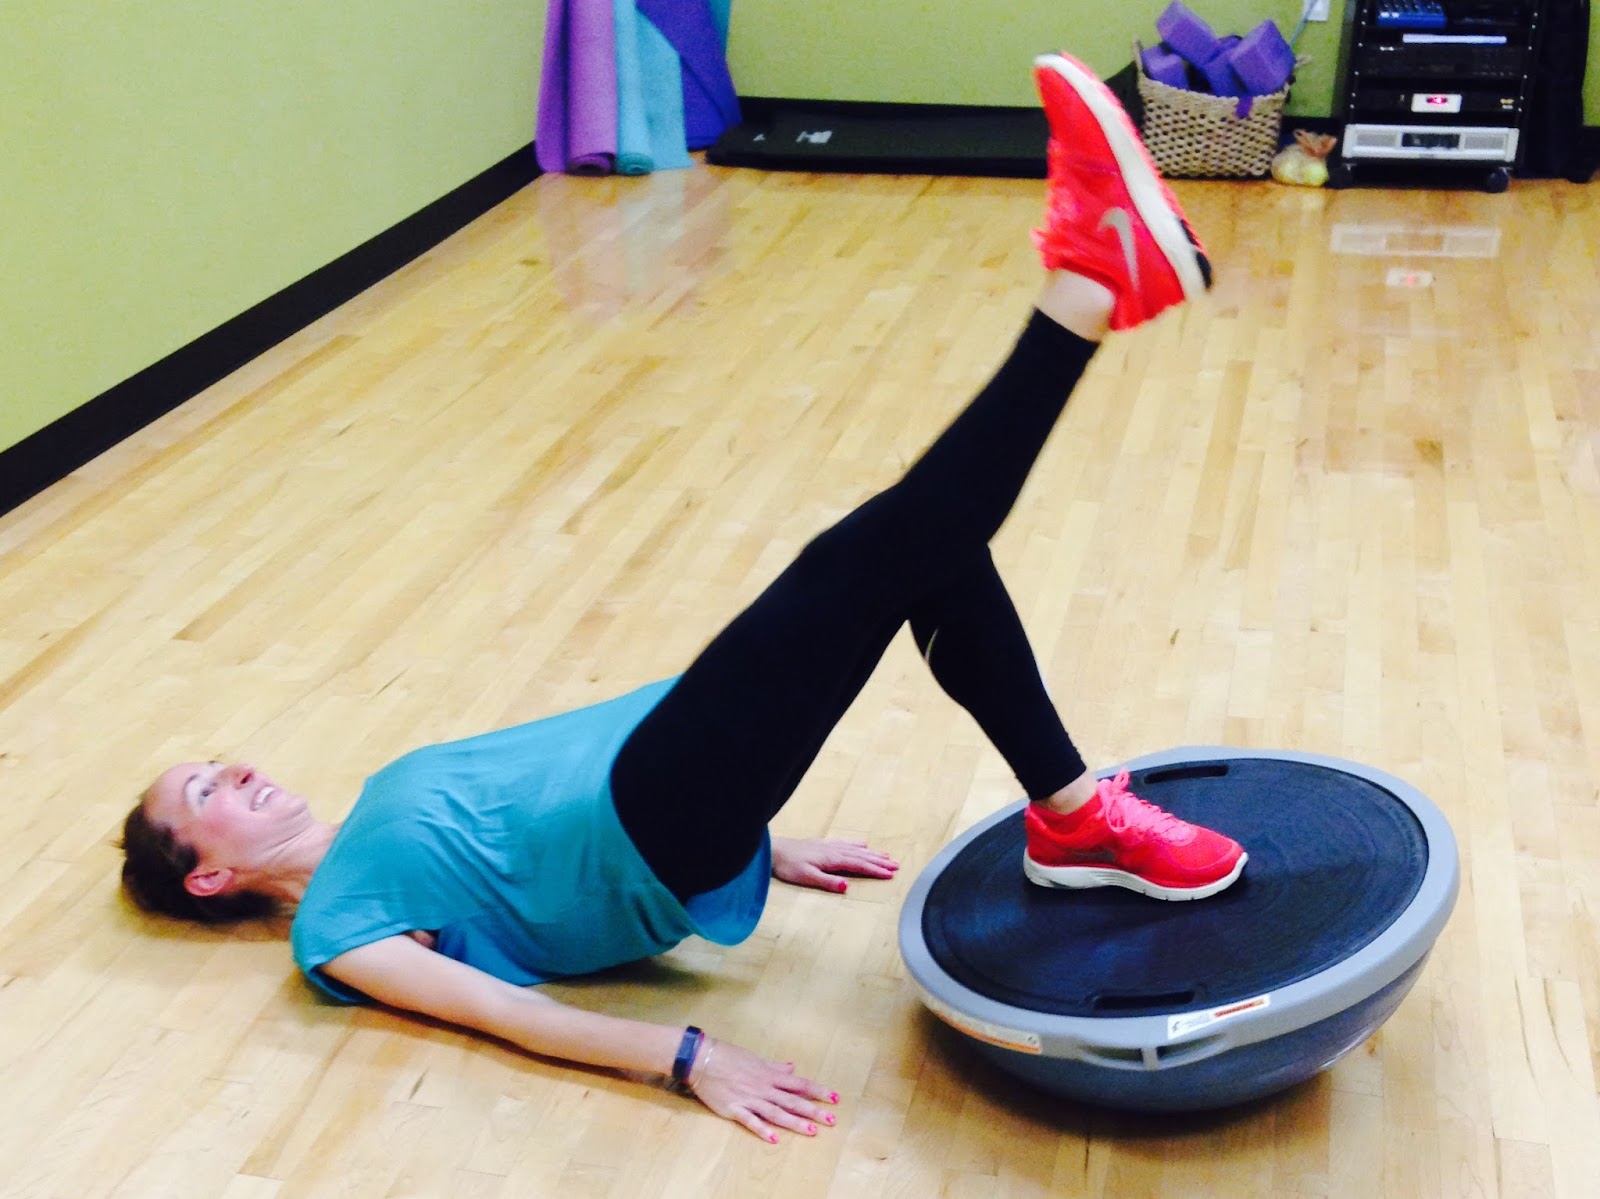
BOSU
Single Leg Bridges
This exercise can be done on a BOSU with dome facing up or down. Lay on your back with knees bent and one leg on the BOSU. Lift and hold opposite leg in the air parallel with your bent knee. Engage your glutes and raise your hips off the ground. Perform 10 repetitions and repeat on the other side.
Blog post by Jen Skiba, RRCA Certified Running Coach
The Animal Workout
It’s #WorkoutWednesday and time for a fun new animal inspired, full body workout routine. Warm up before trying these 6
moves. Begin with 10 repetitions each. Do not
perform any exercise that causes or increases pain.
moves. Begin with 10 repetitions each. Do not
perform any exercise that causes or increases pain.
Frog Squats
Frog squats are a
challenging exercise strengthening the quads and glutes while increasing
hamstring flexibility.
challenging exercise strengthening the quads and glutes while increasing
hamstring flexibility.
Start with your feet
a little wider than shoulder width apart, toes facing forward. Place your hands on your ankles and press your
hips back, lowering yourself into a deep squat.
Keep your back straight and head up. Exhale as you straighten your legs,
feeling a nice stretch in the hamstring muscles. Repeat for 10-15 repetitions.


Dipping Bird
The dipping bird aka
single leg dead lift is great for flexibility, strength and stability of the
hamstrings, glutes and core.
single leg dead lift is great for flexibility, strength and stability of the
hamstrings, glutes and core.
Start by holding a
dumbbell in your left hand while standing on your right foot. Hinge forward at the hips. Your left leg will rise up in extension
behind you and move in the same plane as your upper body. Keep a soft knee, forward facing hips, neural
head position and the core engaged.
Don’t allow your upper body to hunch forward or to move independently
without your free leg. This exercise is often done incorrectly so
check in with a trainer if you are unsure of the movement. Repeat 10-15 repetitions and switch to the
other side.


Stork with Lateral Raises
This exercise will
test your balance while strengthening your deltoids.
test your balance while strengthening your deltoids.
Start by standing on
one foot holding two dumbbells, palms facing inward. Raise your arms up, palms facing down, until
your arms are parallel with the ground.
Lower to start position. Repeat
10-15 repetitions and switch to the other side.
one foot holding two dumbbells, palms facing inward. Raise your arms up, palms facing down, until
your arms are parallel with the ground.
Lower to start position. Repeat
10-15 repetitions and switch to the other side.


Inchworm
The inchworm is a
core exercise that will test your hamstring flexibility and work on shoulder
and core stability.
core exercise that will test your hamstring flexibility and work on shoulder
and core stability.
Stand with feet shoulder width apart. Hinge forward at the hips and place your
hands on the ground in front of you.
Walk your hand out until you are in a plank position. Challenge yourself with a push up before
walking your feet in towards your hands.
Repeat for 10-15 repetitions.
hands on the ground in front of you.
Walk your hand out until you are in a plank position. Challenge yourself with a push up before
walking your feet in towards your hands.
Repeat for 10-15 repetitions.


Donkey Kicks
Donkey kicks, also
known as quadruped bent-knee hip extension, targets the glutes as it stretches
the hip flexors.
known as quadruped bent-knee hip extension, targets the glutes as it stretches
the hip flexors.
Begin on all 4s
(hands under your shoulders, knees under your hips) with your toes digging into
the ground. Keep your left knee bent at
90 degrees while you squeeze your glute and press your heel into the air. Lower leg without touching the floor. Make sure you use slow, controlled movements
and do not swing your legs. Repeat 10-15
repetitions and switch to the other side.


Bird Dog
Bird dog is a great
core exercise that also focuses on shoulder flexion and hip extension.
core exercise that also focuses on shoulder flexion and hip extension.
Begin on all 4s
(hands under your shoulder, knees under your hips) with your toes digging into
the ground. Keep your back straight
while lifting your opposite arm and leg in the air, parallel to the ground. Return to start position and switch. Repeat for 10-15 repetitions.
(hands under your shoulder, knees under your hips) with your toes digging into
the ground. Keep your back straight
while lifting your opposite arm and leg in the air, parallel to the ground. Return to start position and switch. Repeat for 10-15 repetitions.

Cat Camel
Finish up your
workout with the cat camel stretch for mobility in your back.
workout with the cat camel stretch for mobility in your back.
Begin on all 4s
(hands under your shoulder, knees under your hips) with your toes digging into
the ground. Start with your back in a
neutral position then alternate between arching your spine upward toward the
ceiling (cat) and rounding your back (camel) by relaxing your back and allowing
your stomach to fall towards the ground.
Repeat for 10-15 repetitions.

Blog post by Jen Skiba.
Take Your Workout to the Turf
With the past winter being so
terrible, I try to spend every second in the sun as I possibly can.
One way is by moving my lunch time workout (or at least part of
it) outside. Working out is just more fun when
you go outside, especially when you work inside all day. I like to think of it
as my adult recess!
terrible, I try to spend every second in the sun as I possibly can.
One way is by moving my lunch time workout (or at least part of
it) outside. Working out is just more fun when
you go outside, especially when you work inside all day. I like to think of it
as my adult recess!
Obviously you can’t take the
machines outside with you, but there are a ton of exercises that require just a
medicine ball, free weights, or your own body weight that are just as
challenging and beneficial as using a weight machine. Changing up the scenery during you work out will help to keep it interesting
and make sure you stay motivated to work hard!!
Here are some of my favorites to
do outside…
do outside…
Walking Lunges with Rotation

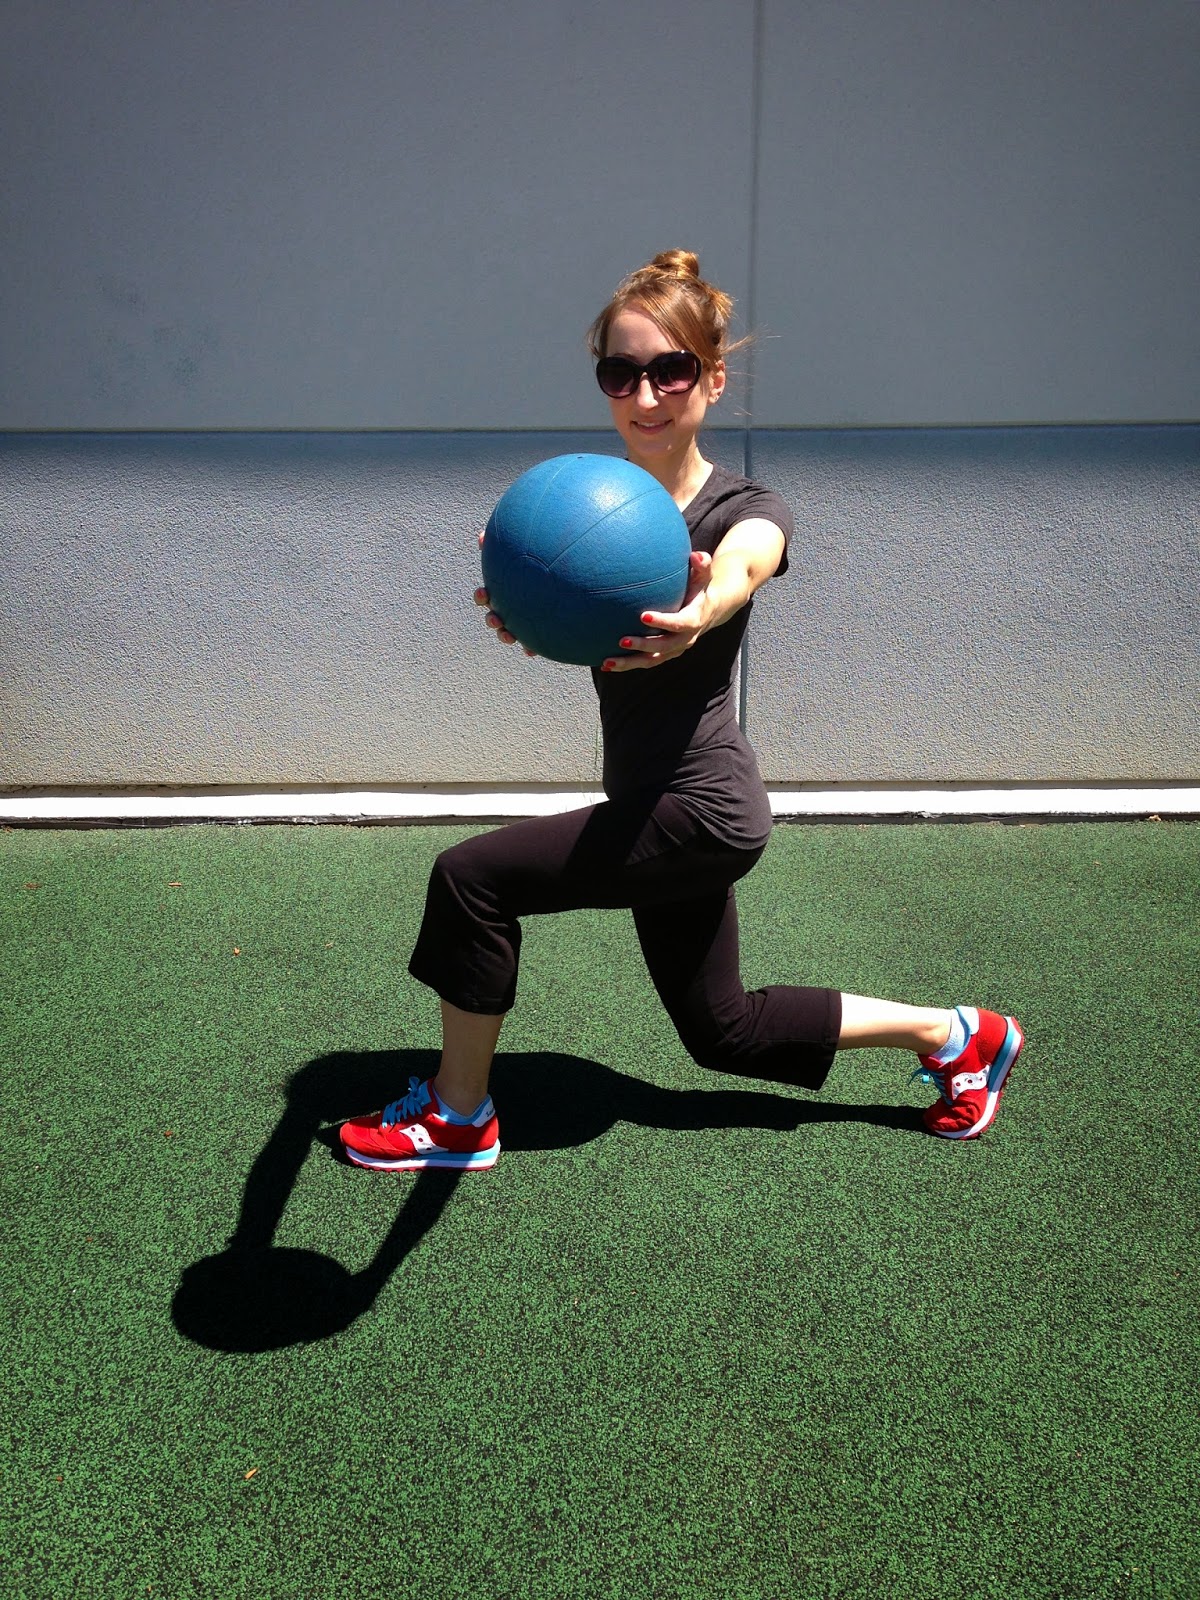
Holding a med ball with arms out
in front, lunge forward with left leg, rotate torso to the left. Drive off the
left leg and immediately lunge forward with the right. Remember to keep your
core engaged and torso upright when lunging. These can be done going forwards
and backwards across the turf.
in front, lunge forward with left leg, rotate torso to the left. Drive off the
left leg and immediately lunge forward with the right. Remember to keep your
core engaged and torso upright when lunging. These can be done going forwards
and backwards across the turf.
Wall Balls


Standing in front of the wall with
a med ball in your hand, squat down as low as you can go, drive through the
legs and stand up out of your squat while throwing the med ball up towards the
wall as high as you can. As you catch the med ball, squat back down and repeat.
a med ball in your hand, squat down as low as you can go, drive through the
legs and stand up out of your squat while throwing the med ball up towards the
wall as high as you can. As you catch the med ball, squat back down and repeat.
Med Ball Burpees
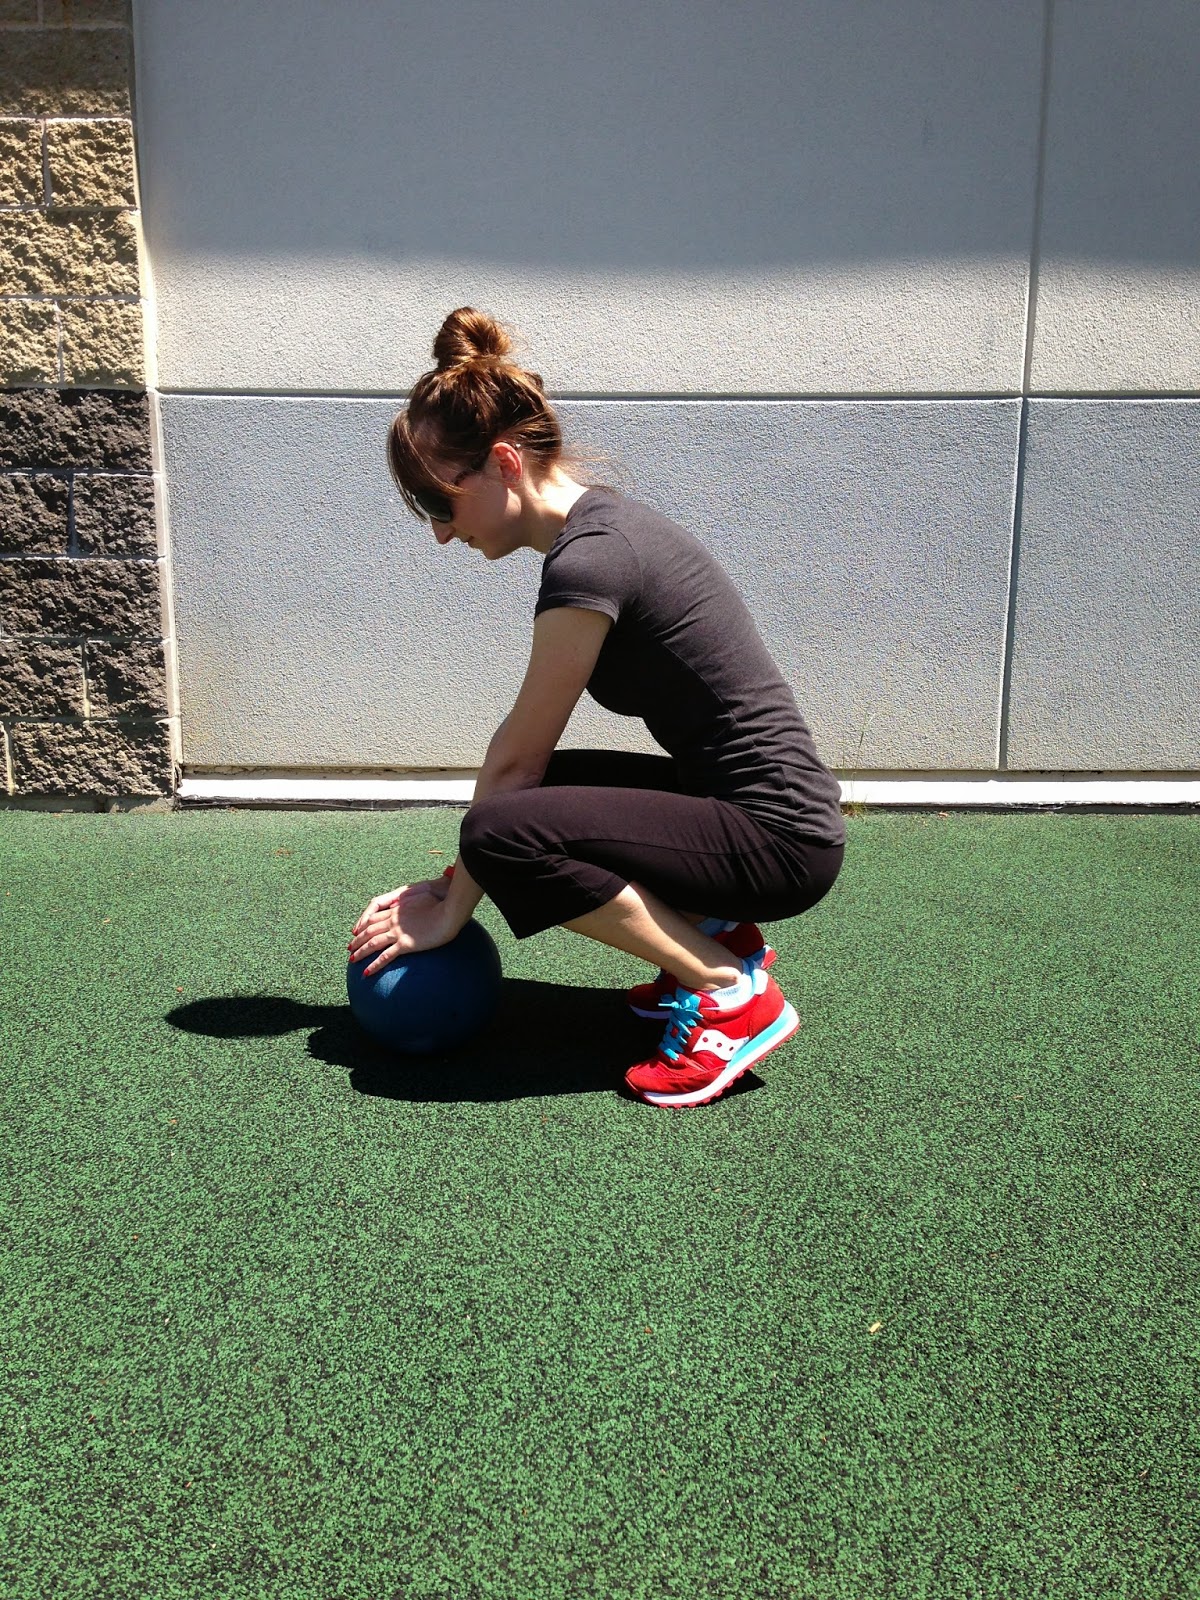
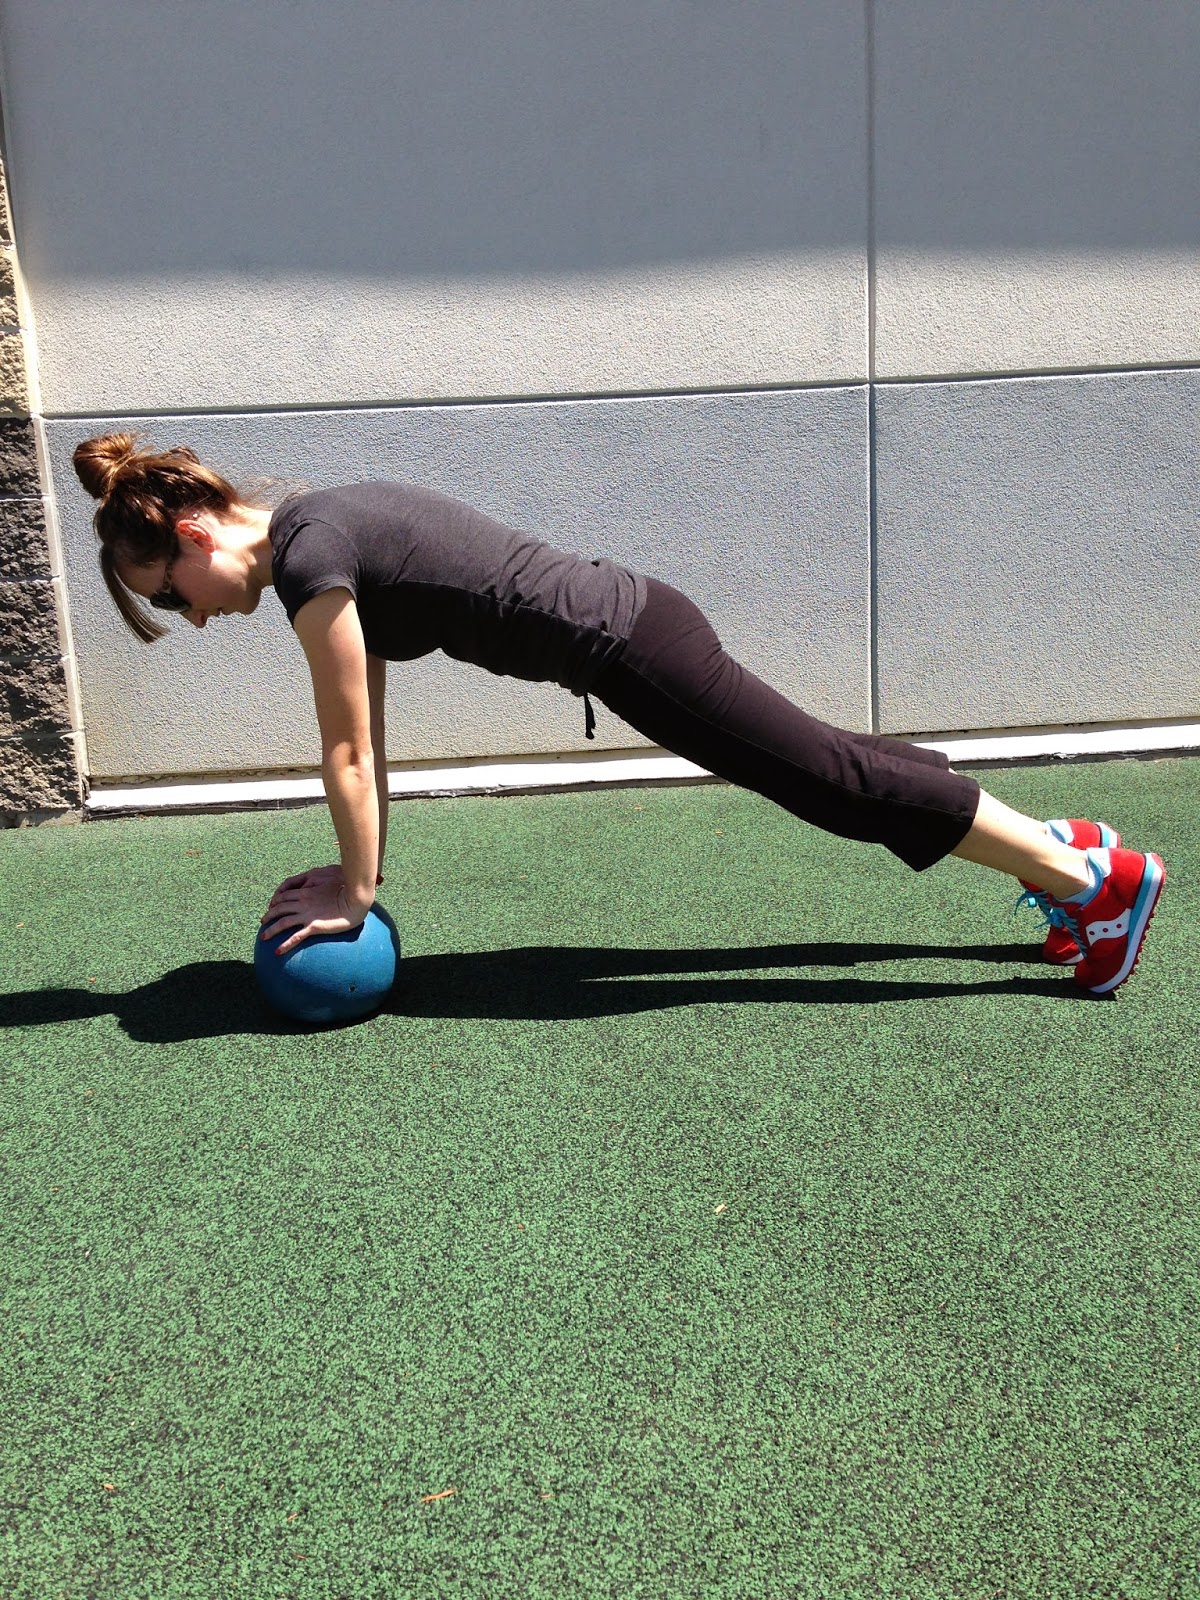
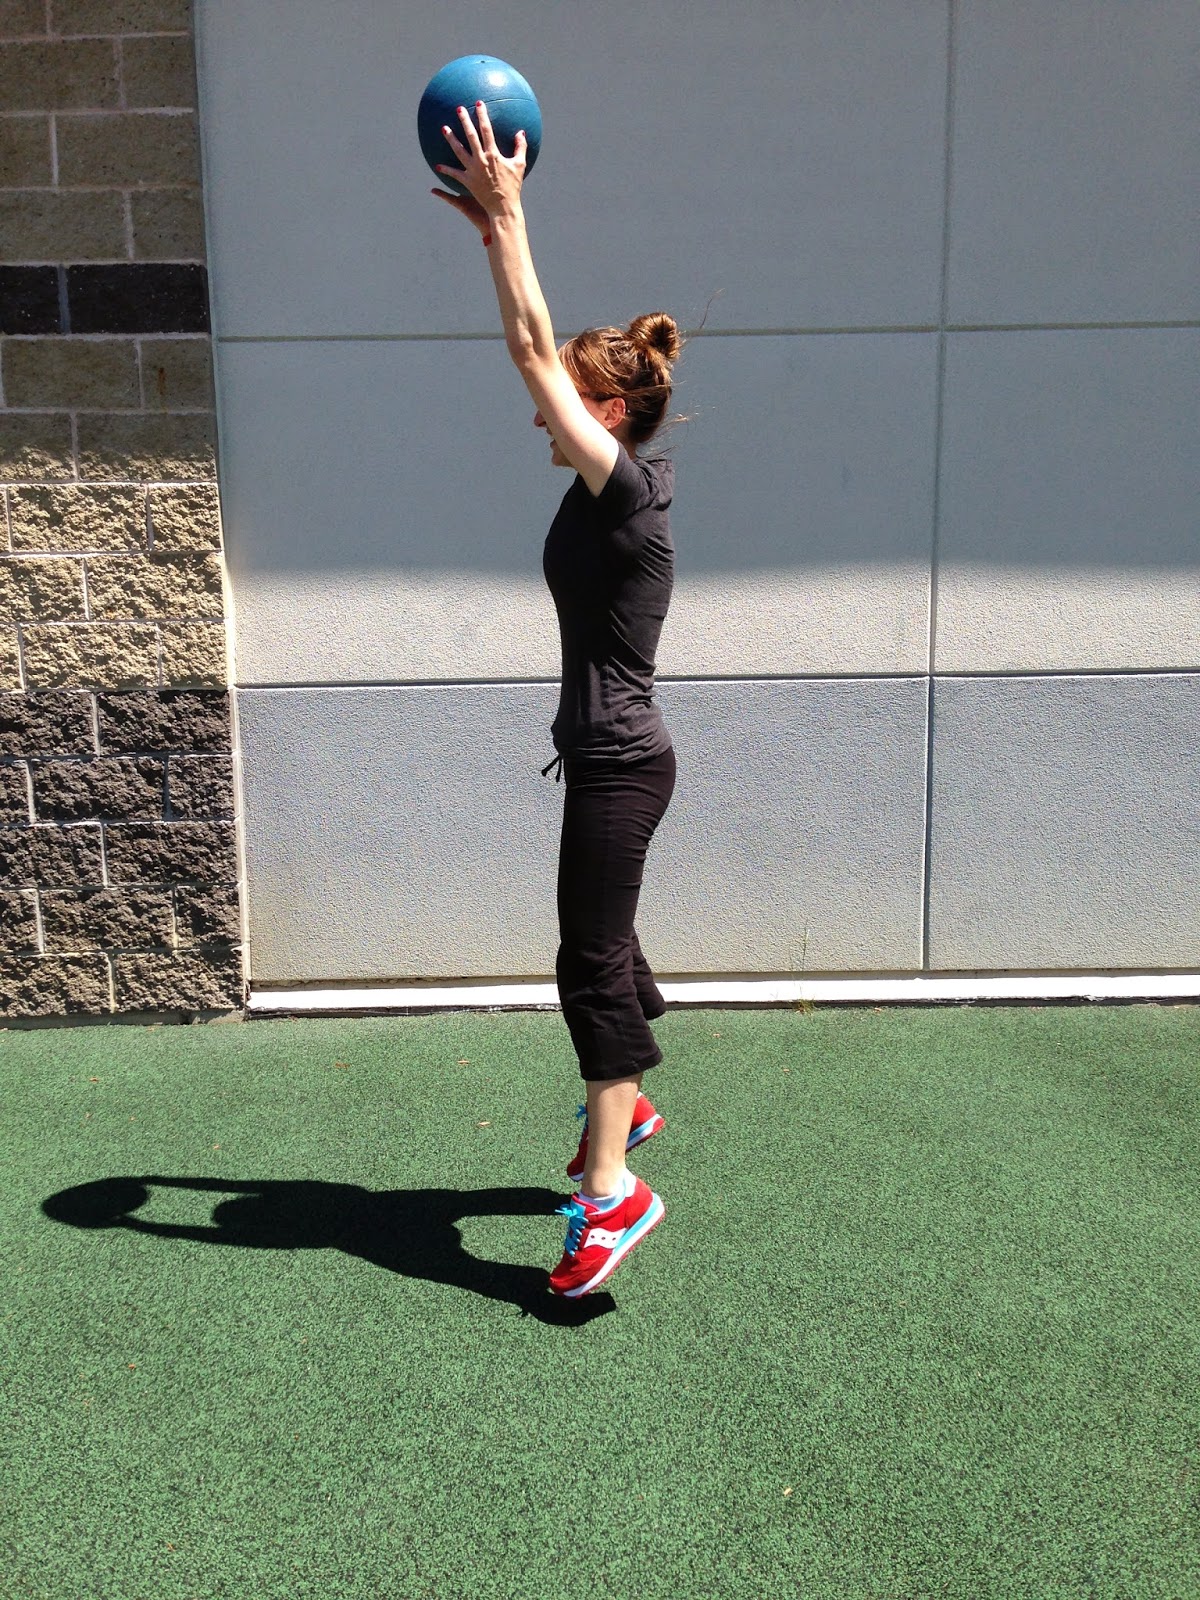
Standing with a med ball, squat
down placing med all on the ground with hands placed on either side of the
ball. Jump feet back into a plank position. Perform a push up on the med ball.
Quickly jump feet back towards the ball. Explode through your legs jumping up
while lifting (or throwing) the med ball straight overhead.
down placing med all on the ground with hands placed on either side of the
ball. Jump feet back into a plank position. Perform a push up on the med ball.
Quickly jump feet back towards the ball. Explode through your legs jumping up
while lifting (or throwing) the med ball straight overhead.
Wall Sits with Rotation and Alt. Heel Raise
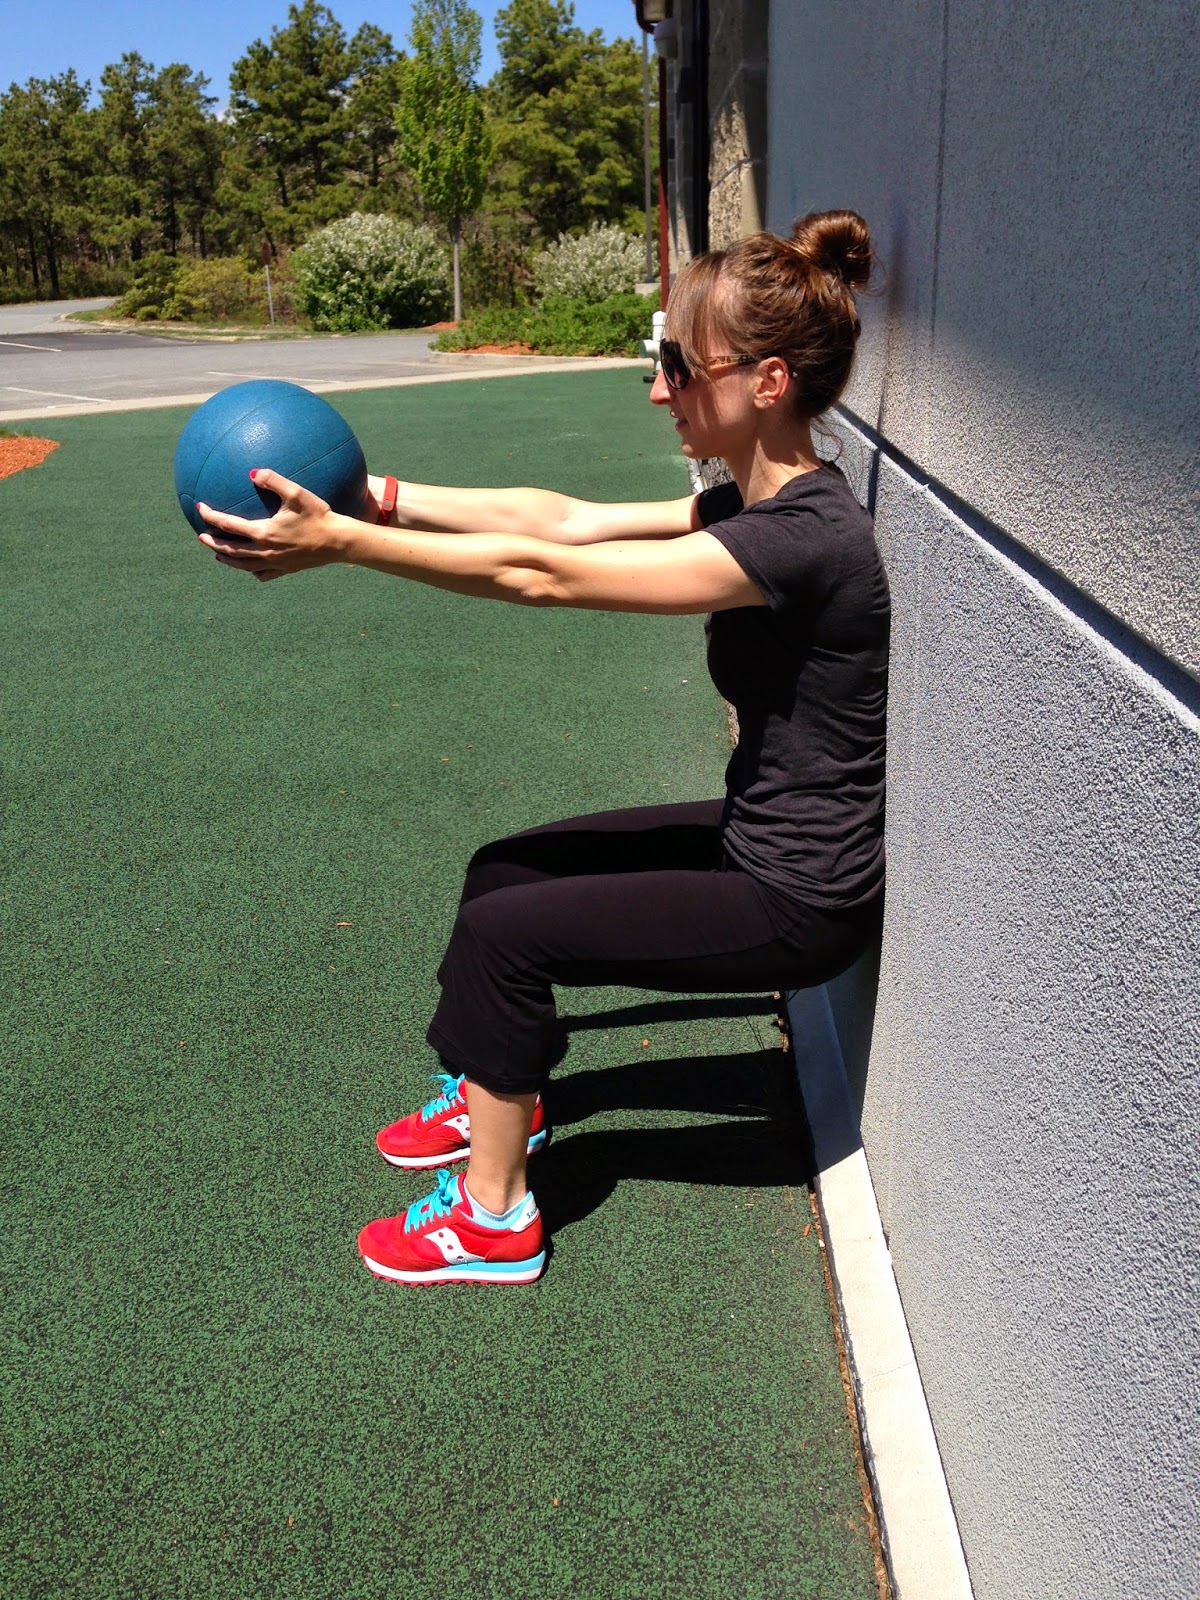


Sit with back against the wall and
knees at 90 degrees. Slightly lean your torso forward, so your back is free to
rotate from side to side. Holding the med ball out in
front, rotate torso side to side trying to touch the ball to the wall each
time. As you rotate to the left lift your right heel up off the ground. Repeat
on the right side, lifting your left heel.
Mountain Climbers on the Wall


Start in a plank position with hands under shoulders and feet in line with hips and pressed into wall. Pull
the right knee toward chest, and then return foot to wall. Repeat immediately
on left side. Continue, quickly alternating legs.
the right knee toward chest, and then return foot to wall. Repeat immediately
on left side. Continue, quickly alternating legs.
Blog post by Catie Furbush CSCS.
TRX Training for Runners
Normal
0
false
false
false
EN-US
JA
X-NONE
Everyone can
benefit from TRX suspension training. It is a great way to develop
core strength, as well as stability in joints and muscles. The TRX is easy
to use and can be set up almost anywhere, which makes it a great piece of
equipment to add to your workout routine. You chose how easy or how tough your
workout will be by simply changing your body angle or the length of the straps
making it a great tool for beginners as well as seasoned athletes.
[Related post: Plan. Progress. Perform with the TRX!]
TRX training for runners will allow you to focus on building up your running performance and get you
ready to take on longer runs and can actually help to improve your running
time. If it’s done right, a TRX workout can elevated your heart rate as much a
normal run would. This makes it a great tool to mix
up your workouts helping to decrease risk of injury and help with recovery.
ready to take on longer runs and can actually help to improve your running
time. If it’s done right, a TRX workout can elevated your heart rate as much a
normal run would. This makes it a great tool to mix
up your workouts helping to decrease risk of injury and help with recovery.
Suspension
training can help to target key areas that benefit runners. It mobilizes the
thoracic spine, increases hip mobility, and engages the glutes, which are often
ignored by runners. A strong core is important for runners and TRX training is
a great way to build up strength and stability in that area.
training can help to target key areas that benefit runners. It mobilizes the
thoracic spine, increases hip mobility, and engages the glutes, which are often
ignored by runners. A strong core is important for runners and TRX training is
a great way to build up strength and stability in that area.
Try a TRX workout and see what it can do for you.
Your workout should be designed with runner-specific exercises to improve your body’s strength, stability, and
flexibility. Here are some different exercises that engage the core and work on
building strength throughout the whole body. Aim to do 8-15 reps of each
exercise and make sure that you can maintain good form and posture throughout the
entire motion.
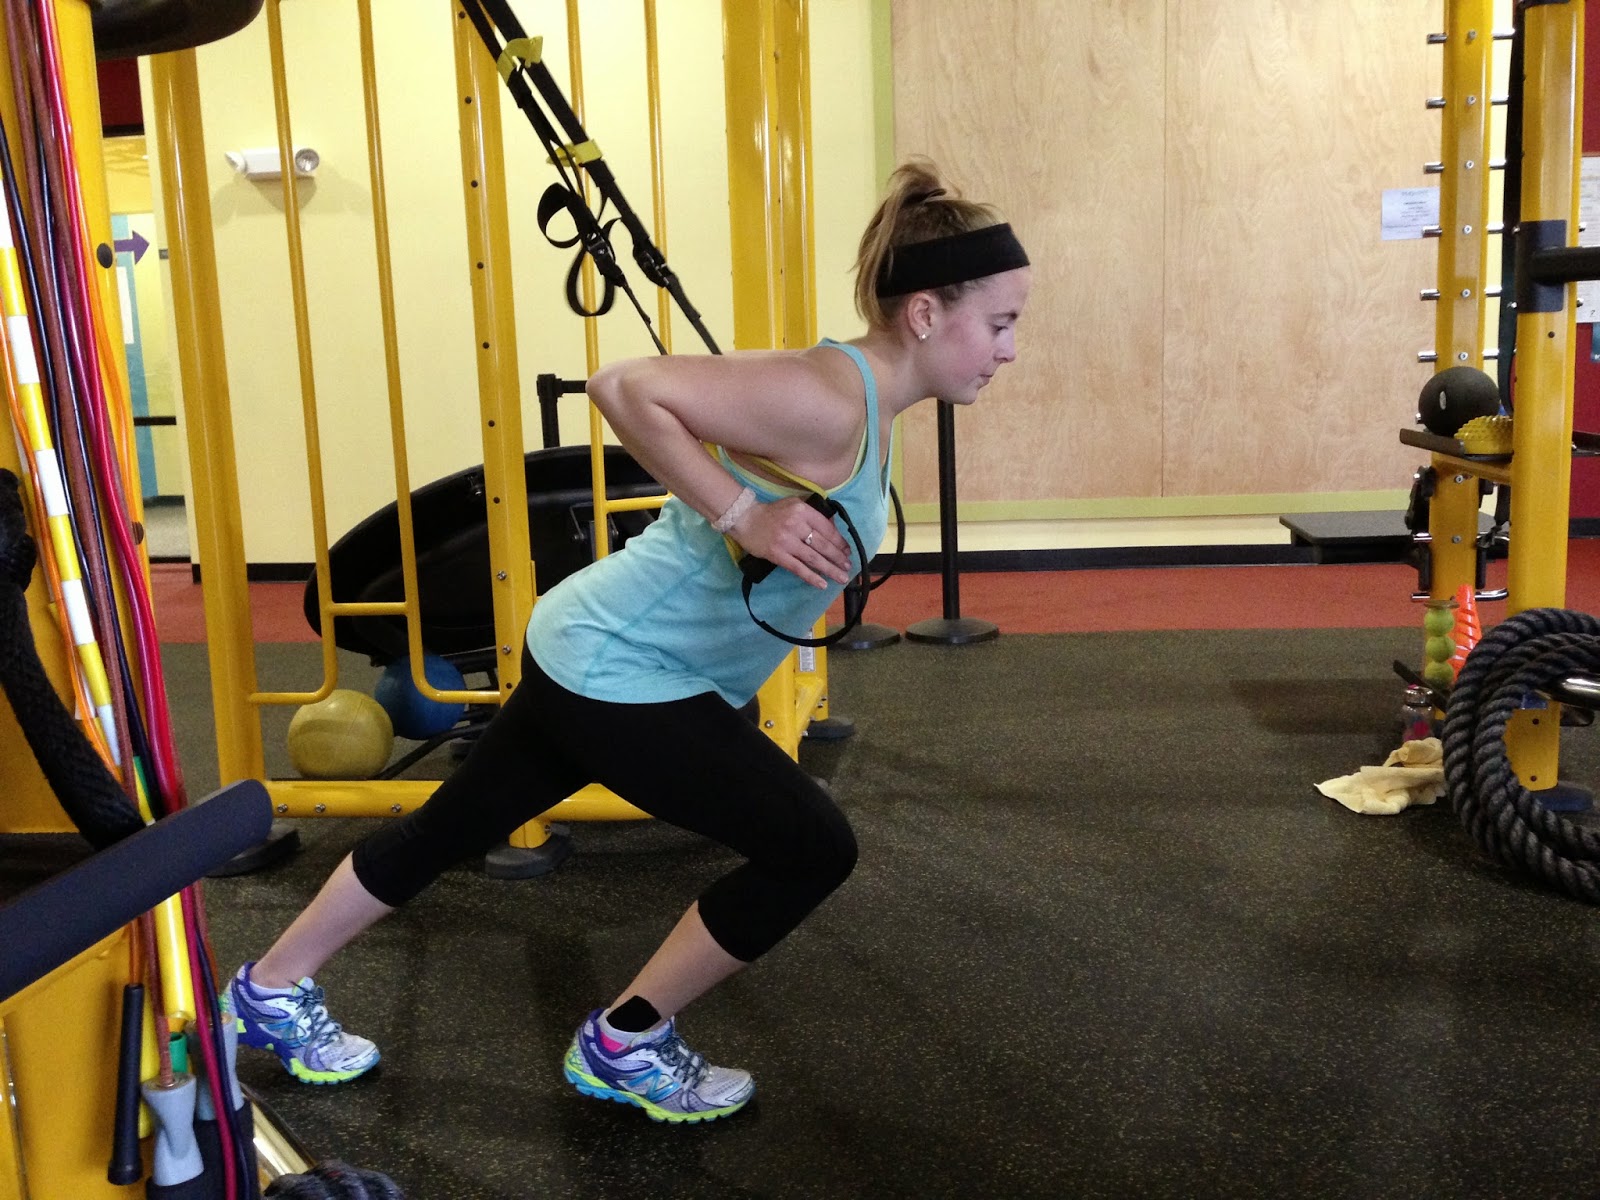
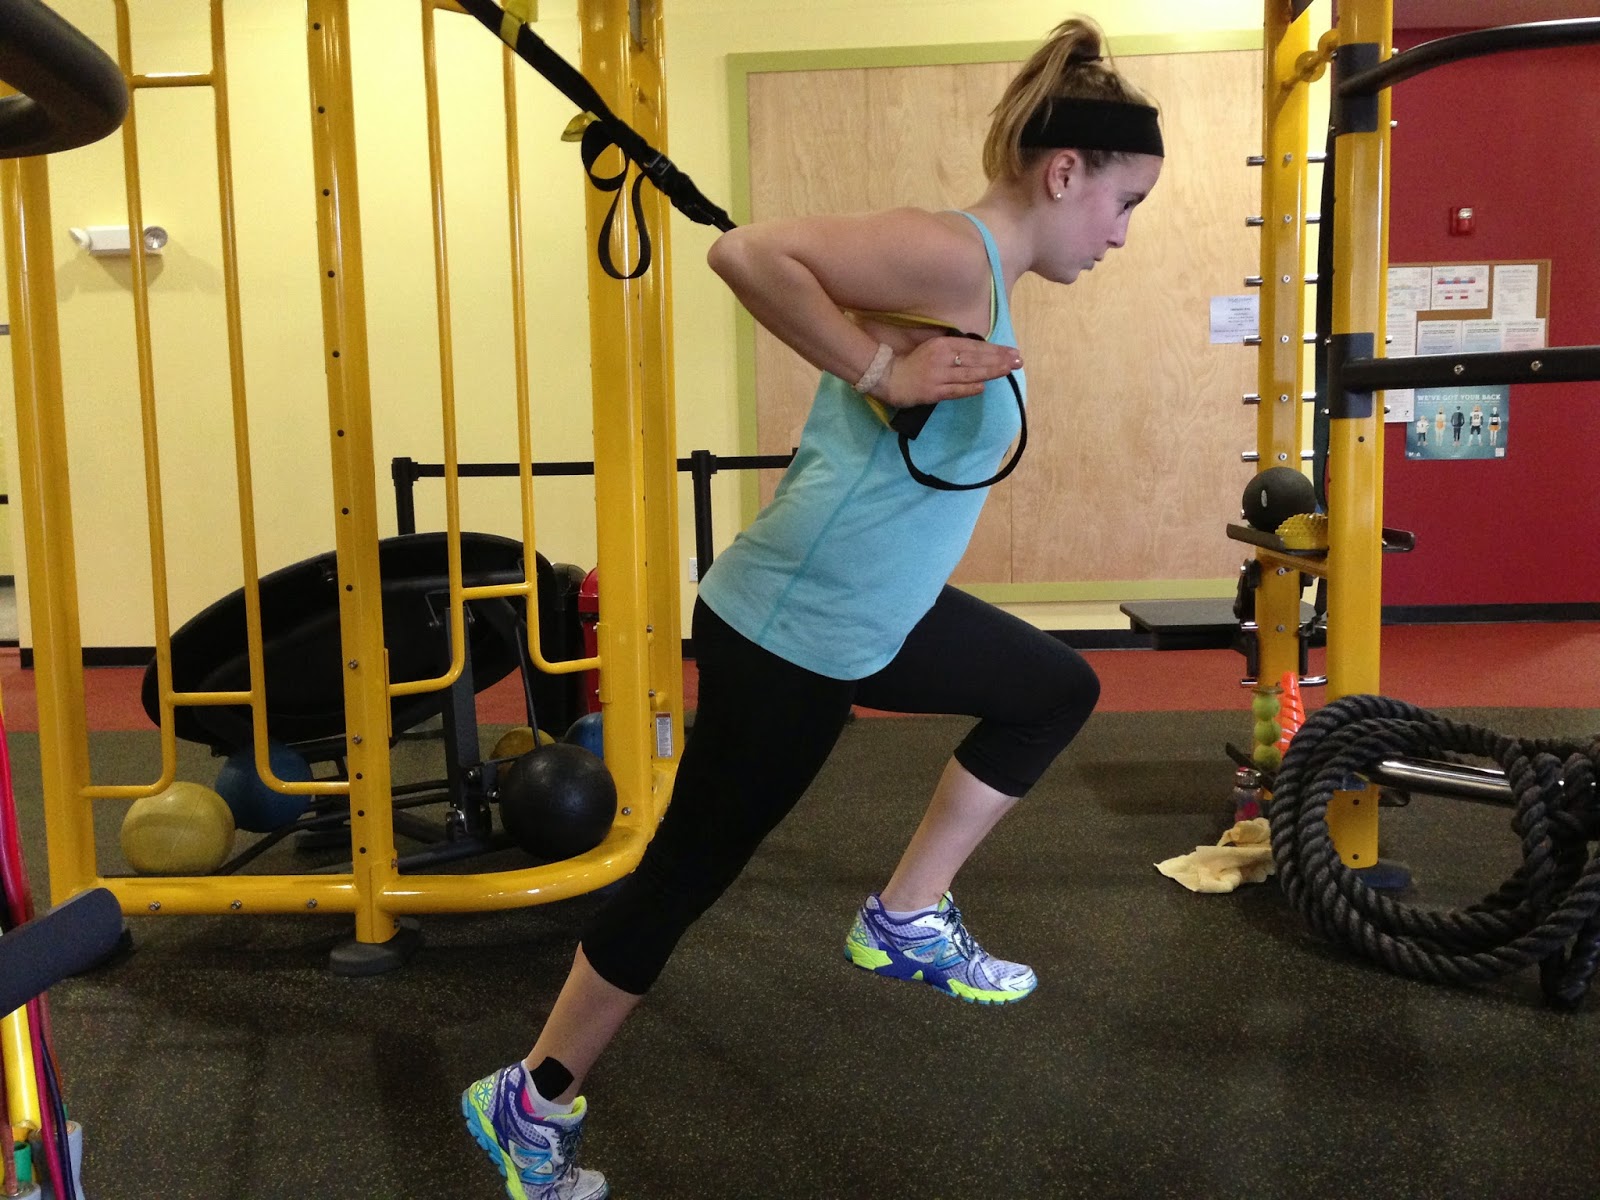
Sprinter
Start
Face away
from anchor point. Step forward with right leg. Lean into TRX at approximately a 45-degree angle. Drive off
front leg and bring rear knee forward. Return to start position. Repeat with
other leg.
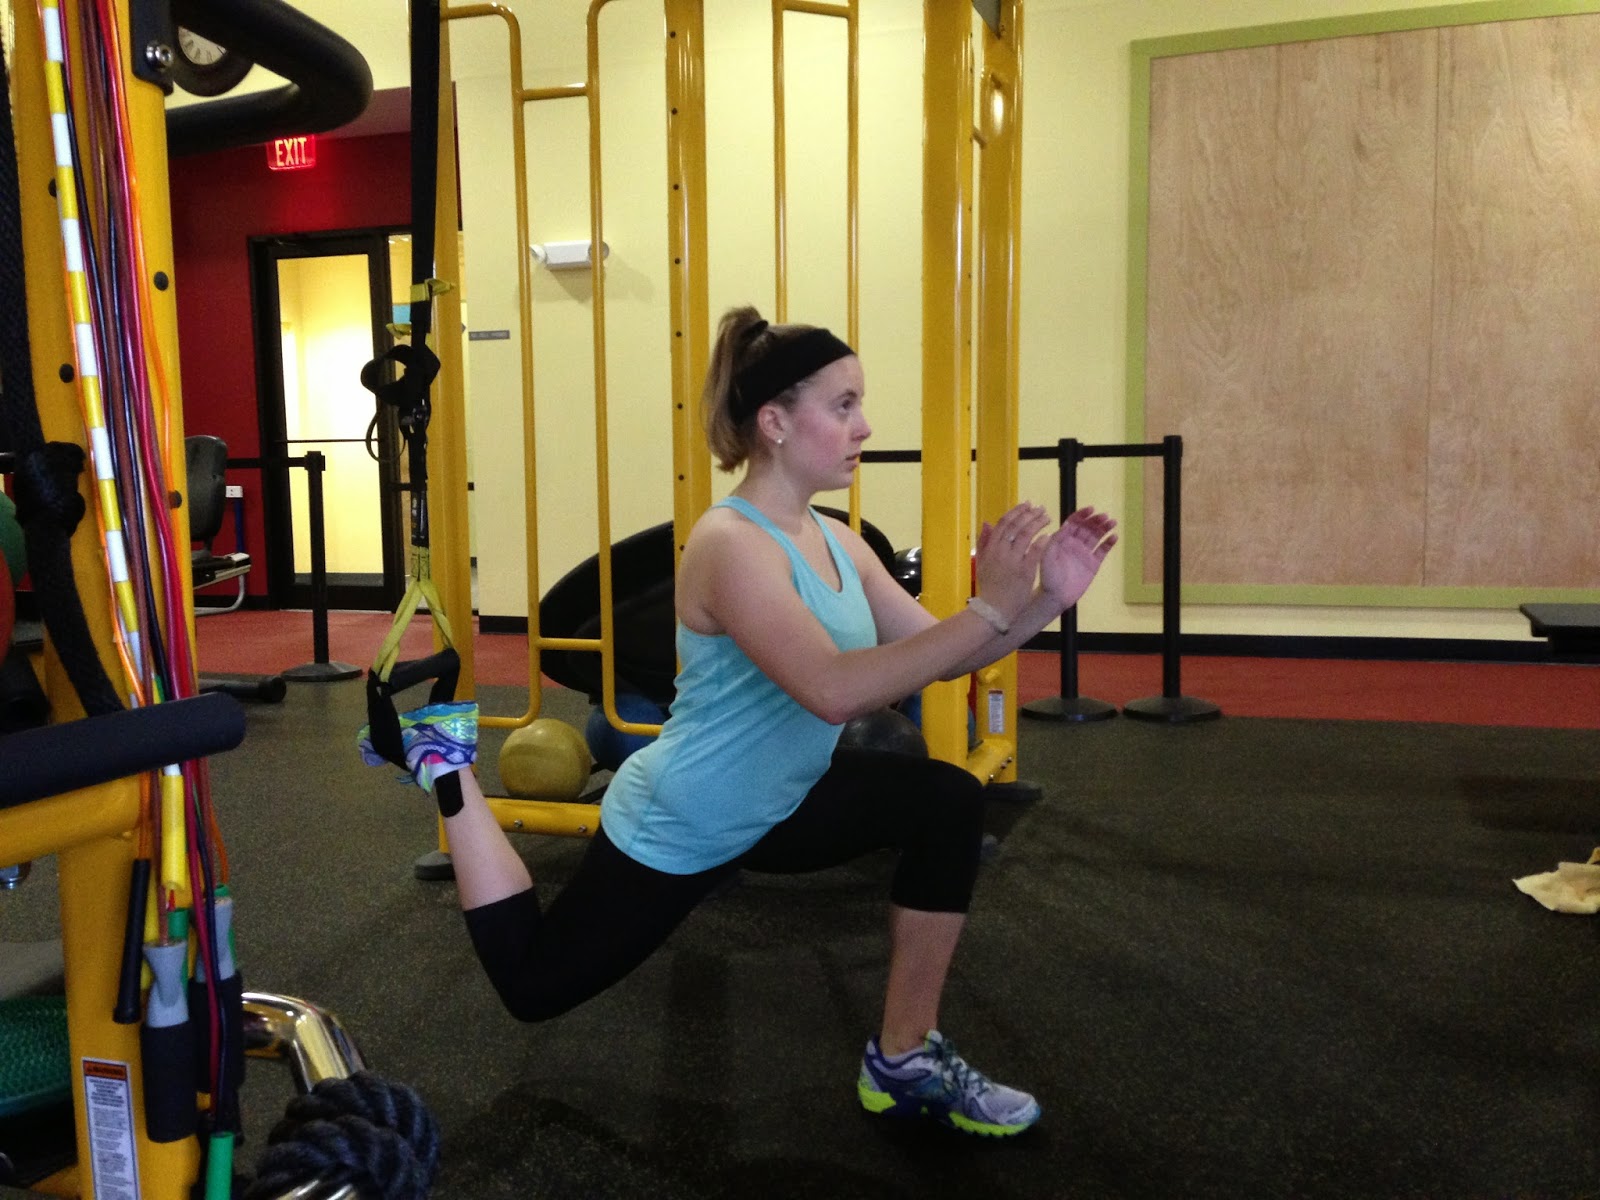
Suspended
Lunge
Face away
from anchor point. Place one foot into both foot cradles at once, toes in.
Plant left foot approximately three feet in front of anchor point. Lower
hips into lunge position. Suspended leg will move back. Pressing down on heel of grounded foot,
return to start position. Maintain balance and upright body posture. Repeat with other leg.

Hamstring
Curl
Place
heels in foot cradles directly under anchor point. Lie on back with arms at sides and palms flat
on ground. Use core and glutes to lift hips into a bridge. Draw
heels toward hips while lifting hips and squeezing glutes. Return to start
position with control.
heels in foot cradles directly under anchor point. Lie on back with arms at sides and palms flat
on ground. Use core and glutes to lift hips into a bridge. Draw
heels toward hips while lifting hips and squeezing glutes. Return to start
position with control.


Squat Rows
Face
anchor point with feet shoulder-width apart. Hold handles with arms extended.
Lean back and walk feet forward to appropriate resistance angle. Lower into a
squat. Stand up
from the squat keeping shoulders pulled down and back. Pull body toward anchor
point using back and arms. Return to start position with slow, controlled
movement.


Did you know that it’s been 10 years since the TRX burst into the fitness world in 2004? How do you incorporate the TRX into your training?
Blog post by Catie Furbush CSCS.
Be Ready to Shred your Snowy Weekend Getaway
3 Exercises to
Increase Ski & Snowboard Performance In Season
It is
imperative as a winter athlete to develop lower extremity strength &
endurance in order to avoid injury, conqueror changes in terrain, and resist
muscle fatigue.
imperative as a winter athlete to develop lower extremity strength &
endurance in order to avoid injury, conqueror changes in terrain, and resist
muscle fatigue.
Forward & Lateral Lunge onto the Bosu
Ball
The
lunge is a great choice due to its activation of the
large leg muscles (gluteus maximus, quadriceps, hamstrings, hip flexors).
lunge is a great choice due to its activation of the
large leg muscles (gluteus maximus, quadriceps, hamstrings, hip flexors).
The
goal of the exercise is to take a large forward step onto the Bosu ball; lunge
by bending the front knee until 90 degrees of flexion is achieved, then
explosively pushing off the ball, returning back to the upright position.
goal of the exercise is to take a large forward step onto the Bosu ball; lunge
by bending the front knee until 90 degrees of flexion is achieved, then
explosively pushing off the ball, returning back to the upright position.


When
performing the lateral lunge, the goal is to side step one foot onto the Bosu
Ball, bending that knee while keeping the other leg straight.
performing the lateral lunge, the goal is to side step one foot onto the Bosu
Ball, bending that knee while keeping the other leg straight.


Tips
for Both:
for Both:
·
Knees should never go over the toes.
Knees should never go over the toes.
·
When performing laterally, try to sit back and
stick out the butt into a squat.
When performing laterally, try to sit back and
stick out the butt into a squat.
Increasing
the repetitions and alternating the legs enhances muscular endurance and
eliminates the ability for one leg to over compensation for the other.
the repetitions and alternating the legs enhances muscular endurance and
eliminates the ability for one leg to over compensation for the other.
The
addition of the Bosu Ball challenges balance making the ankle stabilizing
muscles work harder to maintain proper posture.
addition of the Bosu Ball challenges balance making the ankle stabilizing
muscles work harder to maintain proper posture.
This
exercise can be performed with or without weight (dumbbells, medicine ball over
head, etc.)
exercise can be performed with or without weight (dumbbells, medicine ball over
head, etc.)
Depth Jump
Improper
lower body mechanics is one of the leading causes for ski & snowboard knee
injuries.
lower body mechanics is one of the leading causes for ski & snowboard knee
injuries.
The
depth jump focuses on the proper landing phase from a predetermined height.
depth jump focuses on the proper landing phase from a predetermined height.
The
goal of this exercise is:
goal of this exercise is:
·
To land
softly, receiving the weight through the balls of the feet.
To land
softly, receiving the weight through the balls of the feet.
·
Then distributing it into the heels.
Then distributing it into the heels.
·
While carrying that downward momentum into a Perfect Squat (Sit the butt back, knees
don’t go over toes, and maintain proper foot and knee alignment)
While carrying that downward momentum into a Perfect Squat (Sit the butt back, knees
don’t go over toes, and maintain proper foot and knee alignment)


This
exercise focuses on the deceleration of one’s own body weight by forcing the
large leg muscles receive the weight, slow then stop that momentum.
exercise focuses on the deceleration of one’s own body weight by forcing the
large leg muscles receive the weight, slow then stop that momentum.
Russian Twists
Core
development is vital in order to maintain strong posture, form, and the ability
to turn rapidly from the waist or trunk.
development is vital in order to maintain strong posture, form, and the ability
to turn rapidly from the waist or trunk.
The
Russian twist is performed with only the lower back in contact with ground,
while the body is positioned in a “V” shape.
Russian twist is performed with only the lower back in contact with ground,
while the body is positioned in a “V” shape.
Goal
of this exercise is to;
of this exercise is to;
·
Rotate the torso and arms side to side
Rotate the torso and arms side to side
·
Both hands should make contact with the ground
or mat, clasp hands together.
Both hands should make contact with the ground
or mat, clasp hands together.

To
progress this exercise a medicine ball should be added and held so each twist
involves contact of the medicine ball to the ground instead of hands.
progress this exercise a medicine ball should be added and held so each twist
involves contact of the medicine ball to the ground instead of hands.
Recommendations for
Intensity & Frequency
First step is to master perfect form and
correct range of motion before using any weight or large heights.
correct range of motion before using any weight or large heights.
Second step is to increase your
repetitions per set until you can achieve 12 great reps per set.
repetitions per set until you can achieve 12 great reps per set.
Step three is to then incorporate weight
or increase height by small increments to ensure safety and correct form.
or increase height by small increments to ensure safety and correct form.
Incorporating
these exercises into your fitness routine 2-3 times/week will help prevent
injury, increase performance, and keep you feeling strong. You’ll be ready to
hit the slopes all winter long!
these exercises into your fitness routine 2-3 times/week will help prevent
injury, increase performance, and keep you feeling strong. You’ll be ready to
hit the slopes all winter long!
Blog post by Drew Sifflard CSCS.
